Monday 31 August 2020

Maker's Movement - Beautiful Posey Traveler's Notebook

 Hello, my friends!


I'm back today to share a fun new project for Maker's Movement
Of course I used my Crossover II Machine for all my die-cutting.
 
I've also used:


I can't tell you how much fun I had putting this one together!
I've been having such a great time creating Traveler's Notebooks lately.
I've made them out of chipboard, mat board, and placemats.
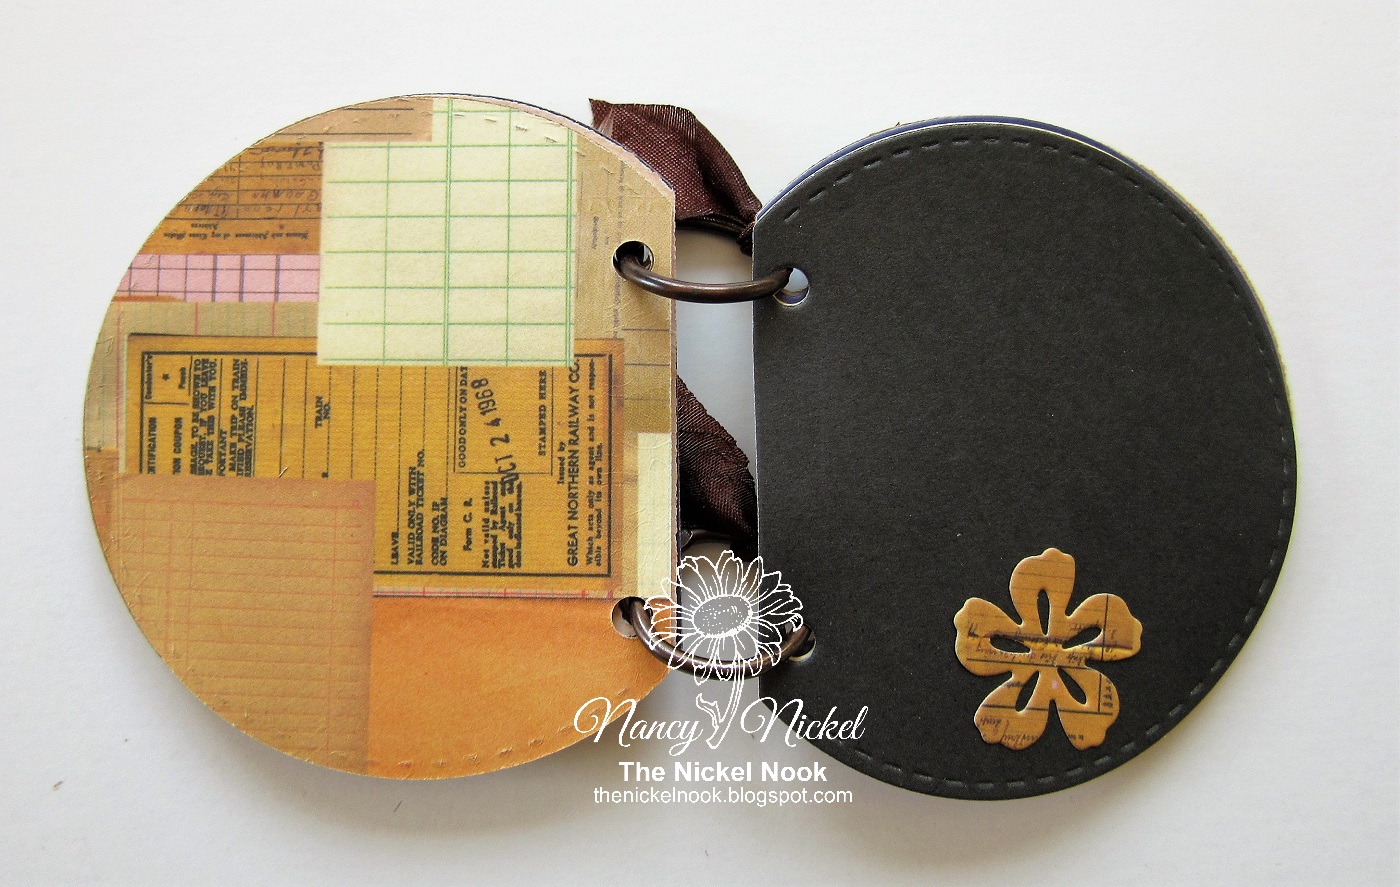
I've made several different kinds of inserts too. 
So when I received this wonderful Posey Fab die from Maker's Movement,
it inspired me to make this TN.

Fab Dies are very strong dies that will cut through as many as six layers of fabric.
When cut on the Crossover II Machine, using the metal plate,
the corners and points all cut crisp and clean.

This project was a bit of an experiment for me.
I'm so happy with how it turned out that I can't wait to make more...and more... :o)

Here we go:


I actually began by choosing my flower fabric.
That determined my choice of the natural canvas for the base
and I put my cover all together.

*If you want more information on how I put this all together,
just leave a comment below. 
If there's enough interest I'll create a tutorial post.

I ironed some Heat N Bond interfacing to the back of the floral fabric.
I did the same with a piece of black print.
Once it was cooled I die-cut multiple flowers and leaves.


I peeled the paper off the back and positioned everything where I wanted it.
Then it was just a matter of ironing it in place.


The main cluster is on the bottom front corner.


I added just a little cluster to the top right,
using the flower center cut as extra embellishments.
Then I added another cluster to the top of the back.


Then it was a matter of adding my eyelets,
and threading my elastics.

I wanted to add an extra element to the front elastic.
So I went through my Tim Holtz stash and found this one.
That determined the theme of this TN...which is HOPE.


I had so much fun decorating the outside
that I decided to carry in on to the inside.

I added fabric pockets to the inside front and back.


The long leaves looked like feathers to me.
I added one to each of the pockets.

Then I created tags to fit in the pockets.
I added appropriate quotes to each of the tags.


Isn't that fun? 
I can't wait to make the inserts and fill it up with all my HOPES,
and wonderful quotes and verses of HOPE!

* * * * *

Maker's Movement Products Used:

Crossover II Fabric & Paper Cutting System,

Beautiful Posey Flower Set 1 Fab Die

* * *
Thanks so much for stopping by!
I'll be back soon with another fun project!

* * *

Here are all the links for you:


Friday 28 August 2020

In Love Arts - Mini Label Semicircle Album

Hello, my friends!

Today I have another fun project for In Love Arts.

To see my previous projects, just click on "In Love Arts" in the sidebar.


Oh, and did I mention that they gave me a discount code for all my friends?
Yes! You can get 15% off any order you place, using discount code: G-19403.
I'll have some more fun information about the shop later in my post.

This time I have a really fun little mini album to share with you.

I used:


Here's the cover of my mini:


Isn't that adorable? 
It measures 2 1/2" wide and almost 3" tall.
I cut the front and back cover from chipboard.
The die cut the chipboard easily, and the stitches look great.
Then I decorated with several of the mini blossoms,
which were cut from the same papers as the inside pages.


I used double sided paper to cut all the inside pages.
I arranged them with a solid on one side, and a print on the other.


I added another mini blossom to each of the solid pages.


These small scale papers work very well for this mini project.


There are several more pages in this cute mini.
They are just the reverse of these pages, so I didn't take photos.


Here's the back cover:


To finish things off, I added little rhinestones to each of the flowers,
along with sentiment stamps.
I inserted the mini book rings through the die-cut holes,
and added ribbons to them.

 
Again, here are the products I used from the In Love Arts Shop:

Other Materials Used:
7gypsies Camden Paper Pad;
Finnabair Sentiments;
Crafts Ribbon and Rhinestones;
Tim Holtz Mini Book Rings.

* * * * *
Some final words on In Love Arts.
The prices in the shop are fabulous...no question!
They have loads of items on sale for shocking prices.
They offer free worldwide shipping on any $25.00 order.
Finally, my items arrived to me in Canada within three weeks.
That is much faster than any parcel from the US.
All in all I am really happy with my experience with In Love Arts!
I'll definitely be choosing more fun items from their shop!

Head on over and check it all out for yourself!
Don't forget to use my discount code: G-19403

* * * * *
Here are all the links for you:


Wednesday 26 August 2020

Dies R Us - Whimsical Love Tree

 Happy Wednesday, my friends!

It's time to share some new inspiration for Dies R Us!

Just before I get started on my card,
I wanted to remind you that Dies R Us is having a DT Call!
You'll find all the details HERE.


Here's my card:


I began with a cream colored card base,
to which I added a panel of blue cardstock.

I die-cut the tree out of the same cream cardstock,
and then cut just the butterfly area out of more blue cardstock.

Once the tree was adhered to the card,
I fussy cut the blue buttrfly, and adhered the body only.
I bent up the wings to give it some lovely dimension.


Finally, I added several drops of Bisque Liquid Pearls to the butterfly body.


This is a really fun die to play with. 
There are several elements that can be cut out and layered.
There are also multiple options for embellishment. 
It would be a lovely card for any occasion! 

Products Used:


Other Materials Used:
Bazzill Textured Cardstock;
Bisque Liquid Pearls.
 
* * * * *
Don't forget to come join in the fun at the Dies R s Challenge Blog
 There's a new challenge theme offered on the 1st and 15th of each month 
and one lucky randomly drawn winner will receive a gift voucher prize to the Dies R Us Store.  
For your convenience, all the important Dies R Us links are provided below.


click below for:

Monday 24 August 2020

Simply Crafty SVGs - Crayon Box

Hello, my friends!

Welcome to a new project share for Simply Crafty SVGs!

This month I'm sharing a fun little Crayon Box.
With the start of school right around the corner here, 
it's the pefect time to share this one.

The good news for all of you is that this is a FREE file!
It measures about 2 1/2" x 3 1/2",
and is just the right size to hold a gift card. 
Or you could fill it with yummy treats.
Or you could fill it with a gift card and yummy treats! lol

It would be a thoughtful gift for any teacher, or student,
that may be nervous about heading back to school.

Here's my box:


As you can see, I opted to add a little shaker element.


I found this fun pencil paper in my stash.
It's not crayons but I think it works very well.


It's a very easy project that goes together very quickly,
and it's so much fun to make!


I added a piece of acetate, 
and then used a piece of white cardstock behind.
I think the white shows off the shaker bits beautifully!


File from Simply Crafty SVGs:


Other Materials Used:
Cricut Explore Air;
Recollections Cardstock;
Project Life Desktop Edition;
Scrap of Grafix Acetate;
Unknown Sequins and Micro Beads.

* * * * *
Thanks for stopping by today!
I hope you found some inspiration!
I'll be back next month to share a brand new project! :o)

* * * * * 
Here are all the links:


Simply Craft SVGs Facebook 

Friday 21 August 2020

Vilda Stamps - Thanks Card

 Hello, my friends!


It's time for a new project share for Vilda Stamps!

 Today I'm using the V656 - Flower Elves A5 Kit.
This is a big set of 13 stamps in varying sizes.
It's so much fun to play with!

Now, I realize that these are actually flower fairies,
but as I was colouring it, I decided it kind of looked like an eggplant girl.
Can you see it?

It's the time of year when people are enjoying the harvest of their garden.
On our local community page, 
many are generously offering to sharing their bounty.
That was the inspiration for my card today.
 Whether it's flowers or eggplants, it makes a fun "Thanks" card!

Here it is:


I stamped the image on watercolour paper, using Archival ink.
I then coloured it using Inktense watercolour pencils and a waterbrush.

I layered up the card base and background, and added a labe.
Then I went about creating a fun dimensional bed of leaves for my girl.


I curled cut/embossed and then curled the leaves
before adhering them in place.
Then I used foam tape to add the image.
I die-cut the sentiment and added it to the background.

Finally, I added some sparkly glitter glue to the leaves,
and a rhinestone to each corner.


Vilda Stamps Used:


Other Materials Used:
Unknown Watercolour Paper;
Jet Black Archival Ink;
Recollections Cardstock;
Sizzix Thinlits - Card, Basics;
Momenta Cut & Emboss Leaves;
Inktense Watercolour Pencils;
Water Brush;
Crafts Rhinestones;
Unknown Glitter Glue.

* * * * *
Thanks so much for taking a look!
I'll be back soon with another fun project!

* * * * *
If you're not familiar with Vilda Stamps, they are located in Sweden!
I've been a big fan of the stamps since I was introduced to them 
while working on a DT in Germany!
The stamps can be purchased from Engstroms Artstudio AB.
They ship all over the world.

* * * * *

Here are all the links for you:


Wednesday 19 August 2020

Dies R Us - Happy Birthday Card

 Happy Wednesday, my friends!

It's time for some new Dies R Us Inspiration!

This week I'm sharing a simple but special birthday card!
The dies make it simple, and the choice of paper makes it special!

Here's my card:


I used the Bazzill Basics Bling cardstock for my card. 
It is so sparkly and full of glitter.


I started with a white card base, to which I added a green front.
Then I cut a slightly smaller piece of the white bling.


I die-cut both the branch, and the words, from the same green,
and adhered them in place on the white.
Finally, I added some sparkly rhinestones to the center of the flowers.


So simple and yet so special! 
 

Products Used:


* * * * *
Don't forget to come join in the fun at the Dies R s Challenge Blog
 There's a new challenge theme offered on the 1st and 15th of each month 
and one lucky randomly drawn winner will receive a gift voucher prize to the Dies R Us Store.  
For your convenience, all the important Dies R Us links are provided below.


click below for:

Friday 14 August 2020

My Scrap Chick - My Blessings Box - For Annabel

 Hello, my friends!


Today I have a fun new project share for My Scrap Chick!

This is a follow-up post to the last one I shared. 
If you missed it, you can check it out HERE.
I haven't done anything to my little picket fence box yet
but I've decided to call it "My Blessings Box."

Today I'm featuring the following files:

Words Assortment of 55 

Label Assortment

Here is what I did:


I cut all of the words out of both black and white cardstock.


Then I cut a MULTITUDE of labels.
This file includes so many great shapes.
I sized them all to fit my 4 x 4 cards.
Since some of my labels are quite dark,
I then cut some white labels, slightly smaller.
It will be so handy to have these all cut out and ready to create with.

So with all these fun goodies, I got to work on my first Scripture card.


This one was actually a special request from my sweet friend, Annabel.
She requested this Scripture verse, as well as the color yellow.
(We have this "thing" going with yellow!)
This is the version Annabel shared,
which is from The Passion Translation.
Isn't this verse lovely in this translation?
It fits in beautifully with my recurring theme of JOY too!

I used the "dear friend" and the label on the front. 
Then I decided to decorate the back too.
Here's what I did there:


My Scrap Chick Files Used:


Other Materials Used:
Momenta Cardstock;
Momento Ink - Rose Bud;
Stampin' Up Stamp Set - The Nicest Thing;
Unknown Mini Chipboard Heart.

* * * * * 
Thanks so much for stopping by!
Big thanks to Annabel for requesting this Scripture verse!
You're a dear friend, Annabel,
and you bring me much JOY!

If any of you would like to request a card made,
using your favorite Scripture verse,
just leave a comment for me!

 * * * * *
Have you signed up for the My Scrap Chick newsletters yet?
Don't forget to do that!
You really don't want to miss out on any of the great freebies! :o)

* * * * *
Here are all the links you need:


Wednesday 12 August 2020

Vilda Stamps - Dream Big

Hello, my friends!


I'm back with my second project for Vilda Stamps!

This time I have another card, using a really sweet image!
Cozy seems to be really high on my priority list these days,
and to me this card is just COZY! :o)

Here it is:


Isn't that image adorable?
I stamped it and coloured it with my markers.
Then I die-cut it and did some simple layering.


I then used the "Dream Big" sentiment from a second stamp set.
I punched that out, and layered it on another punched piece.
Finally, I added some matching sequins.

Here's a closer look at the image:


Vilda Stamps Used:


Other Materials Used:
Bazzill Cardstock;
Memento Ink - Jet Black, London Fog;
Sizzix Framelits - Labels, Ornate #3;
Unknown Sequins.

* * * * *
Thanks so much for taking a look!
I'll be back soon with more fun Vilda projects!

* * * * *
If you're not familiar with Vilda Stamps, they are located in Sweden!
I've been a big fan of the stamps since I was introduced to them 
while working on a DT in Germany!
The stamps can be purchased from Engstroms Artstudio AB.
They ship all over the world.

* * * * *

Here are all the links for you:


Tuesday 11 August 2020

Vilda Stamps - Flower Bouquet

 Hello, my friends!


It's my time to share some projects for Vilda Stamps!

Today I have a bouquet of flowers to share with you!

Here it is:


I've used this stamp set before but with different colors.
I stamped it onto watercolor paper, 
and then colored it with my Inktense pencils and a water brush.
I added a green punched doily behind the image
before layering it onto the blue card base. 


To finish it off,
I added a pretty green double looped bow,
along with some shimmer from my sparkle marker.


Vilda Stamps Used:


Other Materials Used:
Bazzill Cardstock;
WRMK Corner Chomper - Deco;
WRMK Mini 8 Punch - Doily;
Ranger Archival Ink - Jet Black;
Inktense Pencils;
Water Brush;
Satin Ribbon.

* * * * *
Thanks so much for taking a look!
I'll be back soon with my second project!

* * * * *
If you're not familiar with Vilda Stamps, they are located in Sweden!
I've been a big fan of the stamps since I was introduced to them 
while working on a DT in Germany!
The stamps can be purchased from Engstroms Artstudio AB.
They ship all over the world.

* * * * *

Here are all the links for you:


Blog Archive