Hello, my friends!
Today I'm sharing a fun album that I created for Clear Scraps!
It's a Slimline Chipboard Album that measures 5 1/2" x 11".
These are the Clear Scraps products that I used:
Here's how I did it:
I began by covering the front and back of the album pages with designer paper.
I punched the binding holes and inked all the edges.
I punched the binding holes and inked all the edges.
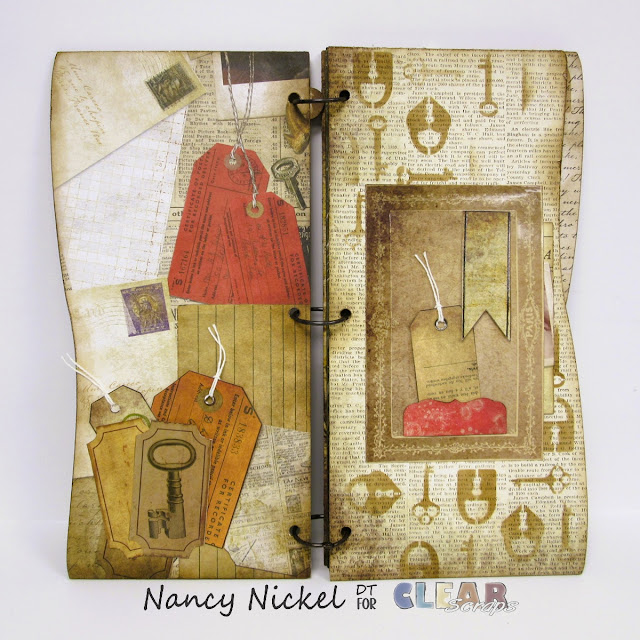
Then I used distress ink, and stenciled several pages with the keys and locks.
I chose one key and one lock, and heat embossed them with an antique gold embossing powder.
While it was still warm, I sprinkled on a little bit of black embossing powder,
While it was still warm, I sprinkled on a little bit of black embossing powder,
and heat set again.
This gives a nice vintage look that worked very well with my album cover.
This gives a nice vintage look that worked very well with my album cover.
I adhered the key and lock in place on my front cover.
All that was left was to embellish my album pages.
I added a variety of tucks and journaling spots.
I really like seeing the way the "wave" from the previous page.
There is lots of room for photos and documentation.
These slimline albums are so fun to decorate and put together.
You can find more Slimline Album options in the shop HERE.
You can find more Slimline Album options in the shop HERE.
* * *
Other Materials Used:
DCWV Timeless Type Stack;
Embossing Ink;
Antique Gold and Black Embossing Powder;
Walnut Stain Distress Ink;
Other Materials Used:
DCWV Timeless Type Stack;
Embossing Ink;
Antique Gold and Black Embossing Powder;
Walnut Stain Distress Ink;
Binding Rings.
* * *
Thanks for stopping by today!
I'll be back soon with another fun project share!
I'll be back soon with another fun project share!
* * *
Here are all the links for you:
Clear Scraps Instagram
Clear Scraps Pinterest


1 comment:
Beautiful and creative. Warm greetings from Montreal 😊 ❤️ Canada 🇨🇦
Post a Comment