Showing posts with label Polka Art Studio. Show all posts

Sunday, 3 August 2025

Grungy Vintage Junk Journal for @polkaartstudio


Hello, friends!

I have a new junk journal video to share with you.
I've used fabulous digital files from Polka Art Studio.

You'll find all the links listed below the video at youtube.


Thanks for watching! See you again very soon!

Friday, 20 December 2024

Christmas Show and Tell for Polka Art Studio

  Hello, my friends!

Today I'm sharing another Show and Tell video of products from Polka Art Studio!

These are all Christmas themed, and so much fun!
I hope it gives you some ideas!


I'll be back after Christmas with the finished journals!

All the product links are listed in the video description! 

* * *

Thanks for stopping by!
I'll be back soon with another project to share!


Friday, 11 October 2024

Show and Tell of Junk Journal Products from Polka Art Studio

  Hello, my friends!

Today I'm sharing a video of some things I've been working on.  

 These are some of my favorite junk journaling products from Polka Art Studio!

Take a look at my Show and Tell:


All the product links are listed in the video description! 

* * *

Thanks for stopping by!
I'll be back soon with another project to share!

Thursday, 14 December 2023

Christmas Cards for Polka Art Studio

    Hello, my friends! 

Today I have another fun project for Polka Art Studio!

I have made a collection of Christmas cards,
using only two collections from the shop:

 Beige Bliss Decorative Papers Collection,

and Beige Bliss Fussy Cuts Collection.

The joy of using digital printable collections is that you can get started immediately!
So you still have lots of time to get some projects finished!
Also, the joy of using these particular collections - they're GORGEOUS!
Plus...there are so many more images for me to use.

Before we get started, I'll give you a little rundown of what I did.
I first printed out the images that I wanted to use, and fussy cut them out.
I then printed out the papers, and decided which image which go with which paper.
Then it was just a matter of choosing some coordinating cardstock,
along with some suitable dies.
I inked all the edges, and adhered everything in place.
Finally, I added some sequins, stickles, twine/ribbon, or buttons;
whatever worked best!

Here we go:


It's a beautiful collection to play with!

As you can see...I made a variety of projects...from elegant to vintage!
I even included a small gift bag and pillow box.
The possibilities are endless!

* * *

Polka Art Products Used:

 Beige Bliss Decorative Papers Collection,

 
Other Materials Used:
Recollections Cardstock;
Sequins;
Diamond Stickles;
Ribbons - Offray, Celebrate It!;
Wood Buttons;
Jute Twine:
Assorted Dies - Spellbinders, Tim Holtz.

* * *

Thank you for stopping by today!
I'll be back soon with another fun project!

* * *
There are lots more fun goodies in the Polka Art Studio Shop!
Make sure you sign up for the newsletter too!
You don't want to miss all the fun events and freebies!

Polka Art Studio Links:

Polka Art Studio Etsy


Polka Art Studio Instagram 

Monday, 4 September 2023

Fun New Junk Journal for Polka Art Studio

 Hello, my friends!

Today I have a new journal project to share with you!

This is my Fall/Autumn Memories Junk Journal for Polka Art Studio!

Take a look:


 All three collections I used are so much fun!
They could be used in so many creative projects!
All the links are listed below the video.

* * *

Thanks for stopping by!
I'll be back soon with another project to share!

Thursday, 24 August 2023

Tuck Tags for Polka Art Studio

   Hello, my friends! 

Today I have another fun new project for Polka Art Studio!

I am busy working on a full journal,
which I hope to share with you next week. 

Today I want to share some sweet tuck tags that I made.
These will be tucked into the finished journal.

I had so much fun making these! 

Here they are:


Although these all look like they have great dimension,
they are actually nice and flat.
That makes them perfect to tuck into a journal and not add any bulk.


I used a couple of printable papers for the tag background,
and adhered them all onto a kraft cardstock base.


The sweet little girl images were all printed, fussy cut,
and adhered in place.

I then printed/fussy cut all the words and sentiments and added them to each tag.
I added a little bit of cheesecloth under several of them.


You may have noticed that I didn't even add a ribbon
or a tab to the top of these tags.
It's unusual for me, I know.
However, these tags just don't need it, do they? :o)

* * *

Polka Art Products Used:


(I used the backing papers from this kit)

 
Other Materials Used:
Kraft Cardstock;
Walnut Stain Distress Ink;
Cheesecloth.

* * *

Thank you for stopping by today!
I'll be back next week with the finished journal!

* * *
There are lots more fun goodies in the Polka Art Studio Shop!
Make sure you sign up for the newsletter too!
You don't want to miss all the fun events and freebies!

Polka Art Studio Links:

Polka Art Studio Etsy


Polka Art Studio Instagram  

Friday, 14 July 2023

Art of Calligraphy Journal for Polka Art Studio

 Hello, my friends!

I have a fun new project to share with you today!
I actually made another talking video that explains what I've done.

Have a look here: 


Products from Polka Art Studios used:

Art of Calligraphy Scrapbook Papers;

Vintage Grunge Paper Pack.

* * * 

Find Polka Art Studio here:


Friday, 17 March 2023

Once Upon A Time Album for Polka Art Studio

   Hello, my friends! 

Today I have another fun project for Polka Art Studio!

I have finished my album using the Once Upon a Time Collection!

Here's the cover:


Isn't that pretty? 
I just love this beautiful collection!

Here's a closer look at the charm dangle I added to the spine:


 I've actually made a talking video (only my second one) that shows the entire album,
  and explains a few things that I've done.

Here's the video:


* * *

If you missed my post about the included Folio, you'll find it HERE.

* * *

Polka Art Products Used:


Other Materials Used:
Zutter Bind It All;
Zutter Curved Spine Cover-All;
Zutter Removable Photo Pockets;
Seam Binding;
Ranger Ice Stickles;
Vintage Photo Distress Ink;
Charms and Chain from My Stash.

* * *

Thank you for stopping by today!
I'll be back soon with another fun project!

* * *
There are lots more fun goodies in the Polka Art Studio Shop!
Make sure you sign up for the newsletter too!
You don't want to miss all the fun events and freebies!

Polka Art Studio Links:

Polka Art Studio Etsy


Monday, 20 February 2023

Fun Folio for Polka Art Studio

  Hello, my friends! 

Today I have another fun project for Polka Art Studio!

I am working on an album using the gorgeous Once Upon a Time Collection!
There is a matching folio kit that I am sharing today.
It's "The Glass Slipper" Loaded Folio, and you can find it HERE.
This folio will be tucked inside my finished album.

It's a gorgeous kit, and so much fun to put together!

This is the front:


This is the back:


This is the folio back when opened up:


This is the inside opened up:


I've cut everything out and inked all the edges.
I used a velcro tab to close it securely.
The left side page is a big pocket. 
The center has two flaps.

Here it is with the flaps flipped open:


Each flap has a pocket.
The center panel also has a large pocket.

Here is the left side panel with all the bits removed from the pocket.
It creates a seamless image...so pretty! 


Here I've emptied all the other pockets.
You can't even see that the center panel has a pocket, can you? 
I added a definition tag to each of the outside pockets.


These are all the fabulous bits that the pockets hold!
Some will stay in the folio but others will be used in my album.

It's a gorgeous collection to work with!
I'll be back soon to share my finished album,
and how I add my folio to it!

* * *
Polka Art Products Used:


Other Materials Used:
Vintage Photo Distress Ink;
Velcro Tab.
 

* * *
Thank you for stopping by today!
I'll be back soon with another fun project!

* * *
There are lots more fun goodies in the Polka Art Studio Shop!
Make sure you sign up for the newsletter too!
You don't want to miss all the fun events and freebies!

Polka Art Studio Links:

Polka Art Studio Etsy


Monday, 30 January 2023

Fun Ephemera Project with Bonus Bits

 Hello, my friends!

When I saw this beautiful collection of Easter and Spring Fussy Cuts
over at Polka Art Studio's Etsy Shop,
I just knew it was going to be a fun file to play with!

As you know...I love to fussy cut!

I've shared several ephemera folios with you before
but this file needed something different. 
There were 7 pages of fussy cuts to organize. 

Then I saw the Shabby Chic Digital Envelope File
and new it was just what I needed!


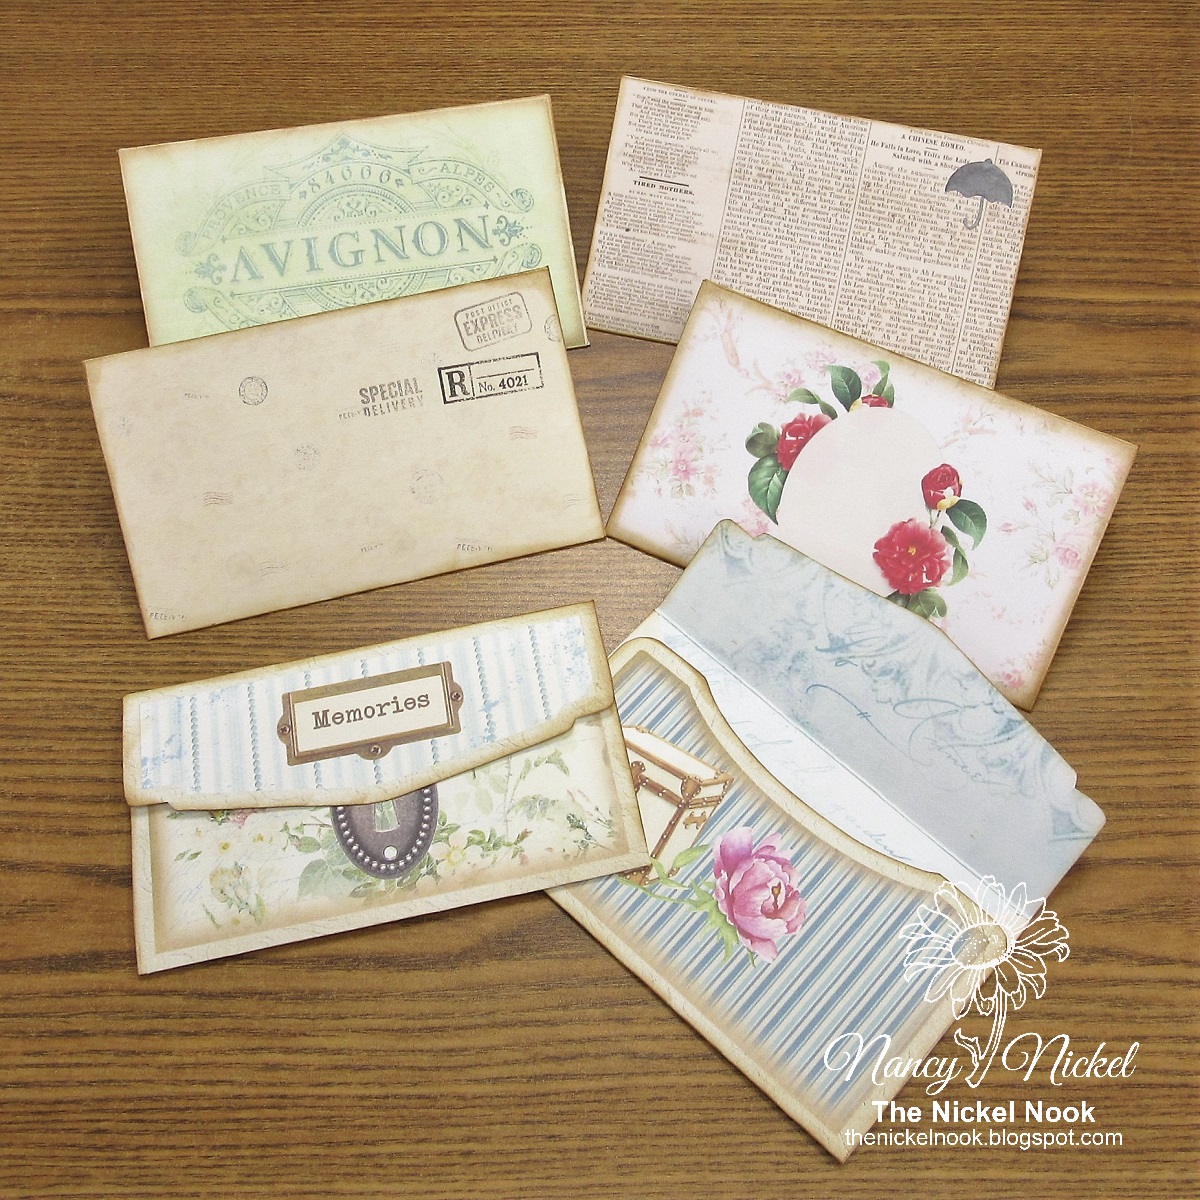
This file included 6 beautiful envelopes, along with three optional backing papers. 
I printed them, cut them out, and assembled them following the included instructions.


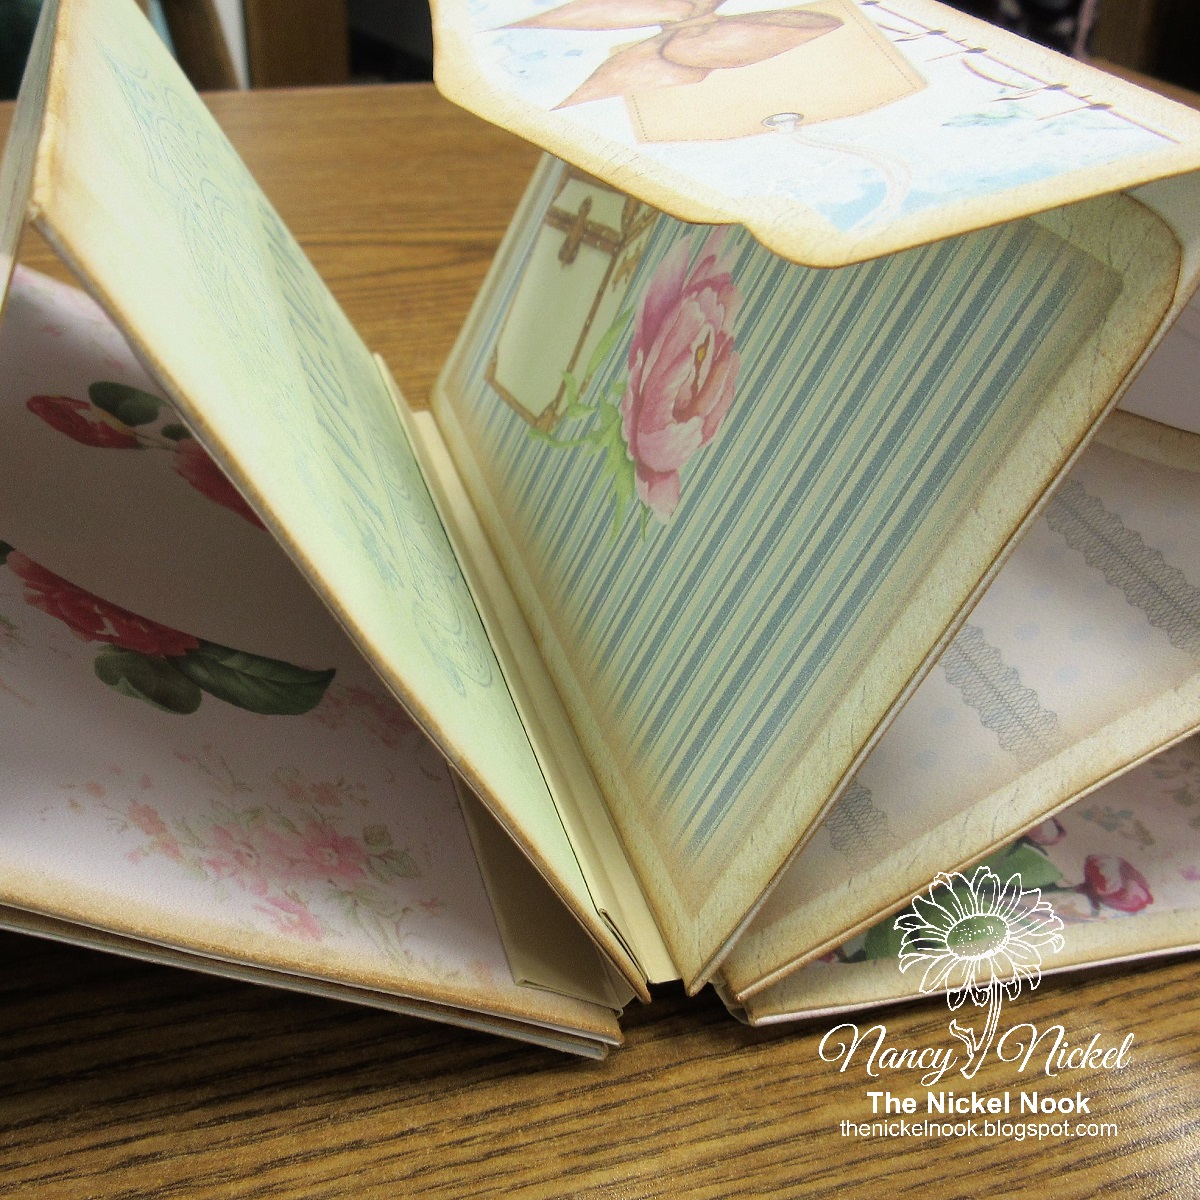
I wanted to connect all my envelope, so I made a hinge. 
It's a simple matter scoring and folding a strip of cardstock.


My hinge had six flaps for my six envelopes.
I adhered the hinge to the back of each envelope.
There is a 1/8" space between each hinge.

In the photo below, you can see the envelopes assembled:


Once all the pretty Easter/Spring bits were fussy cut, I sorted them into piles.
On the inside of each envelope I wrote the name of what was going in that envelope.
In the photo you can see "Flowers".
I also had: Bunnies, Easter, Butterflies, Birds, and Other.  

Hmmm...I guess I missed a photo of this envelope folio in the wooden box. 
You can see a corner of the wooden box showing in the photo above. 
This piece fits beautifully into the box!
It stands up and allows me to flip through the envelopes
and pull out the pieces I want.

Then I went on to make these fun projects, shown below:


Aren't those little envelope dangles adorable?
Each one measures 1 1/4" x 3/4". 
Each envelope page included a mini envelope diagram,
showing how to assemble the full envelopes.
I cut them out and assembled them. 
I inserted an eyelet in each and then added a bulb pin.
They're tacked shut with temporary adhesive,
and are just perfect for a tiny secret message!

The envelope shown on the left side, is another fun extra.
It's a small flat image of the envelope.
I cut them out and inked the edges.
Now they are a lovely little tuck!

* * *
Polka Art Products Used:


Other Materials Used:
Vintage Photo Distress Ink;
Recollections Cardstock;
Bulb Pins.

* * *
Thank you for stopping by today!
I'll be back soon with another fun project!

* * *
There are lots more fun goodies in the Polka Art Studio Shop!
Make sure you sign up for the newsletter too!
You don't want to miss all the fun events and freebies!

Polka Art Studio Links:

Polka Art Studio Etsy


Blog Archive