Showing posts with label Digital. Show all posts

Thursday, 14 December 2023

Christmas Cards for Polka Art Studio

    Hello, my friends! 

Today I have another fun project for Polka Art Studio!

I have made a collection of Christmas cards,
using only two collections from the shop:

 Beige Bliss Decorative Papers Collection,

and Beige Bliss Fussy Cuts Collection.

The joy of using digital printable collections is that you can get started immediately!
So you still have lots of time to get some projects finished!
Also, the joy of using these particular collections - they're GORGEOUS!
Plus...there are so many more images for me to use.

Before we get started, I'll give you a little rundown of what I did.
I first printed out the images that I wanted to use, and fussy cut them out.
I then printed out the papers, and decided which image which go with which paper.
Then it was just a matter of choosing some coordinating cardstock,
along with some suitable dies.
I inked all the edges, and adhered everything in place.
Finally, I added some sequins, stickles, twine/ribbon, or buttons;
whatever worked best!

Here we go:


It's a beautiful collection to play with!

As you can see...I made a variety of projects...from elegant to vintage!
I even included a small gift bag and pillow box.
The possibilities are endless!

* * *

Polka Art Products Used:

 Beige Bliss Decorative Papers Collection,

 
Other Materials Used:
Recollections Cardstock;
Sequins;
Diamond Stickles;
Ribbons - Offray, Celebrate It!;
Wood Buttons;
Jute Twine:
Assorted Dies - Spellbinders, Tim Holtz.

* * *

Thank you for stopping by today!
I'll be back soon with another fun project!

* * *
There are lots more fun goodies in the Polka Art Studio Shop!
Make sure you sign up for the newsletter too!
You don't want to miss all the fun events and freebies!

Polka Art Studio Links:

Polka Art Studio Etsy


Polka Art Studio Instagram 

Thursday, 26 May 2022

Fun Projects for Paper Craftivity

Hello, my friends!

Today I'm sharing a fun art journal page that I put together.
I used the beautiful Brave Beauties Collection from Paper Craftivity.

This is a digital printable junk journal kit,
and the creative possibilities are endless. 

Here's my page:


The background was colored with Prima Metallic Watercolor Paint.
Then stamped with some great Dylusions stamp sets.


On the left side a adhered the great collage tag,
and added the fussy cut girl in front.
I added a strip of tulle through the tag hole,
and another piece behind the girl.


On the right side, I adhered this fun collage pocket.
I tucked a tuft of tulle into the pocket,
and then added all these great collage strips.
I just love them all - with their sweet faces and words!


I also added a fussy cut butterfly to this page.

Then I went on to make these two tags to tuck in a future journal.
I backed the collage tags with kraft cardstock,
and added some simple stamping with the Tim Holtz Field Notes Set.
I then added some fussy cut elements from the collection.
Finally, I added the bow toppers.
You'll see more about that in my next Bowdabra post.


Materials Used: 

Brave Beauties Collection by Paper Craftivity;

Dylusions Art Journal;
Prima Marketing Metallic Watercolor Paints;
Dylusions Stamps - Basic Backgrounds, Background Love;
Distress Ink - Peeled Paint, Walnut Stain;
Desert Sand Memento Ink;
White Tulle;
Kraft Cardstock;
Ribbons.

* * * * *
Thank you so much for stopping in today!
I'll be back soon with another fun new project!

 * * * * *

Head on over to the Paper Craftivity Shop on Etsy to see all of the great kits!  

Saturday, 20 November 2021

No. 19 Vintage Emporium - Challenge #2

 Hello, my friends!  

It's time for a new challenge at No 19 Vintage Emporium!
As always, it's anything VINTAGE goes!


Our fabulous sponsor is:


The beautiful kit this month is called "Gypsy Soul"
and you can find it HERE.

The winner of this challenge will receive this fabulous kit for a prize!


It was a great kit to create with!

Here's what I made:


First is a tag! 
Aren't those images lovely?
I layered the papers, added the photos, and then the butterfly.
Finally, I used the lace "washi" strip for the top of the tag.

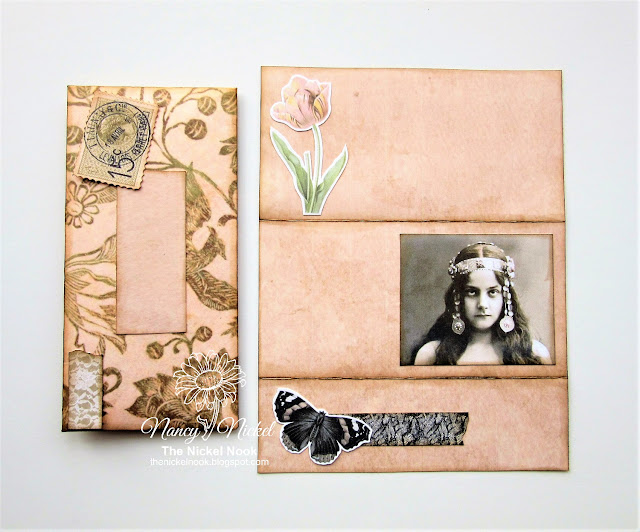
Next, I made an envelope:


I used the patterned paper from the kit for the base.
I cut the label from one of the other papers,
added the stamp, and then a little strip of the lace "washi".

On the back I added the fabulous "wax seal".
Doesn't it look real?
It's hard to believe it's just a print on paper!


I then printed out another of the papers,
folded it like a letter and inked the edges.
I added the lovely photo and elements to the page.
This letter will be folded and tucked into the envelope.
It will then be tucked inside a junk journal,
ready for lots of hidden journaling!


I'd like to thank so many of you for making our first challenge such a wonderful success!
I hope to see you join us again this month!

* * * * *

This vintage challenge runs for an entire month,
and the only requirement to enter is that your project be VINTAGE!
That's it!
I really hope to see MANY of you join us!

* * * * *

Here are the links for you:


Monday, 30 December 2019

Ephemoire - Winter Bird Cards

Hello, friends!

Today I have a fun new project for Ephemoire!

I am featuring two of my favorite items from the shop:

Winter Birds

and

Wood Texture Sampler.

These bird images are so beautiful!
There are LOTS of ways to get creative with these images and papers!
I confess that the Wood Texture paper collection 
has probably moved to the top of my favorites list! 
There are so many ways to use all the beautiful colors!

Here's what I made:


For all of the cards, I chose a wood background color that worked with the bird image.
I cut them to fit a white or kraft cardstock card base, 
distressed the edges, and adhered them in place.


For the first two cards, I die-cut a white cardstock wreath.
I then die-cu the bird image to fit inside the wreath.
I adhered them to the front of the card, leaving some leaves free.
I then curled up the leaves to give some added dimension.


Don't they look suitably frosty?


For the second two cards, I die-cut the wreaths from kraft cardstock.
Instead of die-cutting the image, I trimmed it town, 
and used a corner chomper on the corners.
I then adhered it to the card base at an angle
before adhering the wreath in place, on top of it.


Finally, I added some Stickles to the curled leaves.


I think these cards are great for so many different occasions!
I hope you make some of your own!


Other Materials Used:
Papers: Recollections - Cardstock;
Die: Spellbinders Shapeabilities - Wreath Die;
Corner Chomper: WRMK - Cloud;
Stickles: Frosted Lace;
Tim Holtz Distressing Tool.

Ephemoire Products Used:

Winter Birds

Wood Texture Sampler
* * * * *

Here are the links for you:

Tuesday, 23 July 2019

Let Me Introduce You To Artsystamper!

Hello, my friends!

I have some new fun to share with you starting today!
I want to introduce you to Artsystamper.
My sweet and very talented friend, Bev Cole,
has opened up a new etsy shop to sell her artwork.
You may know Bev from her most recent work over at Sparkle 'N Sprinkle. 
I have had the pleasure of knowing Bev, and creating with her artwork, years before that!
So I'm thrilled to be a member of her Artsystamper Addicts DT!

Today I am sharing a project that features:


One thing to note about these fabulous digital sets
is that they include both pre-colored and non-colored images!
I love that option, and look forward to sharing both with you in the coming months!

Here's what I have for you today:


Isn't that pretty?
I began with a box cut file from My Scrap Chick.
I cut the box base from solid purple cardstock.


The side panels were cut from this beautiful 
Aster and butterfly print, with a yellow background.


The top panel was cut from the gorgeous print Bev created.
I know...it looks like I slaved away for hours! lol


Once my panels were all added to the box,
I used the print/cut feature on my Cricut to print/cut the 
pre-colored Aster and Butterfly Image.
I added it to the top of the box using foam tape.


Finally, I added some sparkle marker to the butterfly, and all the flowers, 
and then added some pretty sequins!


Other Materials Used:
Papers: AC - Cardstock;
Marker: Spectrum Noir - Sparkle Marker;
Unknown Sequins;
Machine: Cricut Explore Air;
Cut File: My Scrap Chick - CG 4 x 6 Box for Ephemera.

* * * * *
Linking Up To:


* * * * *

Oh, some happy news for you...
there just happens to be a sale going on in the shop!
Buy 3 items and get 25% off your entire order!
Sale ends July 31st!

* * * * *
Thanks so much for stopping in today!
I hope you find these images as inspiring as I do!
I look forward to sharing more with you!

* * * * *
Here are the links for you:


Friday, 21 June 2019

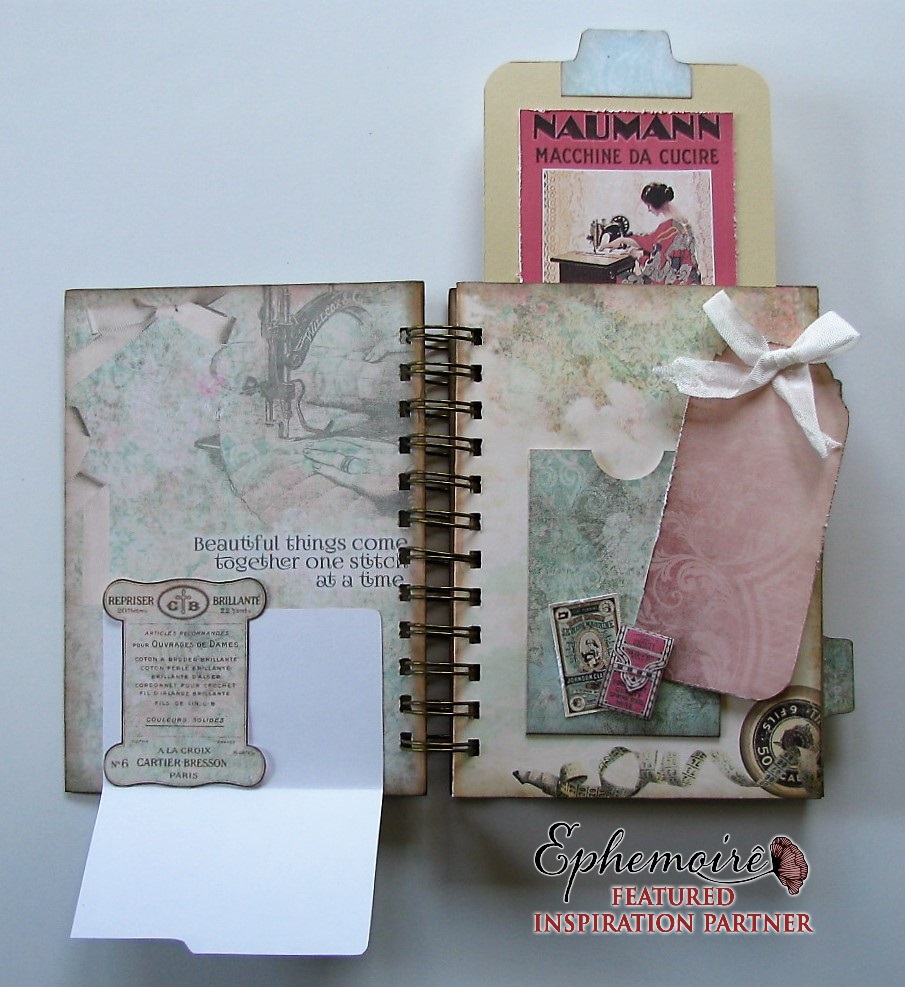
Ephemoire - 'Til the Bobbin Runs Out Mini Album

Hello, friends!

Today I have a fun new project for Ephemoire!

This month I've had the best time creating a mini album!
It's been a while since I've done one, and I've missed it!
They do take me a little longer than some of my other projects,
just like it will take you a little longer to read this post! lol
It is VERY photo heavy!

Actually, I just had a great idea! How about a slideshow option?
It's short and sweet!
Then I'll follow it up with all the photos, 
just in case you want more details!


Please let me know if you have any questions!

Ephemoire Products Used:


* * * * *

Now here are the photos:


Here are the links for you:

Blog Archive