Showing posts with label Paper Craftivity. Show all posts

Tuesday, 1 November 2022

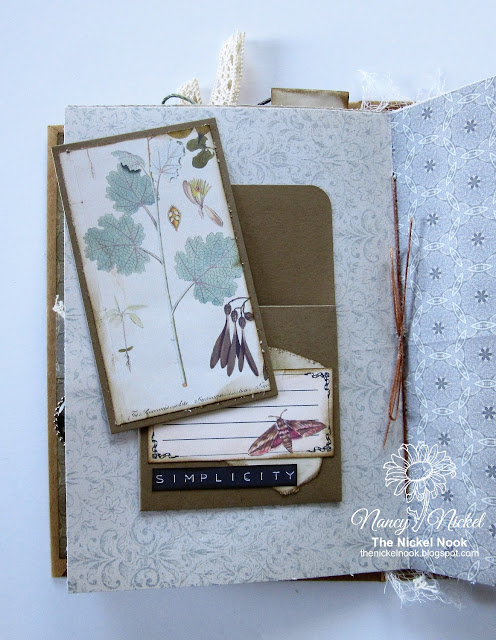
Nature's Notebook Junk Journal

 Hello, my friends!

This journal has been sitting it wait for a little while now.
I really felt it deserved a flip-through video
but I hadn't yet found the box that held my tripod.

Suddenly I found it...in a very unexpected place! lol
Then I had to find a spot in my craft room that would work.
This is the first video made in my new craft room and I hope to make many more.

So today I'm sharing my journal by video:


Just a few notes about this journal.

The beautiful digital collection I used is called Nature's Notebook.
It's from Paper Craftivity, and you can find it HERE.

I used scrapbook paper for the cover.
I stitched around it by machine, using a decorative stitch.
I also included the same decorative stitch on some fabric ruffles inside.

The burlap book closure wrap was made using my Bowdabra.
You can find that post HERE.

I added a strip of muslin to the inside of the spine.
The single signature is stitched in using a simple pamphlet stitch
and waxed thread.

* * *

I had so much fun putting this together!
Thanks for looking! :o)

* * *
Find more wonderful digital kits here:

Paper Craftivity Etsy Shop

Thursday, 9 June 2022

Art Journal Page with Brave Beauties from Paper Craftivity

Hello, my friends!

Today I'm sharing another art journal page that I put together,
using the beautiful Brave Beauties Collection from Paper Craftivity.

This is a digital printable junk journal kit,
and the creative possibilities are endless. 

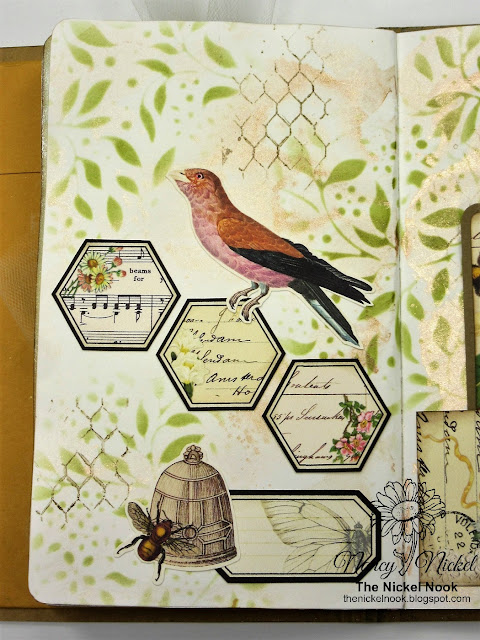
Here's my page:


Again, I started with a Prima Metallic Watercolor Painted background.
The stenciling was done with distress ink and a Creative Expressions Stencil.
Then I used a BoBunny Texture Stamp to add a little dimension to the background.


To this side, I added several of the fussy cut elements from the collection.


On this side, I added a pocket, and inserted a journaling card.
I also added a fussy cut butterfly.


Here is the entire journaling card...isn't she adorable?
I cut the card out and backed it with kraft cardstock.


These are the rest of the journaling cards...
all ready for future projects!

This is such a wonderful collection FULL of fun!

Materials Used: 

Brave Beauties Collection by Paper Craftivity;

Dylusions Art Journal;
Prima Marketing Metallic Watercolor Paints;
Creative Expressions Stencil - Forget Me Not Vines;
BoBunny Stamp Set - Distressed Textures;
Distress Ink - Peeled Paint, Walnut Stain;
Kraft Cardstock.
 

* * * * *
Thank you so much for stopping in today!
I'll be back soon with another fun new project!

 * * * * *

Head on over to the Paper Craftivity Shop on Etsy to see all of the great kits!   

Tuesday, 31 May 2022

How to Make Crinkly Tag Ties With My Mini Bowdabra Bow Making Tool

   Hello, my friends!

It's finally time for another new project share for Bowdabra!
Having spent the last couple of months unpacking and organizing my new craft room,
 I finally found the box that contained my Bowdabra tools and supplies!
I made the mistake of labeling all the boxes "Craft Room",
instead of specifying what was in each box.
Wouldn't you know my Bowdabra was in one of the last 4 boxes.

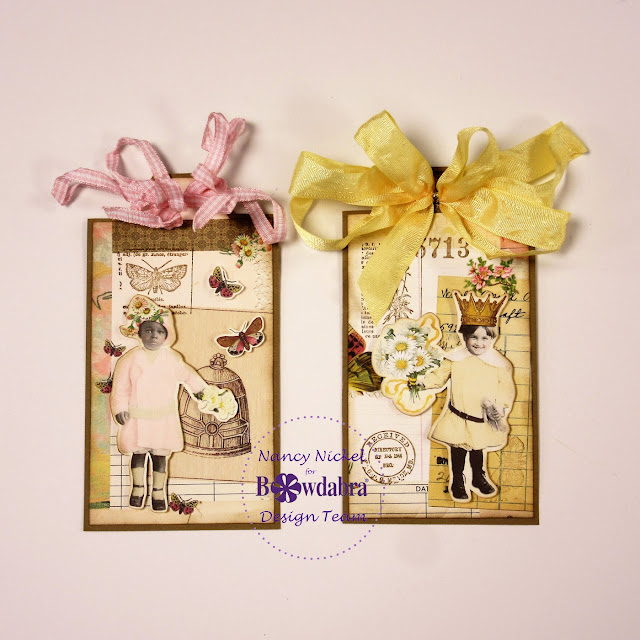
Here is what I made, using my Mini Bowdabra Bow Making Tool and Ruler Kit:

You may have seen these the other day.
They were part of my Paper Craftivity project post.
After putting the tags together I knew I needed a topper for them.
I wanted something that was loopy and wrinkled.
I pulled out my Mini Bowdabra Bow Making Tool and got to work.

Here's how:


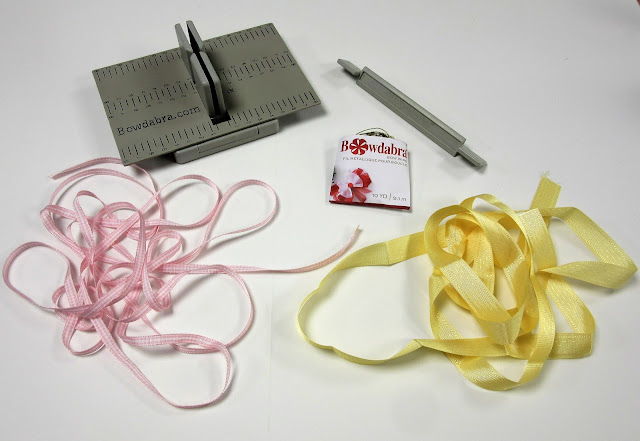
Supplies Used:
Tags of Choice;
Coordinating Ribbons;
Scissors.

I'll begin with the yellow seam binding that matches one of the tags.
This seam binding has lots of polyester in it.
A rayon seam binding crinkles up much more but I didn't have any in yellow.


1. Place the ruler over the Mini Bowdabra.
2. Cut a 9 inch piece of the Bowdabra wire and fold in half. Insert into the Bowdabra tool, as shown in the photo.  


3. Insert the ribbon into the tool with the end on the left side at the 3 inch line, and make the first bow loop on the right side. This loop measured 3".  


4. Twist the ribbon, insert it into the tool, and form another 3" loop on the other side.  


5. Following the same steps, add two loops on each side that measure 2 1/2".


6. Finally, add one loop on each side that measures 2". Trim the end of the ribbon at 3"


7. Pull the Bowdabra Bow Wire up and insert the wire ends through the wire loop. Pull securely and remove the bow from the tool.


There you have a pretty loopy bow!


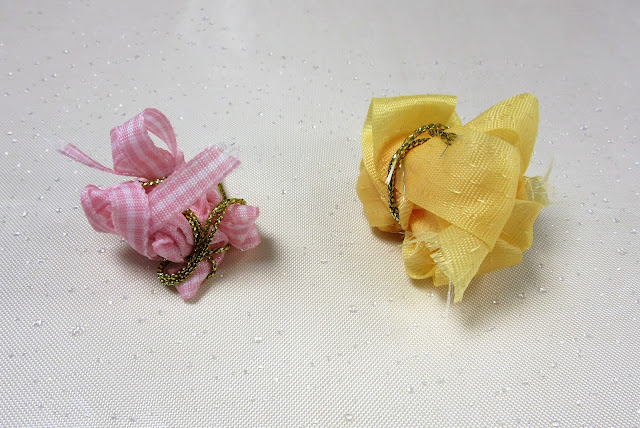
8. To proceed with crinkling up the bow, spritz it liberally with water. 


9. Smoosh the wet ribbon up into a tight little ball, and wrap the wire ends around it.


10. I followed the exact same steps with the pink gingham ribbon. Now set both ribbons aside to dry. 


11. Once they're dry, unwrap the wire and fluff up the bow. Use the wire to attach the bow to the top of the tag.


Aren't those bows great?
The Bowdabra tool makes it so fun and easy to create any bow you want!

* * * * *

Thanks so much for stopping by today!
I'll be back next month with another fun bow project!

* * * * *

Here are all the Bowdabra links for you:

Bowdabra Shop

Bowdabra Blog

Bowdabra Facebook 

Thursday, 26 May 2022

Fun Projects for Paper Craftivity

Hello, my friends!

Today I'm sharing a fun art journal page that I put together.
I used the beautiful Brave Beauties Collection from Paper Craftivity.

This is a digital printable junk journal kit,
and the creative possibilities are endless. 

Here's my page:


The background was colored with Prima Metallic Watercolor Paint.
Then stamped with some great Dylusions stamp sets.


On the left side a adhered the great collage tag,
and added the fussy cut girl in front.
I added a strip of tulle through the tag hole,
and another piece behind the girl.


On the right side, I adhered this fun collage pocket.
I tucked a tuft of tulle into the pocket,
and then added all these great collage strips.
I just love them all - with their sweet faces and words!


I also added a fussy cut butterfly to this page.

Then I went on to make these two tags to tuck in a future journal.
I backed the collage tags with kraft cardstock,
and added some simple stamping with the Tim Holtz Field Notes Set.
I then added some fussy cut elements from the collection.
Finally, I added the bow toppers.
You'll see more about that in my next Bowdabra post.


Materials Used: 

Brave Beauties Collection by Paper Craftivity;

Dylusions Art Journal;
Prima Marketing Metallic Watercolor Paints;
Dylusions Stamps - Basic Backgrounds, Background Love;
Distress Ink - Peeled Paint, Walnut Stain;
Desert Sand Memento Ink;
White Tulle;
Kraft Cardstock;
Ribbons.

* * * * *
Thank you so much for stopping in today!
I'll be back soon with another fun new project!

 * * * * *

Head on over to the Paper Craftivity Shop on Etsy to see all of the great kits!  

Wednesday, 20 April 2022

Woodland Diaries Journal for Paper Craftivity

Hello, my friends!

Today I'm sharing a flip-through of a journal I made a little while ago.
I filmed this one before we moved, and before I packed up my tripod.
There's still no sign of my tripod but I'm sure I'll find the right box one day.

This Woodland Diaries Printable Kit is absolutely gorgeous!
It was a real pleasure to work with!

Here's the video:


Some notes about my journal:

The cover is made of kraft wrapped chipboard.
It contains two signatures that have been stitched into the spine.
Each signature is made up of the beautiful printable pages,
along with some tea-stained paper, a bag, a vintage German book page,
a vintage dictionary page, and an envelope.
There are multiple pockets, flaps and tuck spots.
Various pieces of the printed ephemera have been inserted throughout. 
Of course I had to add a bit of lace, twine, and cheesecloth.
It's just the right combination of pages to write on,
along with pretty things to look at and inspire! 

This journal will be listed in my Etsy Shop soon.
Send me a message if you're interested.

Thanks very much for looking! :o)

 * * * * *

Head on over to the Paper Craftivity Shop on Etsy to see all of the great kits! 

Tuesday, 24 August 2021

Maker's Movement - Journal Fun

  Hello, my friends!


I'm back today to share a fun project for Maker's Movement

* * *

For those of you that don't know, I'm in the middle of a big move.
We're packing up the house that we've lived in for 23 1/2 years,
and leaving the town we've lived in for 36 1/2 years!
We don't know where we're going yet, as we haven't found a house we like enough to buy.
I'm finding it rather exciting...with no definite destination in mind.
Everything has gone into storage, including my craft room.
I've managed to keep out a "few" things but I don't think it will all fit in the car!
Apparently I can't take it ALL with me! ;o)
I plan to continue with my regular crafty posts.
although I am a little bit behind right now.
 I'll just need a little time to catch up once the packing is finished.
Okay...now back to our regular schedule...

* * *

This is actually a sneak at a journal I've just finished.
I'll have a video flip-through ready very soon...I hope!
The pages and images used in this post are all from Paper Craftivity .

Maker's Movement has some fabulous dies that are great journal additions
I used my wonderful Crossover II Machine for all my die-cutting on this project.

I've also used:


Here's what I've done:


First, the Library Pocket Die Set. 
I cut the pocket and card from kraft cardstock.
I folded the pocket and adhered it onto my journal page.
I then decorated it with some of the elements from Paper Craftivity.


I also decorated the library card.
The back is left plain to journal on.

Below, I'm sharing another Library Pocket Card.
It's made the same way but decorated differently.


Here's a look at the decorated Library Card. 
On the next page, I've added a tab to the envelope flap.
This tab is also included in the Library Card Pocket Die Set.


Here is another spot where I used the tab die. 
I've added it to the top of a folded coffee dyed page.


Now I'll show you how I used the Waterfall Card Die Set.
I cut the flaps out of kraft cardstock.
The set includes a few options for adding a decorative edge.
I used the bracket shape on my flaps.
I cut three flaps and added them to my journal page.
I decorated the top flap with a pretty journal card,
and added a trim across the top.


I added another journal spot to each of the next two flaps.


I left the spot under the last flap blank.
It's a great spot for some "hidden" journaling.


Here is another way I used the Waterfall Card Die Set.
This time I cut only one flap out of kraft cardstock.
I added a decorative top, and some graph paper for journaling.


I added another piece of the graph paper on the under side of the flap.
Then I positioned it in place over a journal card that had been adhered to my page.


 These fabulous dies from Maker's Movement are great additions to any journal project!
They're so versatile and easy to use too!
You'll be seeing lots more of both of these dies in coming journals! :o)

* * * * *

Maker's Movement Products Used:

Crossover II Fabric & Paper Cutting System,

Other Materials Used:

Coffee Died Papers.

* * *
Thanks so much for stopping by!
I'll be back soon with another fun project!

* * *

Here are all the links for you:

Maker's Movement Facebook 

Friday, 23 April 2021

Sharing Some Fun New Things!

Hello, my friends!

Today I want to share some fun things I've been working on!

I also want to share two new shops with you,
and I must say that their products together are a great combination.

First, I have these fun pockets for a junk journal I'm working on.


These pockets and cards, along with the tags to follow,
Most of you know that I love to work with digital kits,
and this one is gorgeous!
I love EVERYTHING in Karen's shop!
So you'll be seeing LOTS more!

Next I have some fun collage tags, using the same kit.
I used some manila tags for the base.
The patterned papers and all the elements are from the kit.
I added just a bit of burlap, linen, book page, and lace.
The colors in this kit are fantastic!
I can't wait to show you the finished journal. 


The next two photos show you a closer look at each tag.
They also introduce you to the second shop I want to share with you.
I'm now on the Design Team for Tape Runner.
This was my first time using their adhesive,
and I have to tell you that it's fabulous!
The green one shown in this photo is actually a retractable tape runner.
You can read all the details of this one HERE.
I seriously appreciate the retractablility of this adhesive! ;o)


Here are the other two tags,
along with another Tape Runner adhesive.
You can read all about this pretty pink dispenser HERE.
This is also a really great adhesive. 
It's not retractable like the other one
but it has a little flip-open cover that stays attached.


These tags and pockets were so much fun to put together,
and I can't wait to put them in my junk journal.
I'll be sharing that with you soon!

I'll be sharing much more from Tape Runner too,
in the months ahead.
This adhesive makes it so easy to put things together,
with no mess or fuss! 

 * * * * *
Thanks so much for stopping by today!
I'll be back soon with more fun to share!

* * * * *

Here are the links for you:

For Digital Kits:

Paper Craftivity Shop


Tape Runner:

Tape Runner Shop

Tape Runner Facebook

Tape Runner on Amazon


Blog Archive