Hello, my friends!
It's finally time for another new project share for Bowdabra!
Having spent the last couple of months unpacking and organizing my new craft room,
I finally found the box that contained my Bowdabra tools and supplies!
I made the mistake of labeling all the boxes "Craft Room",
instead of specifying what was in each box.
Wouldn't you know my Bowdabra was in one of the last 4 boxes.
Here is what I made, using my Mini Bowdabra Bow Making Tool and Ruler Kit:
You may have seen these the other day.
They were part of my Paper Craftivity project post.
After putting the tags together I knew I needed a topper for them.
I wanted something that was loopy and wrinkled.
I pulled out my Mini Bowdabra Bow Making Tool and got to work.
Here's how:
Supplies Used:
Tags of Choice;
Coordinating Ribbons;
Scissors.
I'll begin with the yellow seam binding that matches one of the tags.
This seam binding has lots of polyester in it.
A rayon seam binding crinkles up much more but I didn't have any in yellow.
1. Place the ruler over the Mini Bowdabra.
2. Cut a 9 inch piece of the Bowdabra wire and fold in half. Insert into the Bowdabra tool, as shown in the photo.
3. Insert the ribbon into the tool with the end on the left side at the 3 inch line, and make the first bow loop on the right side. This loop measured 3".
4. Twist the ribbon, insert it into the tool, and form another 3" loop on the other side.
5. Following the same steps, add two loops on each side that measure 2 1/2".
6. Finally, add one loop on each side that measures 2". Trim the end of the ribbon at 3"
7. Pull the Bowdabra Bow Wire up and insert the wire ends through the wire loop. Pull securely and remove the bow from the tool.
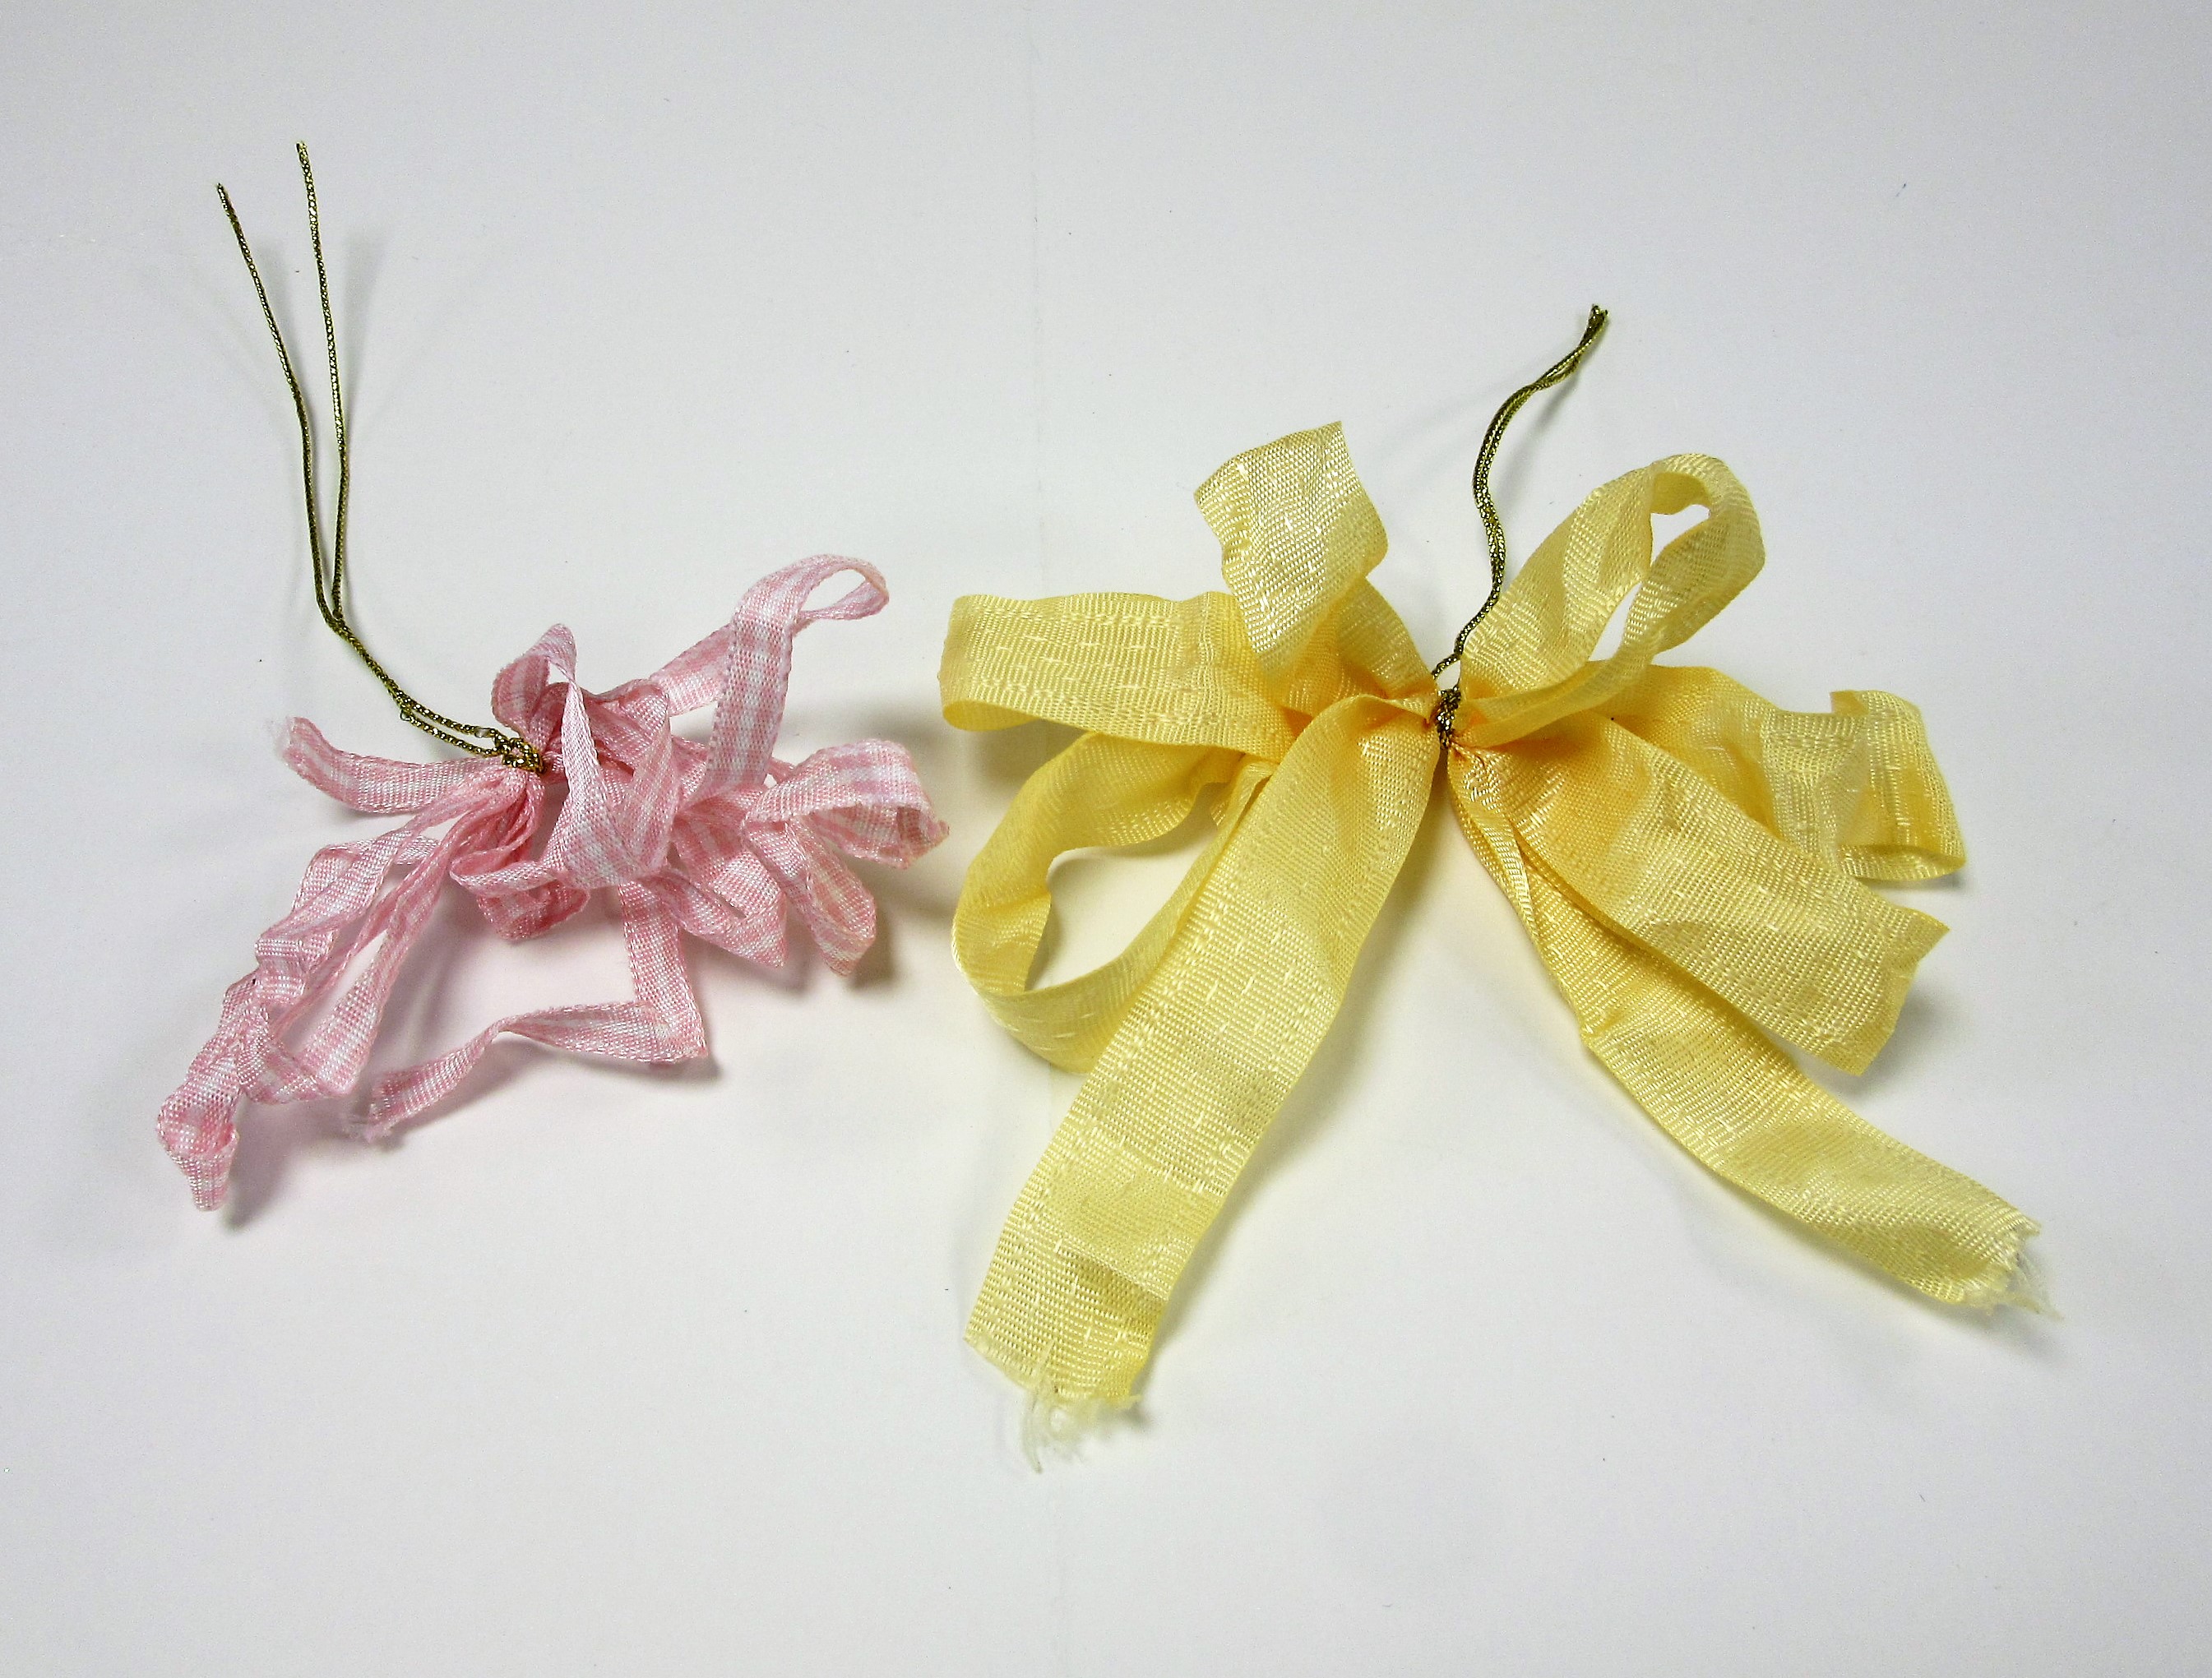
There you have a pretty loopy bow!
8. To proceed with crinkling up the bow, spritz it liberally with water.
9. Smoosh the wet ribbon up into a tight little ball, and wrap the wire ends around it.
10. I followed the exact same steps with the pink gingham ribbon. Now set both ribbons aside to dry.
11. Once they're dry, unwrap the wire and fluff up the bow. Use the wire to attach the bow to the top of the tag.
Aren't those bows great?
The Bowdabra tool makes it so fun and easy to create any bow you want!
* * * * *
Thanks so much for stopping by today!
I'll be back next month with another fun bow project!
* * * * *
Here are all the Bowdabra links for you:
Bowdabra Shop
Bowdabra Blog
Bowdabra Facebook


2 comments:
Awesome tutorial… now to find my bowdabra… haha
Gosh this makes such beautiful bows Nancy.
Faith x
Post a Comment