Showing posts with label Ephemoire DT. Show all posts

Monday, 30 December 2019

Ephemoire - Winter Bird Cards

Hello, friends!

Today I have a fun new project for Ephemoire!

I am featuring two of my favorite items from the shop:

Winter Birds

and

Wood Texture Sampler.

These bird images are so beautiful!
There are LOTS of ways to get creative with these images and papers!
I confess that the Wood Texture paper collection 
has probably moved to the top of my favorites list! 
There are so many ways to use all the beautiful colors!

Here's what I made:


For all of the cards, I chose a wood background color that worked with the bird image.
I cut them to fit a white or kraft cardstock card base, 
distressed the edges, and adhered them in place.


For the first two cards, I die-cut a white cardstock wreath.
I then die-cu the bird image to fit inside the wreath.
I adhered them to the front of the card, leaving some leaves free.
I then curled up the leaves to give some added dimension.


Don't they look suitably frosty?


For the second two cards, I die-cut the wreaths from kraft cardstock.
Instead of die-cutting the image, I trimmed it town, 
and used a corner chomper on the corners.
I then adhered it to the card base at an angle
before adhering the wreath in place, on top of it.


Finally, I added some Stickles to the curled leaves.


I think these cards are great for so many different occasions!
I hope you make some of your own!


Other Materials Used:
Papers: Recollections - Cardstock;
Die: Spellbinders Shapeabilities - Wreath Die;
Corner Chomper: WRMK - Cloud;
Stickles: Frosted Lace;
Tim Holtz Distressing Tool.

Ephemoire Products Used:

Winter Birds

Wood Texture Sampler
* * * * *

Here are the links for you:

Thursday, 28 November 2019

Ephemoire - Rustic Christmas December Daily

Hello, friends!

Today I have a fun new project for Ephemoire!
I have used some fantastic printable projects to create
my very first December Daily!

Good news:
So once you've seen my album,
you can head over to the shop and get everything to make your own! :)

I had SO MUCH FUN putting this album together!
I've always thought the idea of a December Daily is great.
However, since it's just the two of us these days,
I thought there was no point in making one.
How would I fill the pages?

Well...this year I decided that I would make one regardless. 
I'll figure out some fun ways to fill it up.
Maybe I'll even share it when it's full.

I have lots of photos to share with you.
I'll try to keep the words to a minimum. lol

Here's the front cover:

I kept the cover simple and flat.
Then I added this fabulous red ribbon belly band.


I used a Snap Album for my base.
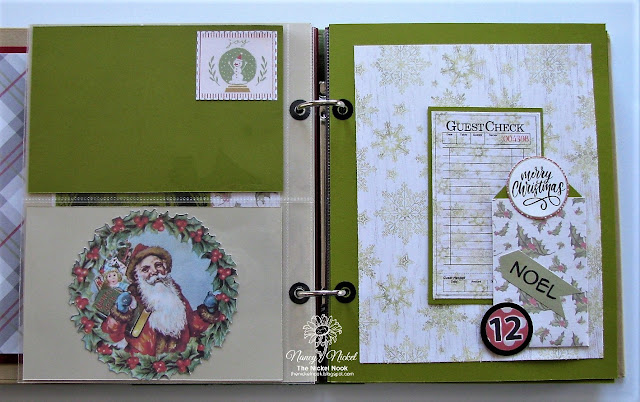
On the inside cover I added a big pocket.
It holds extra photo mats and journaling cards,
that I will use as I fill the album.
On the first page, I made a pocket with the printed image.


The base of each page is cardstock.
I've also added punched numbers to each page,
which have been matted on black.


The cardstock page bases are grouped into four color sections.
I have added one of the Snap Pocket Pages between each color section.
The first one is shown below.


Now we move on to the next color group.


I've used the digital images, and Guest Checks as tuck spots.


Here's the next pocket page:


Now we begin the green page section.
This first green page includes one of four pockets.


I created a tag to fit into the pocket.
I added one of the elements to the top of the tag.


Here's a second pocket.


Again, I've added a tag with element.


Here I've made another big pocket with the digital image,
and I've filled it with several big tags.
Here we end the green pages with another pocket page.


Now we begin the black page section.


Here's another pocket with a tag,
and another pocket page.


We finish with one final red page for the 24th and 25th.
I added this final digital image for all my cat loving friends.
It wasn't an easy thing to do! lol


For the final page of the album
I added a full page pocket page.
It's the perfect spot to add a large photo.
I think a Christmas tree photo will go on this page.


The final page is reserved for a large family photo.


There you have it...my first December Daily!
I hope you liked it, and will consider making one of your own! :o)


Ephemoire Products Used:

Rustic Christmas
(Papers, Journal Tags, Guest Checks, Labels)

 Christmas Countdown

Vintage Christmas Clipart Sampler #1

Whimsical Christmas Stamp Assortment

* * * * *
Final Thoughts:

* Aside from the printable products, the only things I have added is some eyelets, and some baker's twine.
* Printables are perfect for a project like this. You never have to worry about running out of anything...you just print more!
* If you're like me, and wonder how you can fill an album like this, I've come up with a few ideas. We can add: songs, poems, verses, food photos, menus, weather, fun facts. 
* If you have any more ideas for me, please add them in the comments below. I'd love the hear your ideas.

* * * * * 

Here are the links for you:

Wednesday, 30 October 2019

Ephemoire - Faded Foiliage TN

Hello, friends!

Today I have a fun new project for Ephemoire!

This is the first time that I've put an album together
in the Traveler's Notebook style!
I have to tell you that I'm certainly hooked!
I'll be doing many more of these!

For my project, I'm featuring :

Faded Foliage Fauxdori Tn - Journal Kit

Faded Foliage Letter Size Papers

Women in Aprons Digital Stamps

Here's my Journal:


Since this is for a Fall themed album,
I decided to keep the cover just plain chipboard.
The "Journal" is part of the kit.
I really like the way this one feels in my hands.


I've made two signatures. 
I printed one of the plain Faded Foliage papers
on the back of each double-page spread.


Then I put a lot of thought into page placement.


This is the first of three Women in Aprons digital stamps.
I coloured them with my markers and fussy cut them out.


This is the second signature.


Here's another one of them women,
and a fun undercut page.


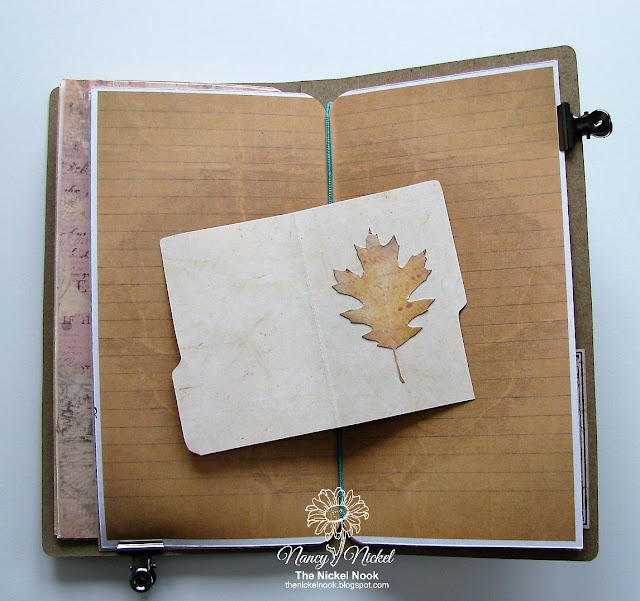
Here I slipped a mini file folder under the elastic.


I added a fussy cut leaf to the inside of the file.


The third and final woman image.


As you can see,
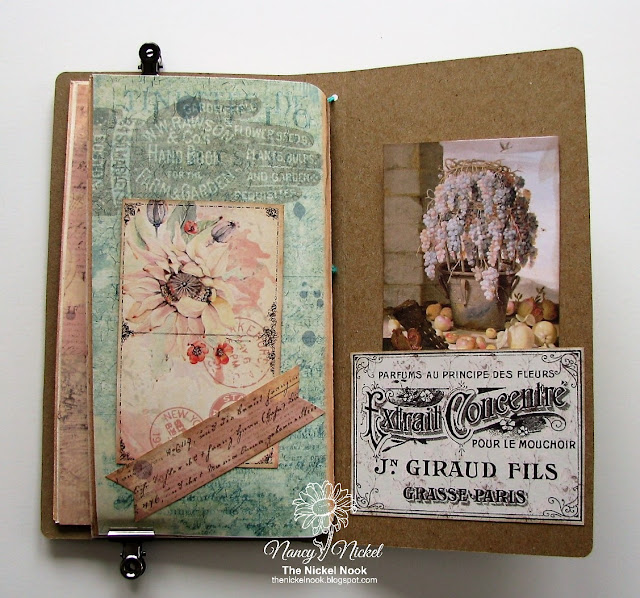
this kit is full of wonderful pockets, tags, leaves, cards,
and so much more!


Here's the plain back cover of the album!
Seriously, this was loads of fun to put together,
and I can't wait to make another one! :o)


Other Materials Used:
Die: Eileen Hull - Journal;
Chipboard: Grafix;
Ribbon: Offray;
Elastic: Unknown.

Ephemoire Products Used:

Faded Foliage Fauxdori Tn - Journal Kit

Faded Foliage Letter Size Papers


Women in Aprons Digital Stamps

* * * * *

Here are the links for you:

Blog Archive