Hello, my friends!
I'm back today with a fun new project for Clear Scraps!
This project was inspired by this great Mini Shaker Envelope.
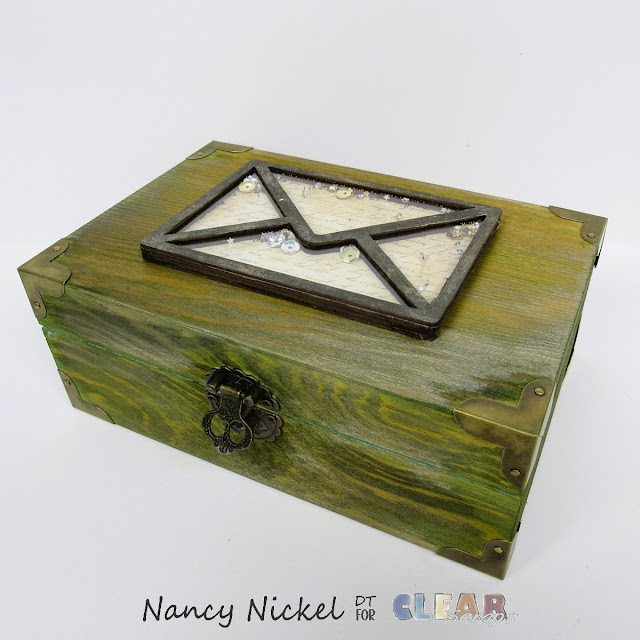
Here's my finished box:
Here's how I made it.
I began with a plain wooden box from our local dollar store.
I used a variety of Distress Stains, and a make-up sponge, to get the colors I wanted.
I also added some swipes of distress ink.
I set the box aside to dry.
I began with a plain wooden box from our local dollar store.
I used a variety of Distress Stains, and a make-up sponge, to get the colors I wanted.
I also added some swipes of distress ink.
I set the box aside to dry.
Then I moved on to the shaker element.

As with all the Clear Scrap Shakers, there are 5 pieces:
the backing, the acrylic piece, and 3 shape pieces.
I adhered a page of handwriting to the backing piece.
The front piece was colored with same stains and inks as the box.
I then assembled all the layers, using beads and sequins for filler.
Here's a closer look at the finished shaker:
I then adhered the shaker element to the top of the box.
I also decorated the inside of the box.
I did this using a digital paper that looks like crumpled paper,
I did this using a digital paper that looks like crumpled paper,
that I stamped with a script stamp.
I inked all the edges before adhering it all in place.
I inked all the edges before adhering it all in place.
I have some fun plans to fill this box.
I'll be back to share that with you very soon!
I'll be back to share that with you very soon!
Wood Box;
Distress Stains - Weathered Wood, Forest Moss, Tarnished Brass;
Distress Ink: Walnut Stain, Black Soot;
Unknown Script Stamp;
Unknown Sequins and Beads;
Paper from Polka Art Studio;
Paper from Lavender Blu Journals.
Distress Stains - Weathered Wood, Forest Moss, Tarnished Brass;
Distress Ink: Walnut Stain, Black Soot;
Unknown Script Stamp;
Unknown Sequins and Beads;
Paper from Polka Art Studio;
Paper from Lavender Blu Journals.
* * *
Thanks for stopping by today!
I'll be back soon with another fun project share!
I'll be back soon with another fun project share!
* * *
Here are all the links for you:
Clear Scraps Instagram
Clear Scraps Pinterest


No comments:
Post a Comment