Showing posts with label Tutti Designs DT. Show all posts

Sunday, 24 September 2017

Tutti Designs - Final with Fall Leaves Scroll

Hello, my friends!

It's Monday, and I'm back with a new Tutti Designs share!

This will be my final post for the Tutti Design Team.
I have made the decision to step down from the DT.
I would like to thank Tutti Design for having me,
and the rest of the girls on the DT for all the fun!
Most of all, I would like to give BIG thanks to Darlene!
She's the best!
I've truly appreciated her role as coordinator, 
all her encouragement, and most of all...her friendship! 

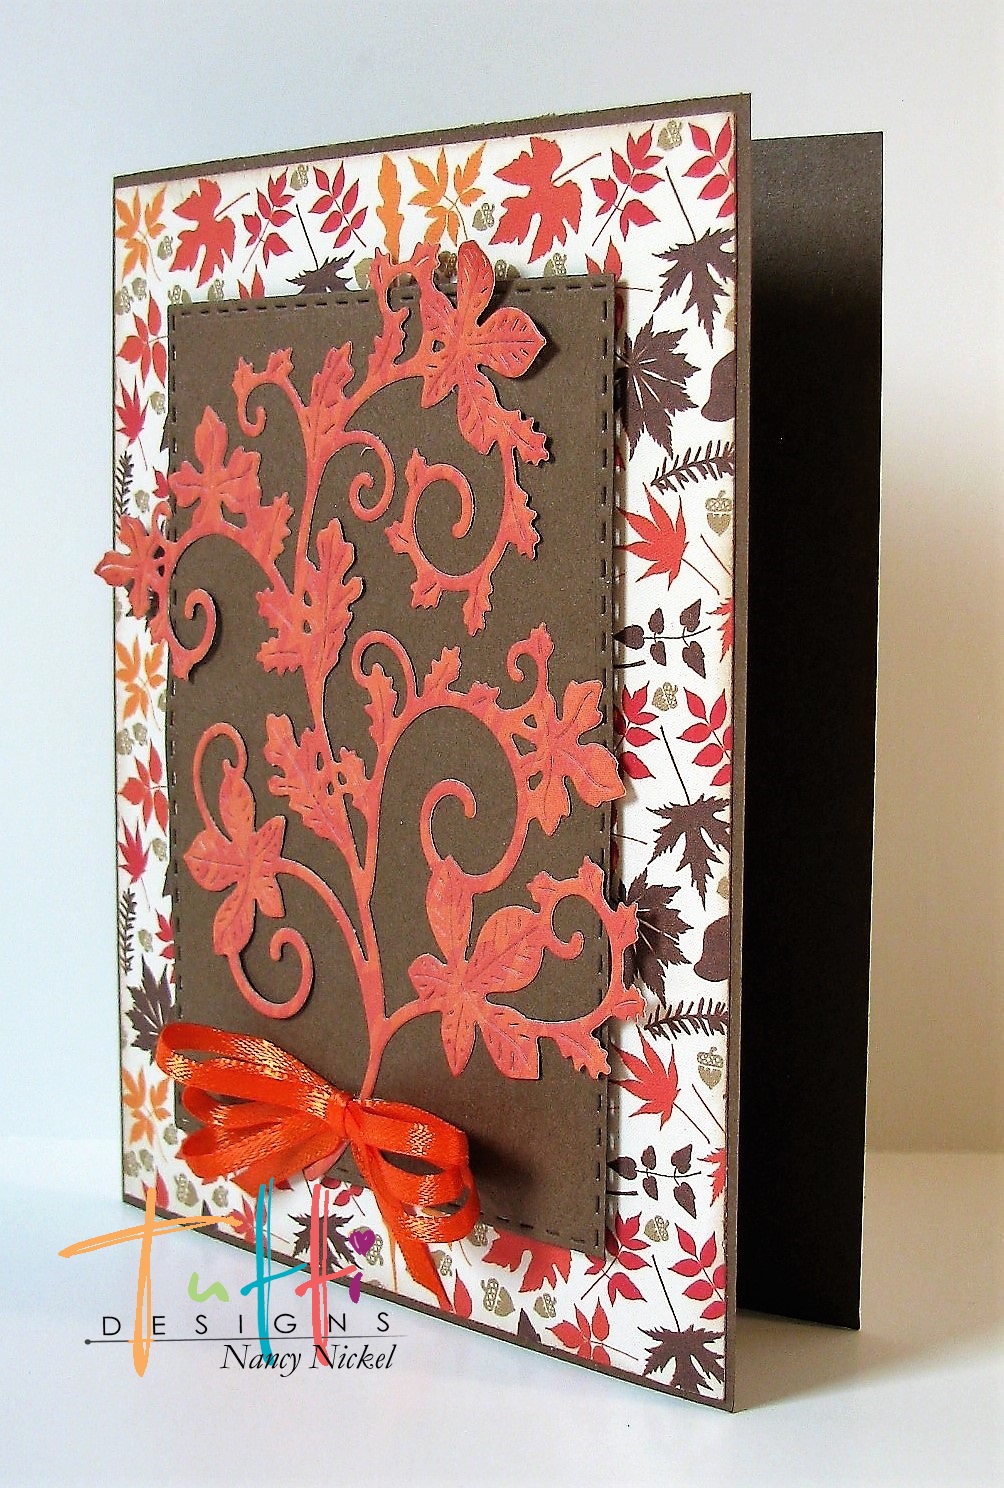
For my final card I am sharing a Fall die from the August Release.
This one is called "Fall Leaves Scroll" die.
You can find it HERE.

I began with a chocolate brown card base.
I added the beautiful leaf print on top.
Next came the Stitched Rectangle cut, again in chocolate brown.
Finally, I added the beautiful Fall Leaves Scroll cut.


The Stitched Rectangle was adhered with foam tape.


Here's a closer look at the wonderful detail of the cut:


I did add a simple multi-loop bow to the bottom of the stem.
Here's a final look at my final card:


Other Materials Used:
Papers: Recollections - Cardstock, MAMBI - Harvest Specialty Pad;
Ribbon: Offray.

Tutti Design Dies Used:


* * * * *
There you have it...my final card for Tutti Design!

I would also like to give each of YOU all a BIG thank you!
I have really appreciated your continued support and encouragement here on my blog,
with your comments and visits of my Tutti posts!
Without you sweet people this wouldn't be the great fun it is! <3

* * * * *

Here are all the links you'll need:


Sunday, 17 September 2017

Tutti Designs - Fall is in the Air

Hello, my friends!

It's Monday, and I'm back with a new Tutti Designs share!

This week I'm back to share another die from the August Release.
This is one of the gorgeous Fall dies.
It's called "Leaves Background" die.
You can find it right HERE.

A die like this makes it so easy to create a beautiful card!
I simply cut it out of my favorite Fall papers, 
and backed it with a coordinating paper.
It's then been adhered to an A2 card base.


All I added was a pretty bow.


Here you can see some of the detail this die gives in the veins on the leaves:


A quick and easy card...but oh, so pretty!


Other Materials Used:
Papers: Basic Grey - Indian Summer;
Ribbon: Celebrate It.

Tutti Designs Dies Used:


* * * * *

I'll be back next week with a new project.
In the meantime, here are all the links you'll need:


Sunday, 10 September 2017

Tutti Designs - Where Did It Go?

Hello, my friends!

It's Monday, and I'm back with a new Tutti Designs share!

This is my first share from the August Release,
and I have combined two of the new dies on my card.
I have used the Spiderweb Window Die,
and the Spiderweb Corner Die.

Most of you know that I don't do Halloween, 
and I know many of you don't either.
So I got a little bit creative with my project.

Here's the front of my card:


I cut the die once in white.
Then I cut just the spider again in black, and adhered it on top.
I added Stickles to the spider web to make it sparkle.


Here's a closer look at the die:


Here's the inside of the card:


Finally, here's a closer look at this die:


Other Materials Used:
Papers: Recollections - Cardstock;
Sentiment: The Nickel Nook;
Ribbon: Offray - Picot Edge;
Bling: Stickles - Star Dust.

Tutti Designs Dies Used:


Spiderweb Corner Die

* * * * *
Linking Up To:


* * * * *
I'll be back next week with a new project.
In the meantime, here are all the links you'll need:


Sunday, 3 September 2017

Tutti Designs - Nativity Shooting Star

Hello, my friends!

It's Monday, and I'm back with a new Tutti Designs share!

This week I'm sharing my final die from the July Release.
This one is called "Nativity Shooting Star",
and you can find it HERE.

This is a beautiful die that reflects the true celebration of Christmas!
There are so many ways to use it on a project.
I chose to cut it out in black,
and then use fun and festive colors to show it off!
Doesn't that bright green make it pop?

To create the perfect shadow for the die,
I simply traced around the die with a pencil, and cut it out.


After that, it was just some simple paper layering.
Finally, I added some rhinestones and a ribbon bow.


Here's a close-up look at the detail:


Here's one final look at the finished card:


Other Materials Used:
Papers: Mambi - Let it Snow;
Bling: Crafts - Glittering Stickers;
Ribbon: Celebrate It.

Tutti Designs Die Used:


* * * * *
I'll be back next week with a new project.
In the meantime, here are all the links you'll need:


Sunday, 27 August 2017

Tutti Designs - Festive Reindeer

Hello, my friends!

It's Monday, and I'm back with a new Tutti Designs share!

This week I'm using the fun "Festive Reindeer" die from the July Release.
You can find it HERE.

Again, there are so many creative options with a die like this!
Here's what I did:

I began with a 5 1/2" square card base, matted with decorative paper.
After cutting and layering some big circles,
I cut the Festive Reindeer from the same cardstock as the card base.
I then adhered the die-cut to the center of the layered circles,
I added them to the card base using foam tape.
Then I filled in his nose with some pretty Star Dust Stickles.


He fills the card so beautifully, 
the only addition needed was a pretty bow!


Here's a closer look at the intricate detail of this die:


One final look at the finished card:


Other Materials Used:
Papers: Recollections - Cardstock, My Mind's Eye - Naughty or Nice;
Ink: Distress Ink - Walnut Stain;
Stickles: Star Dust;
Ribbon: Celebrate It.


Tutti Designs Dies Used:


* * * * *
I'll be back next week with a new project.
In the meantime, here are all the links you'll need:


Sunday, 20 August 2017

Tutti Designs - Glowing Candle Die

Hello, my friends!

It's Monday, and I'm back with a new Tutti Designs share!

I'm happy to be sharing another one of the new Christmas release dies.
This one is called "Glowing Candle" die.
You can find it right HERE.

I've combined it with the Stitched Nesting Tags die to make a sweet little tag card.
This would be perfect attached to a Christmas gift.


I began by inserting a folded piece of kraft cardstock into the tag die.
By ensuring the fold is just inside the top cutting die,
it won't cut through.
Then I cut the Glowing Candle die from dark blue cardstock.
I thought it would be a nice change from the black I usually use.
I punched a scrap of yellow paper with a 1 1/4" circle punch.
This fits perfectly behind the die.


After adhering these pieces in place on the tag base,
I filled in some spots with the Stickles.
Finally, I added a bow to the top and the front of the tag was complete.
Here's a closer look:


Then I did some simple stamping to the inside of the tag.


Wouldn't this dress up a simple package beautifully? 


Other Materials Used:
Paper: Recollections - Cardstock;
Punch: EK Success - 1 1/4" Circle Punch;
Ribbon: Offray;
Stickles: Red, Green, Star Dust.

Tutti Designs Dies Used:

Glowing Candle Die


* * * * *
I'll be back next week with a new project.
In the meantime, here are all the links you'll need:


Sunday, 13 August 2017

Tutti Designs - Nativity Ornament Die

Hello, my friends!

It's Monday, and I'm back with a new Tutti Designs share!

This week I'm sharing another beautiful die from the Christmas in July release.
This one is the "Nativity Ornament" die,
and you can find it HERE.

Again, it's a lovely die that offers many creative options.

I knew that I wanted to cut the die out of black cardstock
to get that wonderful silhouette effect.
I wanted yellow behind it to reflect the glow of the star.
I was originally going to trim the yellow to fit just behind the die.
However, I decided I really liked the die placed on the larger piece of yellow.


I used the Stitched Nesting Rectangle die to cut the yellow cardstock.
Then I adhered it onto a black card base.
Finally, I added mini black rhinestones, and a black ribbon bow.


Here's a closer look at the die-cut.
I added one final sparkle sticker to represent the star.


Other Materials Used:
Papers: Recollections - Cardstock;
Bling: Crafts - Mini Rhinestones, Sparkle Sticker;
Ribbon: Celebrate It.

Tutti Designs Dies Used:


* * * * *
I'll be back next week with a new project.
In the meantime, here are all the links you'll need:


Sunday, 6 August 2017

Tutti Designs - Holly Panel

Hello, my friends!

It's Monday, and I'm back with a new Tutti Designs share!

This week I'm sharing one of the dies from the fabulous new Christmas release!
If you haven't seen this collection, you'll want to check it out!
So many gorgeous new dies for the season!

Today I'm sharing the beautiful Holly Panel Die,
which you can find right HERE.

This is such a pretty panel die,
and it fits perfectly on top of the largest Stitched Nesting Rectangle die.

The creative possibilities are endless,
just by varying the colors of the layers.


I began with a kraft card base.
I used the Stitched Rectangle die to cut the background 
from a neutral music design.


Finally, I cut this beautiful Holly Panel from a green paper.
It's just so pretty!
I finished it with a pretty red ribbon bow,
and some liquid pearl holly berries. 


Other Materials Used:
Papers: My Mind's Eye - Naughty or Nice,
Recollections - Kraft Cardstock;
Liquid Pearls: Rouge;
Ribbon: Offray.

Tutti Designs Dies Used:


* * * * *
I'll be back next week with a new project.
In the meantime, here are all the links you'll need:


Blog Archive