Hello, my friends!
Today I want to share a tutorial with you,
on how to put together my Vintage Hinged Album.
This is my first cut file design,
and it's available to purchase at My Scrap Chick.
I know that many of you have already purchased this file,
and I really appreciate the encouragement I've received.
I might have to try doing this again! ;o)
This really is a very simple album to put together.
It's even easier to customize it to suite your needs.
These are the two albums that I have made, so far:
You've probably seen the album on the left.
The album on the right is my most recent make,
and it will be posted right after this tutorial goes live.
* * * * *
There are some simple steps to putting this album base together.
Once the base is finished,
you can go on to make a quick and easy album,
or you can choose to make it more complicated.
The creative possibilities are truly endless!
Here we go!
Theses are the base pieces: the pages, and two hinge options.
I use the larger hinge piece, and I cut 6 of the pages.
Two are for the front and back cover.
Fold the hinges on the score lines, as shown in the photo.
From here on, I will be working with the large hinge.
The smaller hinge gives you the option of choosing just how many pages you want.
The pages are folded in half.
This is a closer look at the right side of the hinge.
The 1/2" lines form mountains - the 1/4" lines stay flat.
On this side, I apply double-sided tape to the two end pieces on this side.
This is the back side of the scored hinge.
On this side, I apply double-sided tape as shown in the photo.
Leaving the outside strips alone,
I peel off the backing of each of the other strips, and adhere the 1/2" sides together.
This is how the hinge piece looks once it's all put together.
The two outside flaps are for the front and back cover,
and still have double-sided tape on both sides.
and the other five are for the inside pages.
Now it's time to attach the front and back covers.
I peel the backing off the tape on the back of one side of the hinge.
Lining the cover up against the score line,
I adhere it in place as shown in the photo.
I repeat this for the back cover.
I repeat this for the back cover.
Here's a closer look.
One side of each cover is attached to the hinge.
I remove the backing from the other side of the taped strip,
I spread liquid glue all over the one side of the cover.
I know the glue doesn't show very well. ;o)
I then fold the cover over the hinge and burnish it all very well.
Here the back cover is in place.
I repeat for the front cover.
Now you have the front and back cover in place.
For the rest of the pages, I like to use my Best Glue Ever.
It's fabulous for all these paper projects!
It allows some time to ensure that I have my page exactly where I want it on the hinge.
If you're comfortable using double-sided tape for this
it will work very well too.
Now I will show you what I do with the pages.
I apply the glue to one side of the hinge and adhere the page to it.
Then I put glue along the other side of the hinge,
and a line of glue across the bottom of the page only.
Then I fold the page closed and burnish.
This forms a top loading pocket.
If you don't want a pocket to fill,
then just apply each page in the same manner as the covers.
I repeat this process for the first two pages, as well as the last two pages.
This leaves the center hinge free for what I call my cage page.
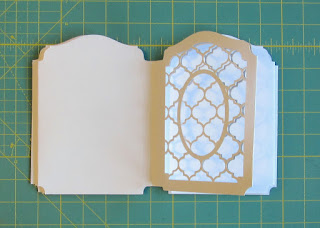
In this photo you can see a second page option (cage page), along with an extra oval cut.
The bottom row shows the two tag options.
One is a single tag, and the other folds in half before inserting into the pocket.
This allows extra space for journaling or photos.
I begin by folding the page in half along the score line.
I then apply the cage page in the same manner as the previous pages.
This page is created slightly smaller than the other pages.
It's a delicate page, and I wanted it tucked in a bit for protection.
I adhere it to the hinge carefully, ensuring that the hinge does not show through the "cage" part.
Here it is with a single tag tucked into it.
It's a fun spot to add a photo or some stamping.
Now the album base is finished!
It's ready for you to decorate and fill however you choose.
These are all layers that fit over the base pages.
These are some smaller cuts that fit on top of the last set.
They can be used on their own on top of the base pages,
or they can be layered on top of any of the bigger layers.
* * * * *
I hope this helps those of you that needed more information
on the construction of this album.
You can see my original Vintage themed album HERE.
You can see my Baby themed album HERE.
I hope you have lots of fun with this Vintage Hinged Album file.
Leave a link below in the comments if you've made something.
I'd love to see it! :o)


2 comments:
So much detail, beautiful work Nancy.
Faith x
Thank you for this wonderful tutorial. So easy to follow too. The space ship is a cute theme with this.
Post a Comment