Showing posts with label Ephemera's Vintage Garden DT. Show all posts

Friday, 3 June 2016

Ephemera's Vintage Garden - Vintage Queen Bee - Project #2

Hello, my friends!

I'm back today to share a new project for Ephemera's Vintage Garden.

This is a bitter sweet post for me,
as it will be my final post as part of the Creative Team.
I have made the difficult decision to step down.
It's been 2 1/2 years, so it wasn't an easy decision.
Debbie has been gracious enough to leave the door open for me! :o)

That being said, I will continue to share projects using these fabulous kits 
because they are great creative fun! :o)

So, for my June project, I will again be sharing the fantastic "Vintage Queen Bee" kit.
You can find it right HERE.

I should have kept my last mini album project with this kit as my final project.
If you missed it, you can find it HERE.
Thank you for your wonderful response! I really appreciated it!
I do hope you will like this one just as much.
Since it is my last one, I wanted it to be different and special!

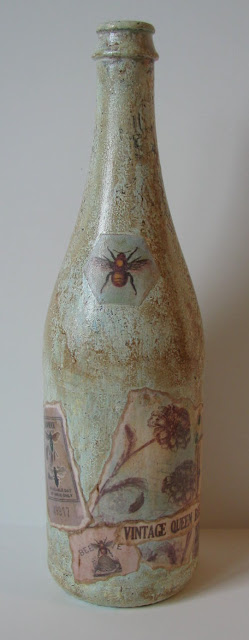
I have altered a bottle.
I will show the finished bottle first. 
Then I will follow it up with LOTS of photos of my process,
just in case you're interested!
Here it is all finished:


I'm sorry that I didn't think to take a photo of the plain bottle.
It was a simple green glass bottle that had sparkling cider in it. 
I'm not a wine drinker, so when this cider came with a cork it it, 
I thought it was worth keeping! ;o)
I started by choosing three paint colours that matched the papers; a white, a cream and an aqua.
I put little puddles of each paint on my palette, and then dabbed a sea sponge in it.
I turned the sponge several times and added more paint.
Then I simply dabbed it randomly all over the bottle.


After the paint had dried slightly, I went in again with the sponge and dabbed some more.
This process took some of the paint off, letting some of the green glass show through.


The green doesn't really show through in the photos
but you can see how cool it looks,
and the great texture!


The next thing I did was go through the kit, and the ATC pages, and print out what I thought I might use. 
All I did to prepare the bits was tear them out.
I find that tearing is the best way to "cut" the papers out when you're using them for a project like this. 
I'll show you why in a minute.


Normally I use multi-medium in matte for these projects.
Unfortunately, I was out and not able to get more in time.
So I watered down some white glue and used that.
It worked very well!
When I knew where I wanted paper pieces placed,
I brushed the bottle with the glue, laid the paper on, and brushed over it.
Here is where tearing the paper comes into play.
Rather than having a hard, sharp edge to the paper, 
the edges are feather soft and blend into the background.
This is especially nice when you're layering pieces on top of each other. 
I decided this would be the front:


...and this would be the back:


When all of that was completely dry,
I went over the bottle with a brushing of antiquing medium.
I used a paper towel to dab some of in some areas,
and brushed more on where I wanted heavier antiquing.
Here you can see where I went lighter on the base papers on the front:


I went a little heavier on the back:


Here's a closer look at the colour and texture: 


When it was dry again, all that was left was the embellishing.

 Using a variety of punches and dies, I created a variety of pretty flowers.
I adhered them onto the bottle in a pleasing way,
and then added liquid pearls for the centers.
This added a bit of sparkle, and another nice texture.


On the back, I also added the title of the collection.


This is just a slightly different angle.
Once the glue was dry on the flowers, I brushed some diluted antiquing medium over all of the flowers.


  I adhered some jute twine around the top of the bottle, then wrapped it with some green wire.
I curled the ends of the wire, and attached two bee charms.
Finally, I popped the cork back in place.
It looks cooler than the usual screw top! lol


Here are a few photos of the entire finished bottle:


One last view of the finished front of the bottle:


Ephemera's Vintage Garden Products used:


* * * * *
Linking Up To:


* * * * *

Here are all the Ephemera's Vintage Garden links you'll need:


*** ON SALE NOW***


* * * * *
Thanks for stopping by!
Please let me know if you have any questions about anything.

Sunday, 1 May 2016

Ephemera's Vintage Garden - Vintage Queen Bee - Project #1

Hello, my friends!

I'm back today to share a new project for Ephemera's Vintage Garden.
For May and June I will be sharing a fantastic kit called "Vintage Queen Bee".
You can find it right HERE.

It's another picture heavy mini album post, so let's get to it!

Rather than creating my own book base, 
this time I opted to use a set of kraft cards and envelopes I found in my stash.
They measure 5 1/4" x 7 1/4" and have a wonderful texture. 
The envelopes form the base pages, 
and the cards are the photo mats and journaling cards.
The first thing I did was cut 2 pieces of chipboard just a hair smaller than the envelopes. 
I slipped the chipboard into two envelopes and adhered them shut. 
These are my front and back cover. 
For the rest of the envelopes (six in total) I adhered them shut, 
and then cut off a tiny slice from one long end.
This forms the pocket pages. Finally, I bound it with my Bind-It-All.
There...the "hard" work is done...now it's time for fun! :o)

I did two things differently with this album.
First of all, I added a clear acrylic cover page to the front.
Secondly, I actually added some photos. 
These photos are from my European vacation last summer.
I chose some beautiful building pics, and printed them out in sepia tones.
They went beautifully with this kit!
Okay...on to some photos!


Here is the front cover.
As always, when working with acrylic, you have to consider both sides.
I began by die-cutting this great background. 
It's actually called Chicken Wire but it works great as honeycomb, doesn't it?
I cut it out in both brown and green.
The green was cut larger to form a nice frame around the brown.
I left some of the pieces in to add interest.
Then I filled the bottom left with a variety of flowers I made, and other little bits. 


It's funny how that rhinestone stands out.
It's a perfect match but shows very blue in the photo.
Here you can see the binding embellishment I created.


Here's a closer look.
I crinkled some seam binding and made a loopy bow.
I added it to the top of a swivel clasp.
Then I added several charms and pearls.
Finally, I made a charm using a bit from the kit. 


Here's the other side of the acrylic, and the front cover.
I LOVE the colours in this kit! 


On the inside front cover I adhered a pocket, and tucked some tags inside.
All of the papers have been both tool and ink distressed.


This is what you see when you turn the page.
These are the pocket inserts made from the cards. 
I trimmed them down to the size I wanted.
Then I used a border punch on the one edge.
I added my photos, and a label underneath to write the location.


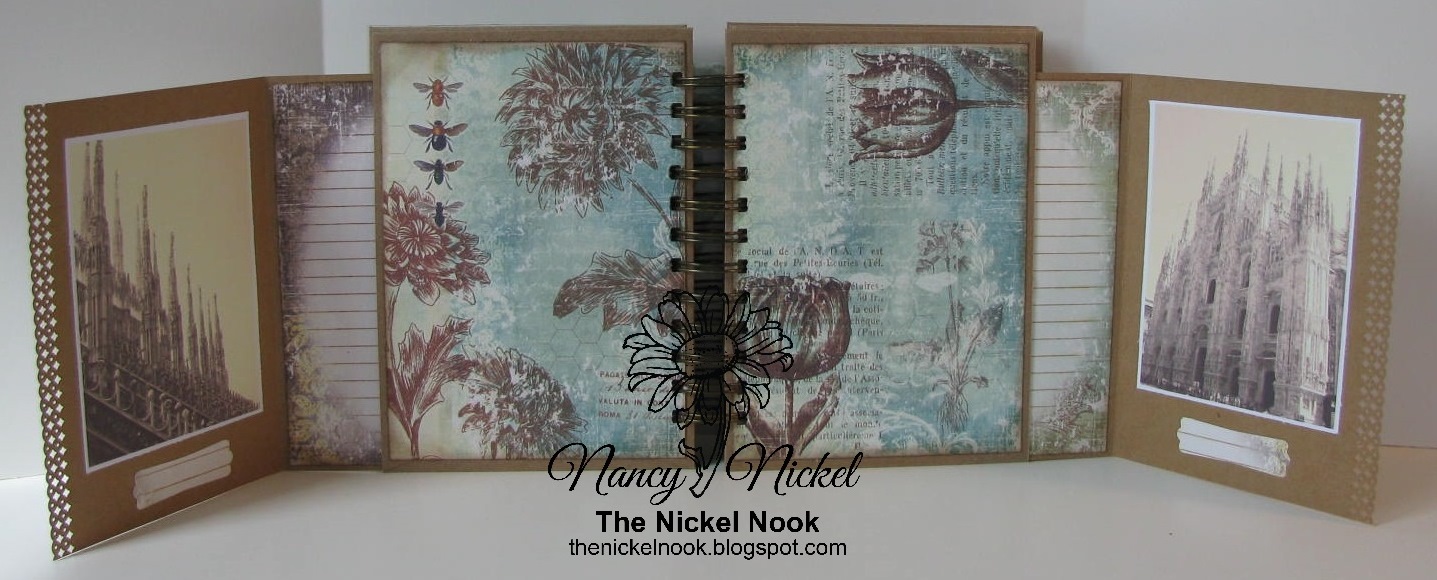
Here, the card inserts have been opened.
Isn't that a lovely spread?
I did pull the cards out a bit so you can see the other side.
Each insert holds two photos and two of the large tabbed cards.
I did cut the tab off though.


Such pretty papers!
On the right, I used this tag as a band to hold some hang tags.
See how the images match up? 


The next page displays more card inserts with photos.


Here they are open again.
On the right page, I cut a slit in just the top paper.
This created the perfect spot to tuck more hang tags.


Another pretty page full of pockets and tags and tickets.


This is the last set of card photo inserts.


Here is the last open spread. 
On the right side, I cut a slit in just the paper.
This forms a pocket to hold these sweet bee cards.


These cards are the fun freebie.
I attached three together with a brad.
There's lots of room for journaling on the back.


Here's the last page, and the inside back cover.
Here I've added another pocket, and tucked in more tags.


Finally, the back cover.


Here's a closer look at the card inserts.
My photo on one side, with a label underneath.
Then the other side has the large lined tabbed card.
It's the perfect spot to document all my memories of the photo.


You can see that there are four different designs on the lined tabbed cards. 


One last look at the front cover!

I hope you enjoyed looking at my latest mini album!
I'll be back next month to share another project using this lovely kit! :o)

* * * * *
Linking Up To: 


* * * * *
Here are all the Ephemera's Vintage Garden links you'll need:


*** ON SALE NOW***


* * * * *
Thanks for stopping by!
Please let me know if you have any questions about anything.

Tuesday, 5 April 2016

Ephemera's Vintage Garden - Gentlemen and Scholars - Project #2

Hello, my friends!

I'm back today to share a new project for Ephemera's Vintage Garden.
It's my second one using the fabulous kit called "Gentlemen and Scholars".
You can find it right HERE.

Now, let me share my process with you.
First thing I did was print out my pages from the kit.
I wanted to make a smaller mini, so I fit two pages on an 8 1/2 X 11" paper.
This determined how big my finished album would be.
Since my pages printed out at 3 1/2 X 5, I made my pages 4 X 5 1/2.
The covers were a touch bigger at 4 1/4 X 5 3/4.


So I went ahead and created my album base.
The cover is cardstock covered chipboard.
The base pages are black cardstock.
I made six page configurations - two of each of three styles.


Then came the fun part...the finishing!
Here is how I decorated the cover:


Here is what the finished pages look like:

Inside the front cover is a pocket that holds several of the tags.
All of the printable pieces were distressed with Walnut Stain Distress Ink.


The first pages turns, and opens up into this tri-fold spread.
The center is a side-load pocket that holds a photo mat. 
You can see the tab poking out. 


Somehow I missed taking a picture of the back of this page, and the front of the next.
The second page is a top loading pocket page.
Here you can see the back of the tag pulled up.


On the right side, I fussy cut the hat and popped it up on foam tape.
It holds this fun pocket full of mini tags.


Here is the back of that page.
It is an undercut pocket page that holds more tags.


There are so many fabulous images on these pages!


Here is the second of the tri-fold pages.
Again, the center page is a side-load pocket that holds a photo mat.


The page on the right is the second top-loading pocket page.


On the right hand side, I adhered the second pocket.
It holds a matching tag.


The page on the right is the second undercut pocket page.


This is the other side of that page, with the tags pulled out a bit.


Here is the last page, and the back inside cover.
There is another decorated pocket that holds more tags.


This has been such a fun kit to work with! 
It offers endless possibilities for creative masculine projects! 


* * * * *
Ephemera's Vintage Garden Products used:

Gentlemen and Scholars Journal Kit


Gentlemen Glue Book Bits


* * * * *

Here are all the Ephemera's Vintage Garden links you'll need:


*** ON SALE NOW***


* * * * *
Thanks for stopping by!
Please let me know if you have any questions about anything.

Blog Archive