Hello, my friends!
It's time for another fun project for Printable Cuttable Creatables!
Today I'm sharing a tutorial on how I create my flowers,
using the fabulous Rolled Paper Flowers SVG File from the shop!
All the papers I used are from the Spring Polka Dots Paper Pack.
Here are my flowers:

Here's how I made it:

I began by printing the green polka dot paper.
I then used my Cricut Explore Air to cut a variety of leaves
I then used my Cricut Explore Air to cut a variety of leaves
from the Rolled Flowers File.
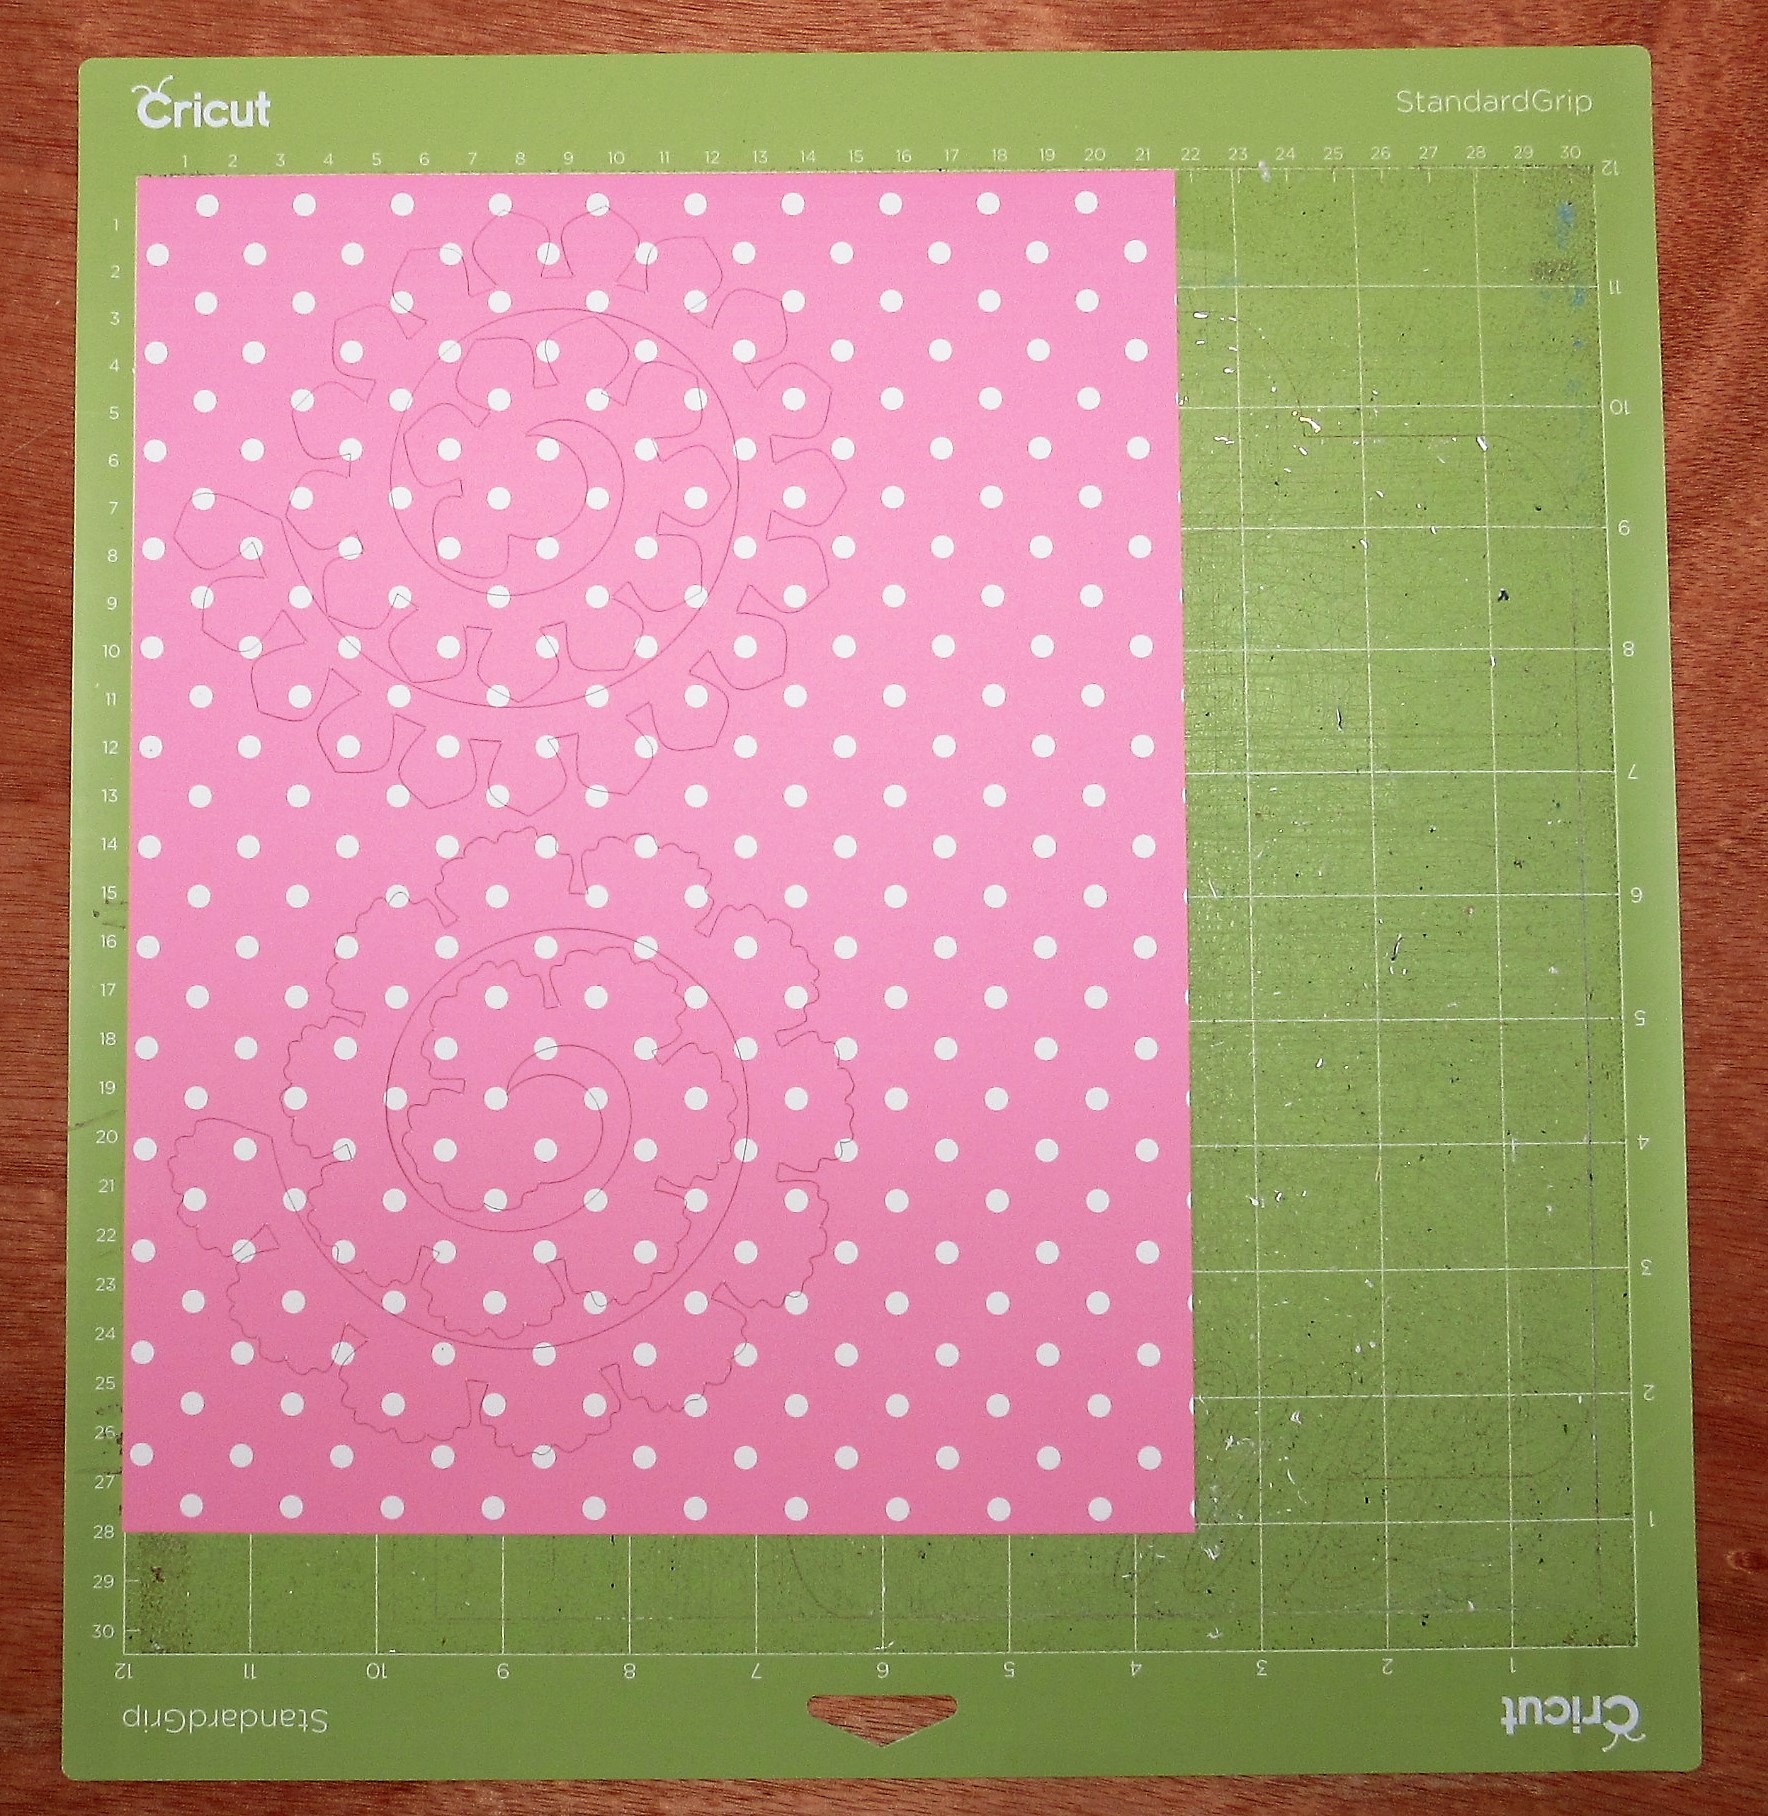
Next, I printed out three more polka dot papers: pink, purple and yellow.
I chose the flower files that I wanted to cut, and uploaded them to Cricut Design Space.
I sized each of my flowers at 5", so I could fit two flowers on each page.
I then cut them all out.
I sized each of my flowers at 5", so I could fit two flowers on each page.
I then cut them all out.

Then I assembled some of my favorite flower making tools:
ink and applicator (makeup sponge works great)
a foam mat (mouse pad would work),
quilling tool (skewer would work),
round stylus (paint brush or pen would work if it's smooth and round),
quilling tool (skewer would work),
round stylus (paint brush or pen would work if it's smooth and round),
tweezers (just tweezers).
Although I am showing how I made the yellow daisy type flower,
I follow the same steps for each of my rolled flowers.

I begin by inking the edges on the rolled flower piece,
as well as the leaves.

I place my flower cut face down on my foam mat.
Then I run my stylus over each petal, using just a little bit of pressure.
Then I run my stylus over each petal, using just a little bit of pressure.

See how the petals are all curled back?
You want a nice smooth curl.

Now it's time to roll the flower.
For this flower I just rolled it with my fingers.
A quilling tool works great for this step, especially if you want a tighter flower.
A quilling tool works great for this step, especially if you want a tighter flower.
Roll the flower up until you get the the center circle.
I added a dollop of wet glue to the circle, pressed the rolled part into it,
and held it for a few seconds.
If you want a looser flower, then just release the roll until it's the size you want.
I added a dollop of wet glue to the circle, pressed the rolled part into it,
and held it for a few seconds.
If you want a looser flower, then just release the roll until it's the size you want.
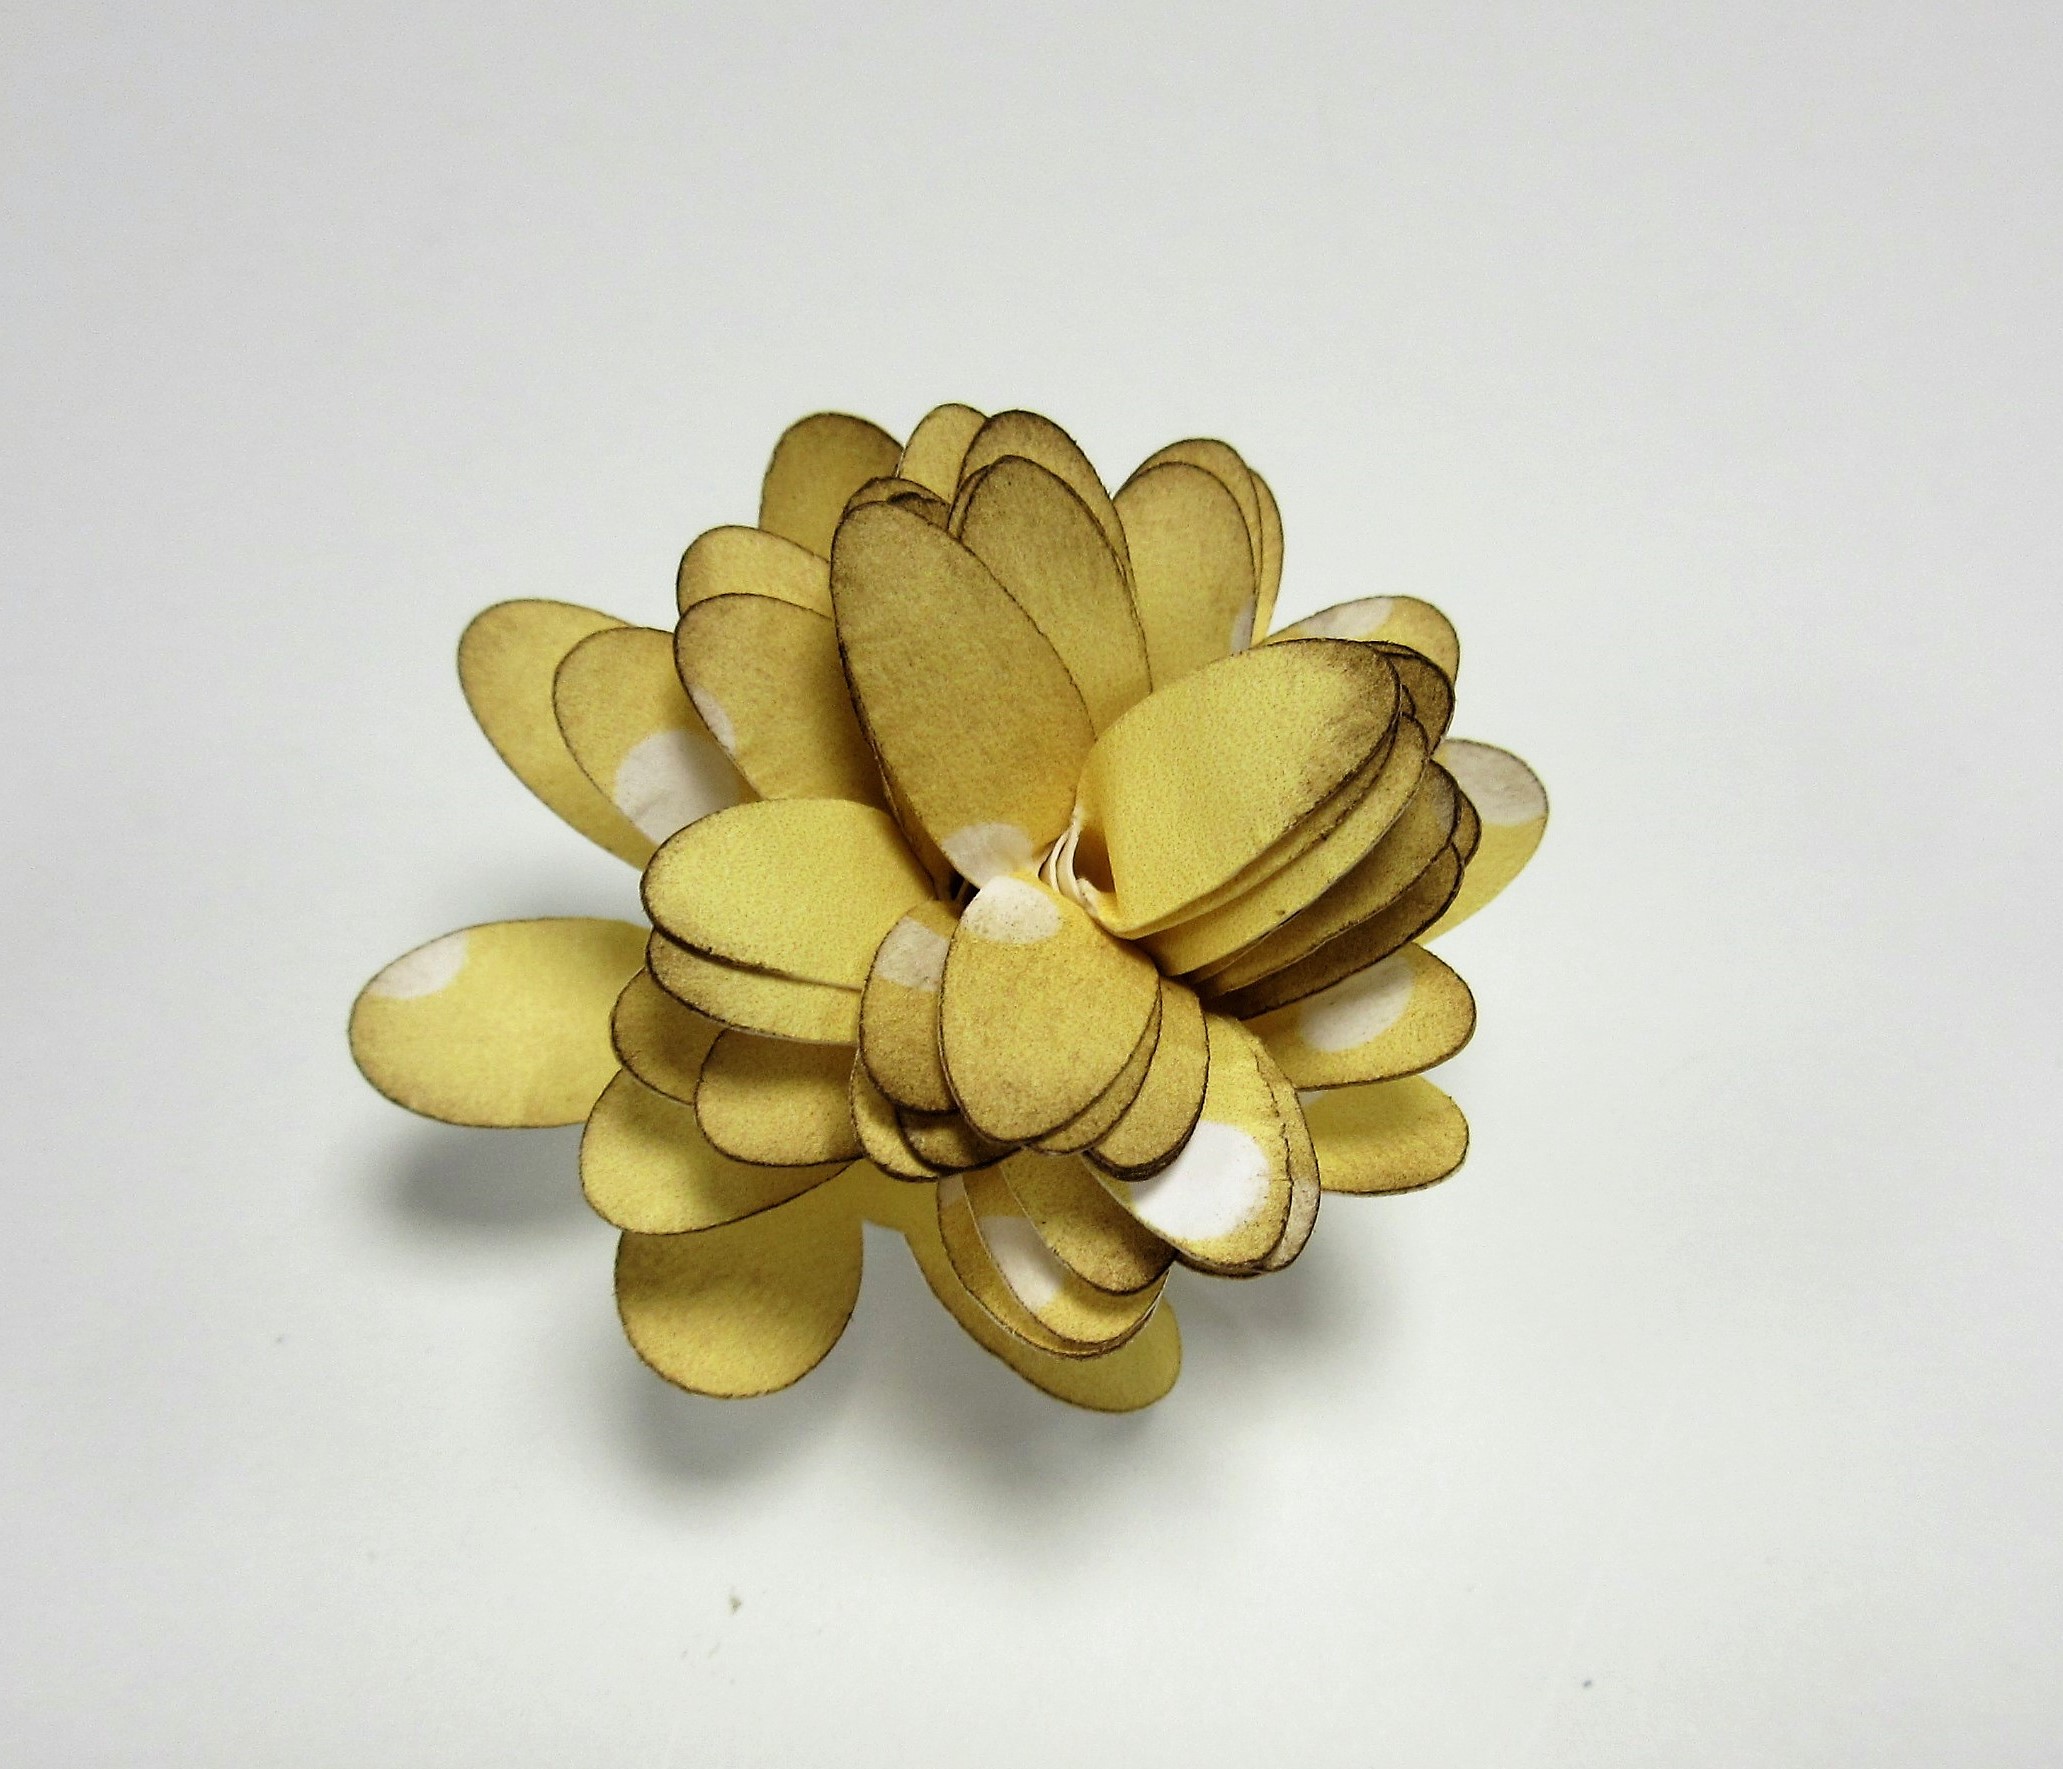
Here is my daisy flower, right after it's been glued.
It hasn't been shaped or arranged yet but it's still cute! ;o)
It hasn't been shaped or arranged yet but it's still cute! ;o)
Those are my steps for every rolled flower:
ink, shape, roll, and glue.
Once the glue has dried, I then go in with my tweezers and do a little more adjusting.
Here are the cuts I used, followed by the finished flowers.

This...
...became this:

The daisy flower on the right is the one I used in my sample.
It looks a little bit different now that it has been arranged.
I've added the leaves and a pearl center.
It looks a little bit different now that it has been arranged.
I've added the leaves and a pearl center.

This...
...became this:

The addition of leaves and pearls really finish them off nicely.
I did use a quilling tool on the left-hand flower,
I did use a quilling tool on the left-hand flower,
but then I loosened it up for the outside rolls.
.JPG)
This...
...became this:

Again, it's just a matter of inking, shaping rolling and gluing!
I did use a quilling tool for the left-hand flower,
I did use a quilling tool for the left-hand flower,
as I wanted a tighter roll.
I've only shown you half of the flowers in this file.
There are 12 in total and they are all so pretty and fun!
Grab the file and try making some for yourself.
Try different sizes and different materials.
Handmade flowers are like snowflakes,
Try different sizes and different materials.
Handmade flowers are like snowflakes,
each one is unique! :o)
* * * * *
Printable, Cuttable, Creatables Product Used:
Other Materials Used:
Cricut Explore Air Machine;
Cricut Explore Air Machine;
Pearl Beads.
* * * * *
Thanks for stopping by today!
I'll be back soon with another fun project!
* * * * *
Here are all the links for you:
Printable Cuttable Creatables Shop
Printable Cuttable Creatables Blog
Printable Cuttable Creatables Facebook
