Wednesday, 20 December 2017

The Project Bin - Christmas Blessings

Some weird glitch made this post go out by email today!
This is an old post and I'm not sure why that happened.
Sometimes blogger baffles me! :o)

Happy Wednesday, my friends!

Today I am sharing two Christmas cards for The Project Bin!
This post will be my final post as a DT member.
I have made the tough decision to step down from the team.
It's always so hard to leave a good DT but the time is right.
Big thanks to Denise for all the fun over the past year!

For my first card today I have used a stamp from the
Luke 2 Stamp Set.


Other Materials Used:
Papers: Recollections - Cardstock;
Cricut Cartridge: Holly and Ivy;
Machine: Cricut Expression 2;
Ink: Memento - Tuxedo Black;
Bling: Darice - Large Rhinestones;
Ribbon: Celebrate It.

Products from The Project Bin:


* * * * *
 For my second card I used the beautiful Joyful Song Stamp Set.


I just did some simple layering with some of my favorite Christmas papers.


I used my piercing tool to pierce holes around the edge of each layer.


Finally, I added some pretty black rhinestones.


Other Materials Used:
Papers: My Mind's Eye - Naughty or Nice;
Ink: Memento - Tuxedo Black;
Tools: Piercing Tool;
Bling: Kaisercraft - Black Rhinestones.

Products from The Project Bin:


* * * * *
If you're not familiar with The Project Bin,
they specialize in wonderful sentiment stamps.
They're clear photopolymer and stamp as crisp as can be!
Each set has multiple stamps, and 
"A Way With Words."
* * * * *
Here are all the links you'll need:


Friday, 15 December 2017

All Dressed Up - Challenge #76

Hello, my friends!

Today is the beginning of a new challenge at All Dressed Up!
The challenges are always Anything Goes but you MUST use an image from All Dressed Up.
There are freebies available at the challenge blog HERE! :o)

This month I used the fun Christmas Deer Image.
You can find it right HERE.

I came across this sweet little deer in my craft room. 
He was all colored up and ready for me.
I simply created a little scene for him.


Other Materials Used:
Papers: Recollections - Cardstock;
Coloring: Spectrum Noir Markers;
Dies: CC Designs - Scalloped Square, Stitched Square Frame; 
Echo Park - Snow Flakes, Whimsy - Trees;
Snow: Ranger - Enamel Accents - White;
Bling: Crafts - Sprinklers.

* * * * *
Head on over to the Challenge Blog and join the fun! :o)

* * * * *
Here are all the links you'll need:


Thursday, 14 December 2017

Some Fun With Products from My Artistic Adventures

Hello, my friends!

I'm just popping in with a quick post today!
I had some fun with some great new printables. 

These were all made by my friend Heather.
She has a great Etsy shop called:


Here's what I made:


Here's what I used:


* * * * *
Aren't those fun? 
It's hard to tell in the photos but everything is covered with glitter! 

So head on over to My Artistic Adventures!

It's just loaded with goodies!
Be prepared to spend LOTS of time looking...and shopping!  

You'll also want to check out Heather's blog.
Have fun! :o) 

Sunday, 10 December 2017

Cards and More Shop Blog - Challenge #19

Hello, my friends!

Welcome to the December Challenge of the Cards and More Shop Blog.


* * * * *
Here's what I made.
It's a fun little winter tag!


Isn't he cute?

Here are the products used from Cards and More Shop:


* * * * *
Now it's your turn!
You can make whatever you want: 
a card, a layout, art journal page, or mixed media
...anything goes!

So head over to the shop blog and link up!
You might win a prize! 
You'll also see the variety of projects that the DT created.

You'll find the linky tool here:

I look forward to seeing what you make! :o)

Saturday, 9 December 2017

Gingerbread Merry Christmas with Swedish House Crafts

Hello, my friends! 

 I hope you're all enjoying this wonderful season! I love it!
 Just remember to take time to enjoy it all...and not to stress over the little things! :o)


If you've still got some cards to make then here's a good idea for you. 
It goes together very quickly, 
and a couple of elegant touches make it more special for the season.
I also have a discount code for you in the bottom of this post!


I began with these wonderful Home for the Holiday papers from Maja Designs. 
I just had to use the gingerbread design. 
I paired it with these fun stamps from Gummiapan. 
I stamped both the sentiment and the gingerbread man in Versamark ink, 
and heat embossed it in gold. 
Then I did some simple die-cutting and layering with the Gummiapan oval dies. 
These were adhered to the card base with foam tape. 


I added this really pretty double looped bow to the top of the oval. 
The pretty gold ribbon adds another special touch of elegance. 
(This one is from my stash but I'll link to something very similar in the store.)


Finally, I added some gold pearls to the bottom corners of the card. 
Just the finishing touch!


This is a design that is very easy to make multiples of in quick order. 
It's also an easy one to mail out, as there's not a lot of bulk to it. 
You can switch it up with different papers or different stamps. 
Have lots of fun making it your own! 

Thanks so much for stopping in today! 
I'll be back with another project soon!

Your special discount code for 5% off these items in the shop for today is : Q7VQHZXYNJZ

Links to products used from Swedish House Crafts:


Thursday, 7 December 2017

Fun with FabScraps - More Joy to the World Collection

Hello, my friends!

I've got two FabScraps projects to share with you today,
created with the beautiful Joy to the World Collection! 

You may have seen a peek of them over at Fabscraps facebook page. 

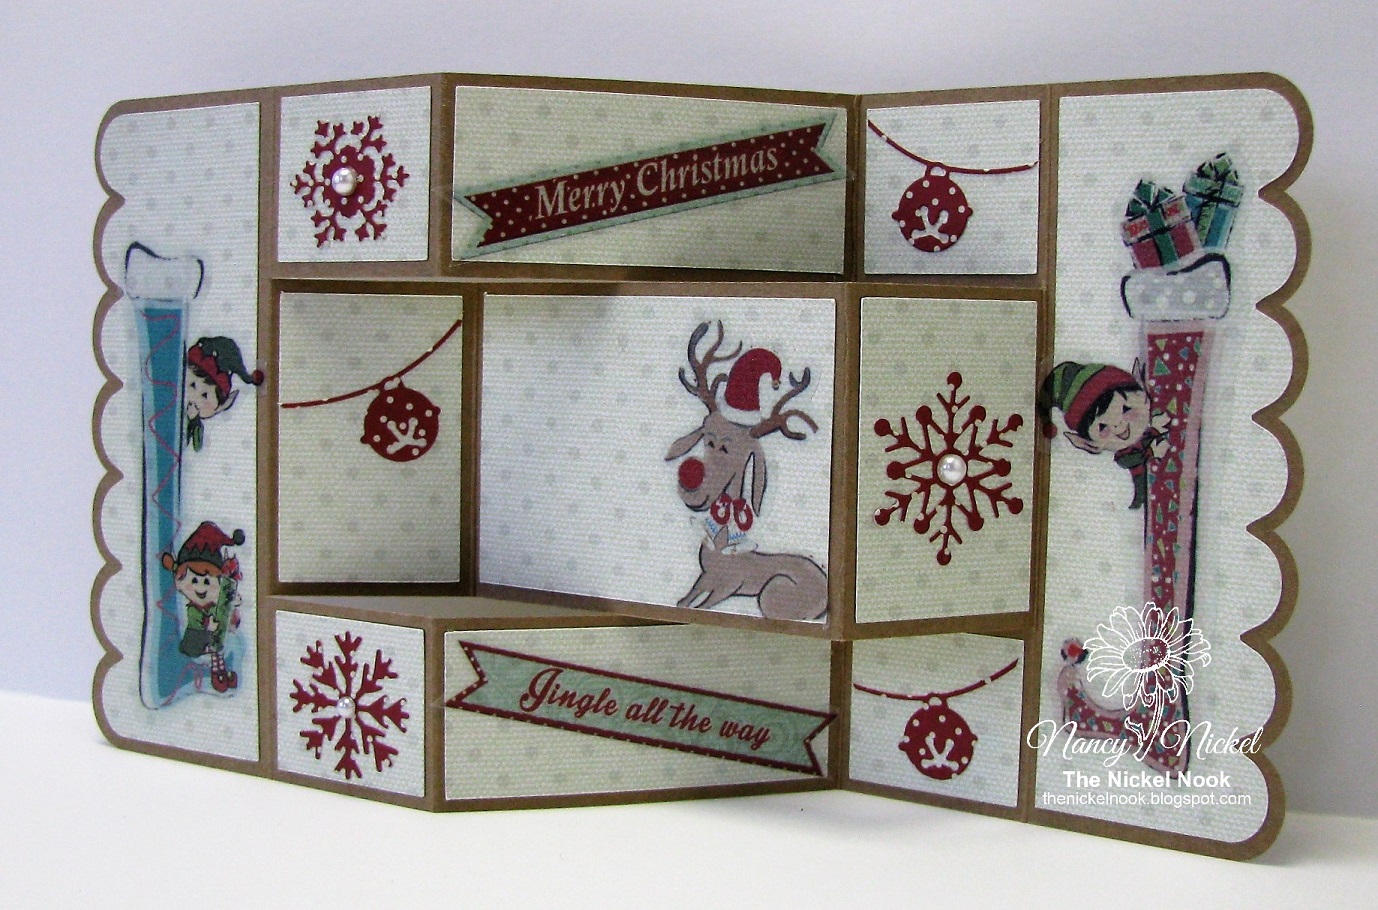
First up is this fun tri-fold card:


JOY TO THE WORLD COLLECTION

Tri Fold Christmas Card


For this project you will need:
·       FabScraps Joy to the World Paper Range C99 007
·       FabScraps Joy to the World Carder’s Pack MC99 001A – 1 Red page
·       FabScraps Joy to the World Stickers ST99 001
·       FabScraps Joy to the World Stickers ST99 002
·       Cricut Explore Air Machine
·       Link to: Tri Fold Card Cut from My Scrap Chick  
·       Kraft Cardstock
·       Snowflake Punch or Die (Echo Park Snowflake Dies)
·       Jingle Bells Punch or Die (Your Next Stamp Die)
·       Ivory Pearls

Instructions:
1.    Using cut file and kraft cardstock, cut tri fold card base. Then cut decorative background layer from C99 007. Adhere in place.
2.    Adhere Stickers from ST99 001 to card, as shown in photo. Reindeer sticker was trimmed to fit into bottom right of center square. This way it shows when the card is closed but also leaves room to write a message in the card.
3.    Choose two of the sentiments from Stickers ST99 002. I chose to use “Merry Christmas” and “Jingle All the Way”. Adhere them in place.
4.    Pulling from the “Jingle All the Way” theme, punch or die-cut three jingle bells from red 6 X 6 page from Carder’s Pack. Adhere in place.
5.    Now punch or die-cut three snowflakes, also from red 6 X6 page from Carder’s Pack. Adhere in place in the final empty places.
6.    Adhere pearls to center of snowflakes. Enjoy! 

* * * * *
Next up is a trio of Candy Boxes:


JOY TO THE WORLD COLLECTION
Trio of Candy Boxes

For this project you will need:
·       FabScraps Joy to the World Paper Range C99 2 - 003, 1 - 004, 1 - 006
·       Cricut Explore Air Machine
·      Link to -  Candy Box Cut from My Scrap Chick
·       Ink (Distress Ink – Walnut Stain)

Instructions:
1.    Cutting file includes Tall, Medium, and Short Boxes. Refer to photos to see paper selection for each. I resized my boxes. My finished boxes are: Tall – 7”, Medium – 4”, Short – 2 ½” in the body of the box.
2.    I did not use the wrapping bands from the cut file but chose to make my own. I did not add one to the Short Box.
3.    For the band on the Medium Box, cut two strips of the music notes from the C99 003 paper. Ink the edges and adhere to the box before assembling.
4.    For the Tall Box, cut a strip of the angels from C99 003. Ink the edges. Adhere in place before assembling the box.  
5.    Fill with candy or treats, to have ready for a quick hostess gift. Or have clustered together for a lovely home décor piece. Enjoy!

* * * * *
Don't forget to head on over to the FabScraps Blog!
There's lots of gorgeous inspiration to see!

Friday, 1 December 2017

The Project Bin and CardMaker Magazine Christmas Blog Hop

Happy hello, to all my friends and visitors!

Today is a special day!
We at The Project Bin are joining with CardMaker Magazine
for a fun Christmas Themed Blog Hop!

You should have arrived here from Gaylynn Martling's Blog!

Since this is such a special occasion, I wanted to create a special card. 
I began with my favorite Christmas stamp set from The Project Bin.
That is the Luke 2 Stamp Set.

For me...it's what Christmas is truly all about... 
celebrating the birth of Jesus! :o)

So here's the fun ornament card I came up with:


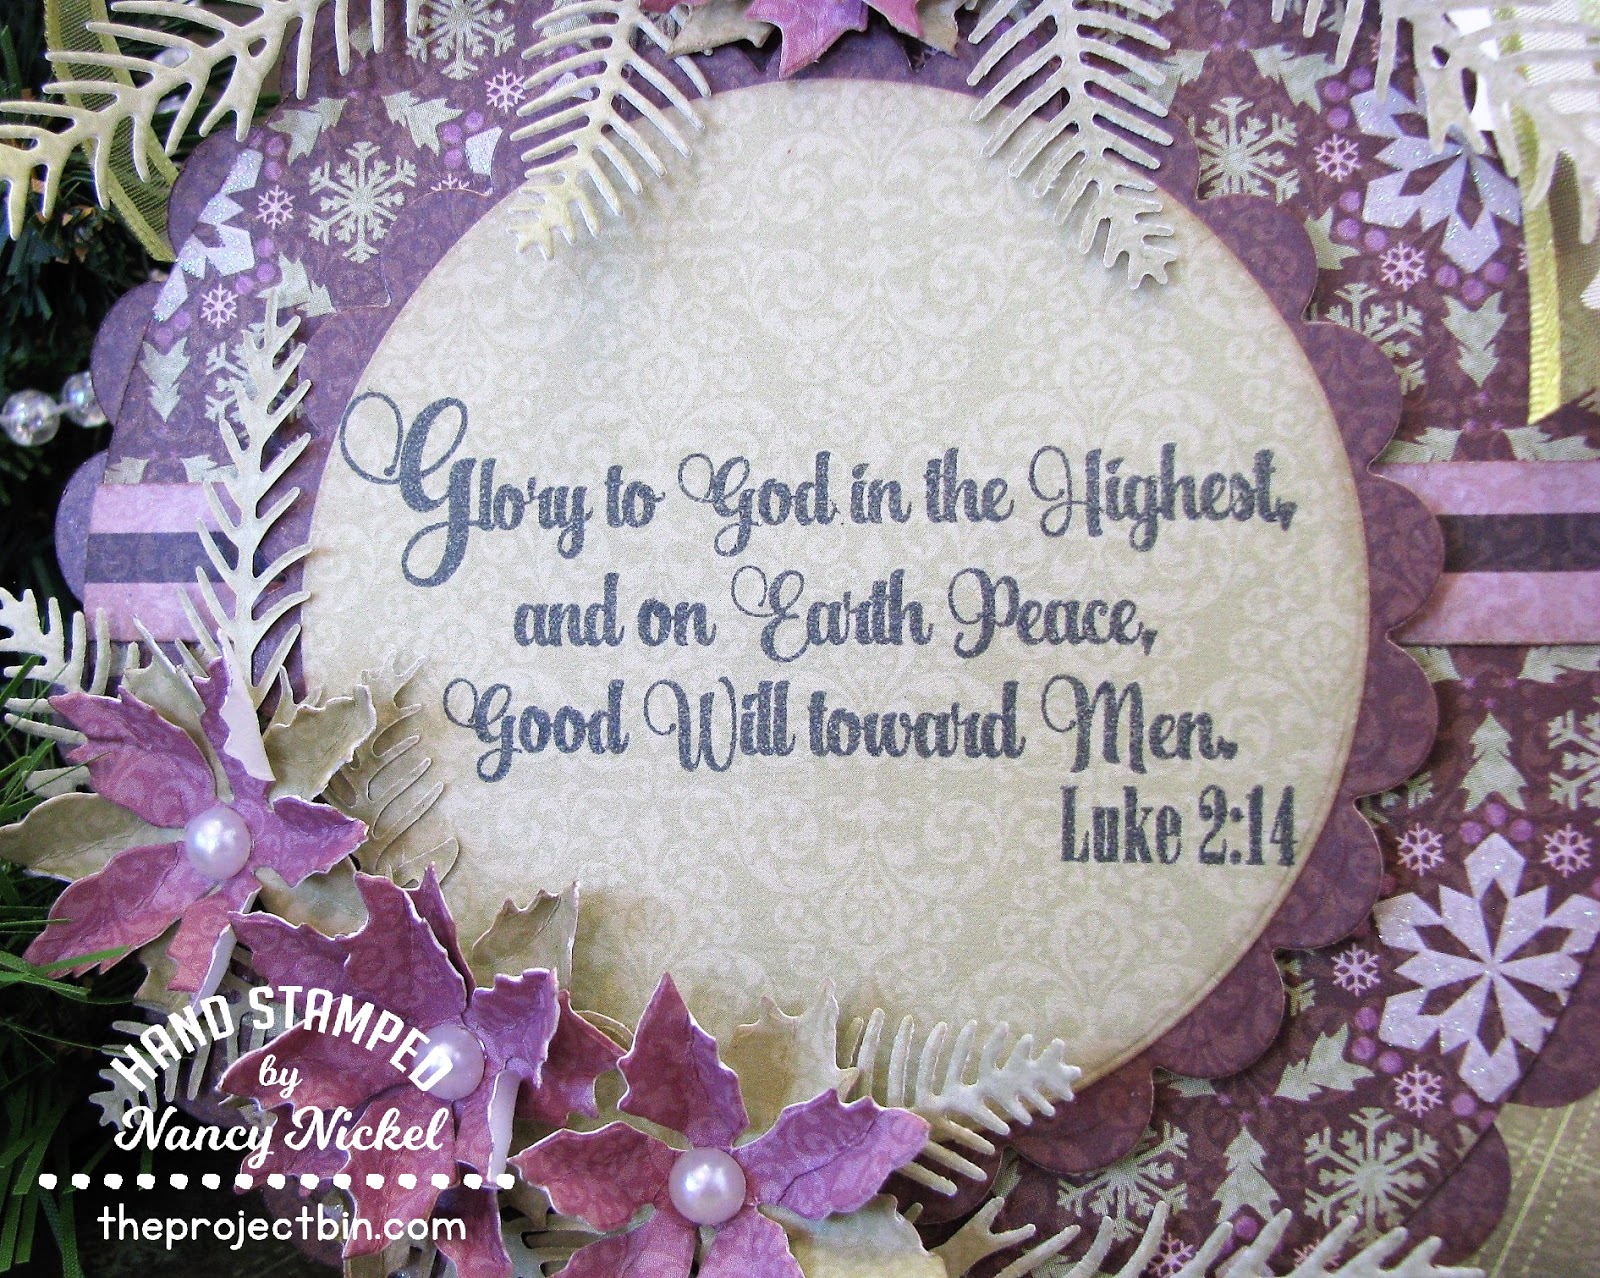
Here's a closer look at the wonderful Scripture verse stamped out. 
These stamps are always so crisp and clear!


I made some little poinsettias to frame around the bottom.


Then I added another little poinsettia and a ribbon bow at the top.


Here's a final look at the finished card:


Other Materials Used:
Papers: Recollections - 
Dies: Tim Holtz - Mini Poinsettia, Your Nest Die - Pine Bough,
Spellbinders Nestabilities - Scalloped Circles (LG), WRMK - Nesting Circles;
Cricut Cartridge: Winter Wonderland;
Machine: Cricut Expore;
Ink: Distress Ink - Walnut Stain, Memento - Tuxedo Black;
Ribbon: Celebrate It;
Pearls: Crafts.

Products Used from The Project Bin:


Thanks so much for stopping by!

Your next stop on the Hop is Kelly Clark's Blog!
If you get lost along the way, 
there's a complete Blog Hop list at the CardMaker Blog!

Now carry on...and be inspired! :o)

* * * * *
Linking Up To:


Blog Archive