Happy Friday, my friends!
Friday means it's time for a new project share for Sparkle N Sprinkle!
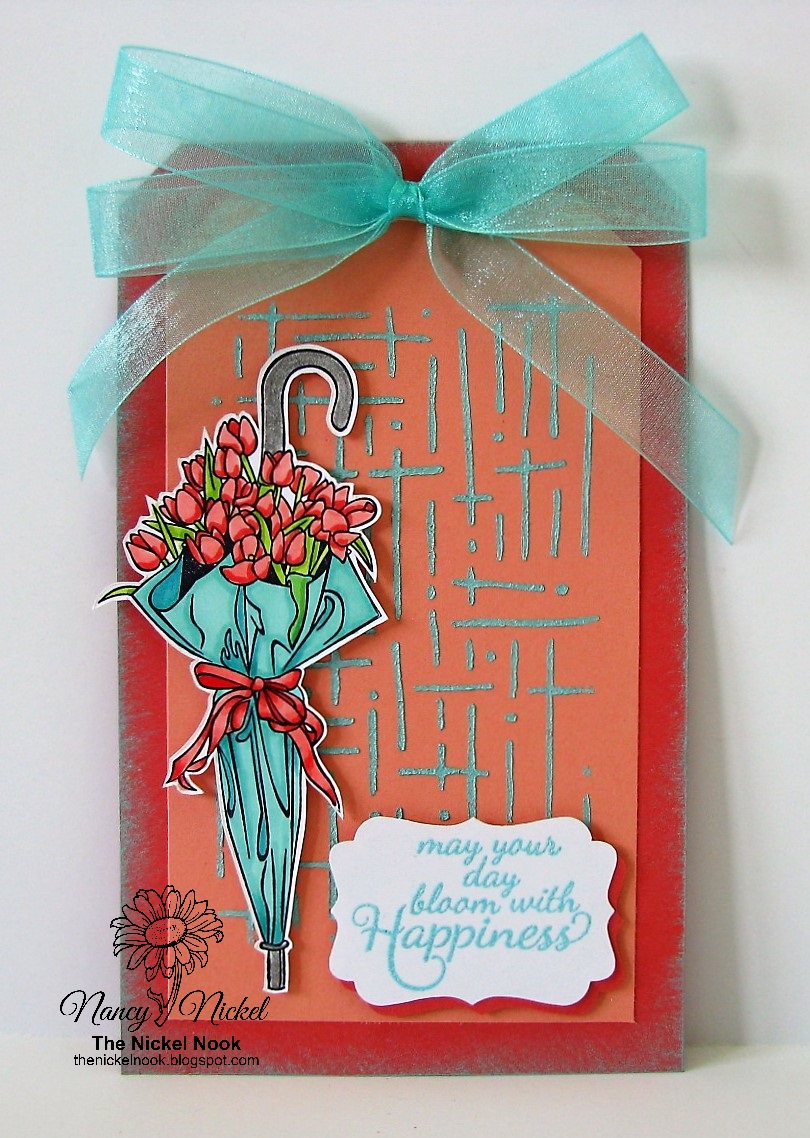
This week I'm sharing a tag that I created:


Next, I took a lighter coral piece of cardstock,
along with the same Nuvo Mousse and Blender Brush,
and the Mini Designer Template Dots & Dashes.
I stenciled the design to the center of the cardstock.

Here's a closer look a the gorgeous shimmer and dimension.
When it was dry, I trimmed this piece down to 3 1/2" x 6 1/4",
angling the corners to match the tag base.


Here's what I used from Sparkle N Sprinkle:
Stamps:
Embossing Powders:
Coloring Mediums:
Ink:
Adhesives:
Tools/Dies:
Other Materials:
Recollections Cardstock, Celebrate It Ribbon,
Stampin' Up Decorative Label Punch.
Before we get started, I'd like to apologize for the quality of some of my photos today.
I took them on a new mat, and I had no idea that the mat interfered with the photos until it was too late.
I've had to play around with them to tone down the psychedelic waves that were happening.
Taking photos in Winter in Saskatchewan is always interesting,
but I will never use this mat again! lol
Okay...here we go:
I began by stamping out the tulip image,
from the New Shower of Tulips Rubber Stamp Set.
I colored it with the Nuvo Markers.
I then fussy cut the image out.

I cut a piece of cardstock that measured 4 1/4" x 7" and angled the corners, creating my tag base.
Using the Mini Blender Brush,
I brushed the Nuvo Embellishment Mousse - Aquamarine
all around the edge of the tag base.
Then I set it aside to dry.

along with the same Nuvo Mousse and Blender Brush,
and the Mini Designer Template Dots & Dashes.
I stenciled the design to the center of the cardstock.

Here's a closer look a the gorgeous shimmer and dimension.
When it was dry, I trimmed this piece down to 3 1/2" x 6 1/4",
angling the corners to match the tag base.

I stamped the sentiment from the Shower of Tulips Rubber Stamp Set,
using the Versamark Embossing Ink.
I then heat embossed it with the beautiful Beach Cruiser embossing powder.
I punched the sentiment out,
and the punched the same punch out of the dark coral cardstock.

I tied a big double looped bow from a matching sheer ribbon.
Here are all the pieces ready to assemble into my finished tag.

and to adhere the sentiment onto the punched cardstock.
I positioned it to one side, forming a shadow behind.
The umbrella and sentiment were adhered in place using foam tape.
Finally, the bow was added to the top of the tag with Tear-ific Tape.


One last look at my finished tag:
Thanks so much for stopping by today!
I'll be back next week with another Sparkle N Sprinkle project!
In the meantime, head over to the store and check it out!
You can take my code with you...it's: NancyDT10
* * * * *
However, before you go...there's more news!
SNS has a Challenge Blog with a monthly challenge.
The challenge is always Anything Goes IF you include
loose glitter, embossing powder and/or flocking!
OR you can use an SNS Stamp - digital or rubber!
Wait...there's more! lol
SNS also has a very active Monthly Creative Challenge on Facebook!
There are lots of other fun events going on too!
I look forward to sharing them with you! :o)
* * * * *
Here are all the links:
3 comments:
Fabulous card Nancy, great tutorial too.
Faith
x
Stunning tag
I love this color palette and your amazing coloring of the umbrella. What a great image! It's great to get to see what you've been up to as I've missed your beautiful work. Big hugs from SC, Autumn
Post a Comment