Happy Saturday, my friends!
Today I'm happy to be sharing my first DT post for ScraPerfect!
I know that many of you have been using these products for a long time.
The ScraPerfect products are all new to me,
so I've been anxious to try them,
and become familiar with all their great properties!
So far I'm thrilled with what I've tried! :o)
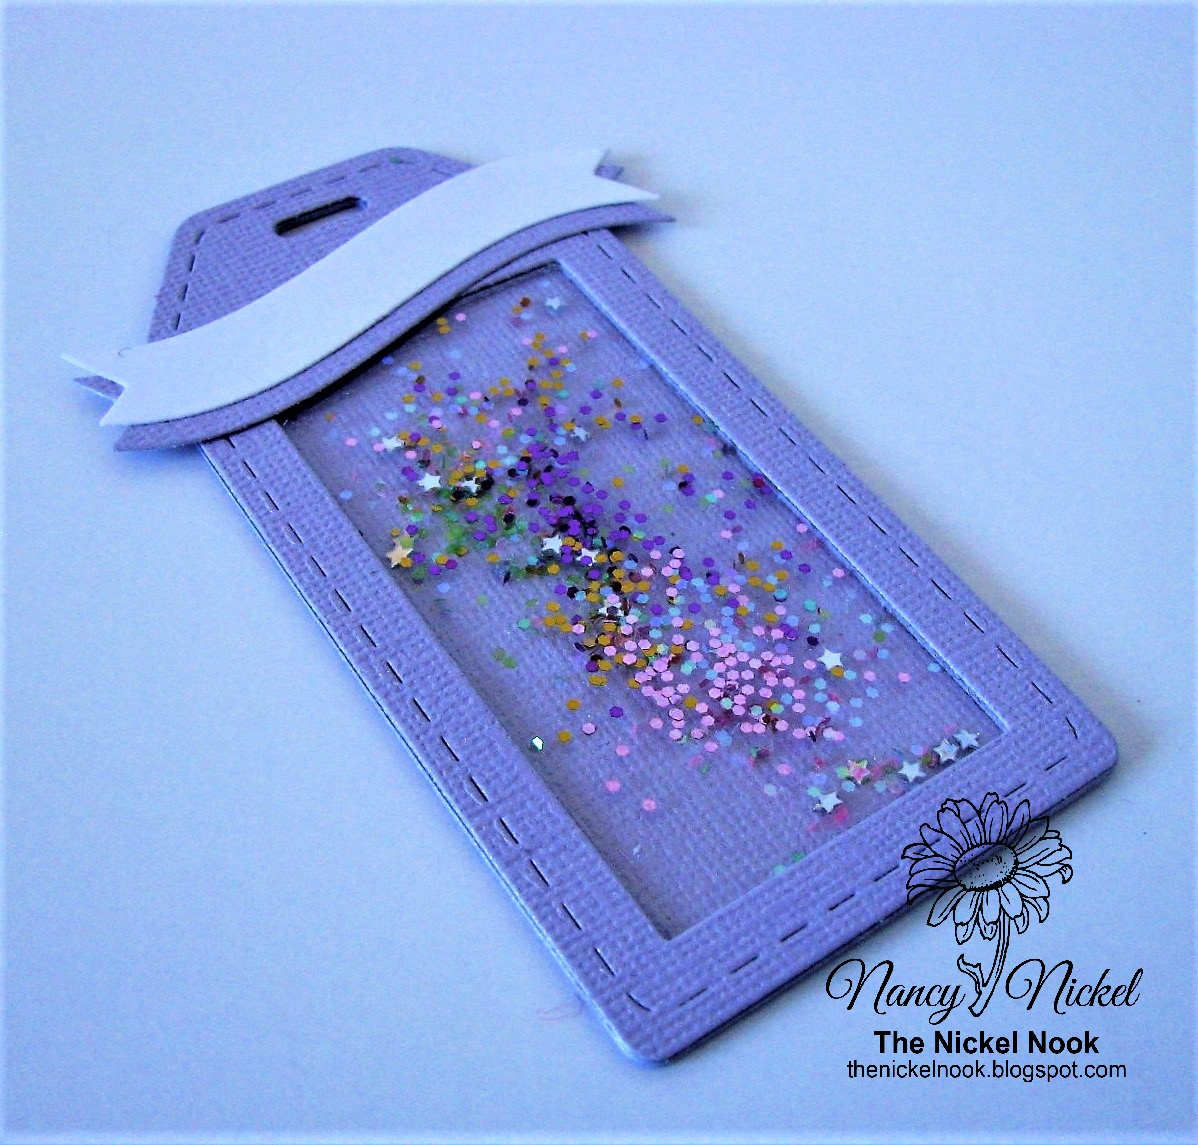
Today I'm sharing this fun Shaker Tag Embellishment.
Since the DT is spending April sharing embellishment ideas,
I thought this might be the perfect opportunity to try this one out.
Here it is:

I've had this shaker tag die for a little while but haven't had the chance to use it yet.
Here's how I did it. I began by choosing a lovely lavender cardstock.
I cut one backing, three front frames, and one acetate front.
I also cut two of the curved tags: one in lavender, and one in white.
Then I grabbed my bottle of The Best Glue Ever and got to work!
To begin with, I adhered two of the frames onto the backing.
I must say that this glue did a fabulous job.
It was my first time using it, and I was very pleased.
They nozzle was nice and small for the skinny frame,
and the glue stuck and dried so fast.
Yet when I didn't align the pieces properly,
I did have time to move it into place.

Before I did any work with the acetate,
I thought I would pull out the Perfect Crafting Pouch.
Shakers always get so static-y, right?
So I gave the one side of the acetate a light wipe with the pouch.
Of course it leaves a powder on the acetate,
which I didn't want, but I was able to blow most of it off.
I wondered if it would make a difference
as to how much the shaker bits clung to the acetate.

Next, I adhered the front frame to the front of the acetate.
Then I went through the all of my Tiny Shorter Bottles of Embellies,
and sprinkled in some little bits of glitter in the colors I wanted.
Then I adhered the acetate and front frame in place.
The Best Glue Ever did a fantastic job of sealing everything in securely!

Finally, I adhered the white label just above the lavender label,
and then adhered them both in place on the top of the tag.

The label is ready to add any sentiment by hand or stamp.
Then add a ribbon through the top of the tag.
Now you have a lovely shaker element that is ready to add to any project:
a card, a layout, or a larger tag.

It's even flat enough to add to a journal!
Other Materials Used:
Papers: American Crafts - Cardstock;
Die: Your Next Stamp - Cool Tag Three Die Set.
* * * * *
Thanks so much for stopping by today!
I hope you've enjoyed my first project share!

* * * * *
Here are all the links for you:
2 comments:
OH! this would make a gift so wonderful to receive, a play before opening the gift. LOVE it Nancy.
Faith x
This is gorgeous
Post a Comment