Hello, my friends!
It's time for another new project share for Bowdabra!
As many of you know...we have recently moved.
This was the last Bowdabra project I made before packing everything up.
I won't have a new project for Bowdabra until I am settled in a new house,
and have had a chance to set up my new space.
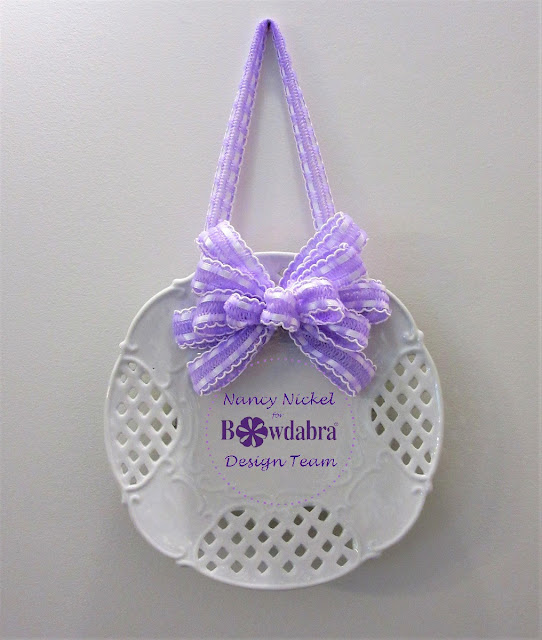
Today I'm showing you how I used a pretty Bowdabra bow
to decorate a ceramic plate.
Here's the finished project:
Here's how:
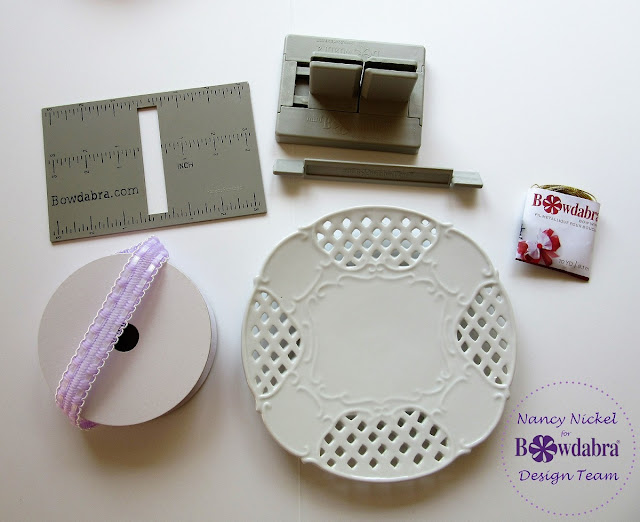
Supplies Used:
Pretty Purple Ribbon from the Ultimate Spring Ribbon Set;
Decorative Plate;
Scissors.

The first thing I did was add a ribbon hanger to the top of my plate.
I decided how long I wanted the hanger,
inserted the ribbon ends from the back to the front,
I decided how long I wanted the hanger,
inserted the ribbon ends from the back to the front,
tied a secure knot and trimmed the ends.
Then I went on to make the bow.
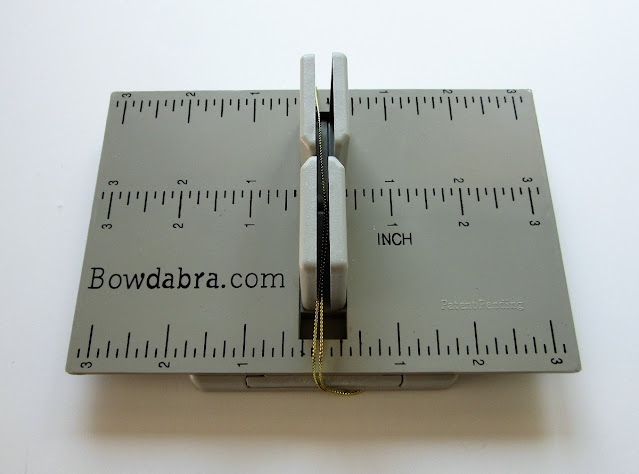
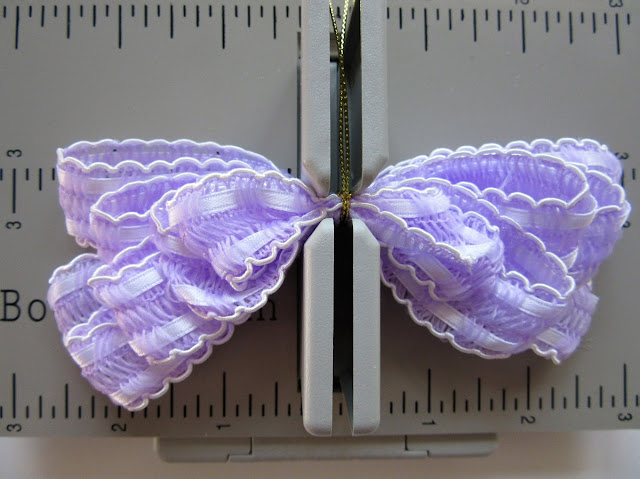
1. Place the ruler over the Mini Bowdabra.
2. Cut a piece of the Bowdabra wire approximately 18" long. Fold in half. Insert into the Bowdabra tool, as shown in the photo. Tuck the extra length under the base of the tool.

3. Insert the ribbon into the tool with only a small end on the right hand side, and make the first bow loop on the left side. This loop measured 3". Twist the ribbon, insert it into the tool, and form another 3" loop on the other side. Continue looping and twisting until there are three 3" loops on each side.
4. Following the same steps, add two loops on each side that measure 2 1/2".
5. Next, add one loop on each side that measures 2".
4. Following the same steps, add two loops on each side that measure 2 1/2".
5. Next, add one loop on each side that measures 2".
6. Finally, add one more loop that measures 1", and then trim the ribbon off at 1" on the right side.
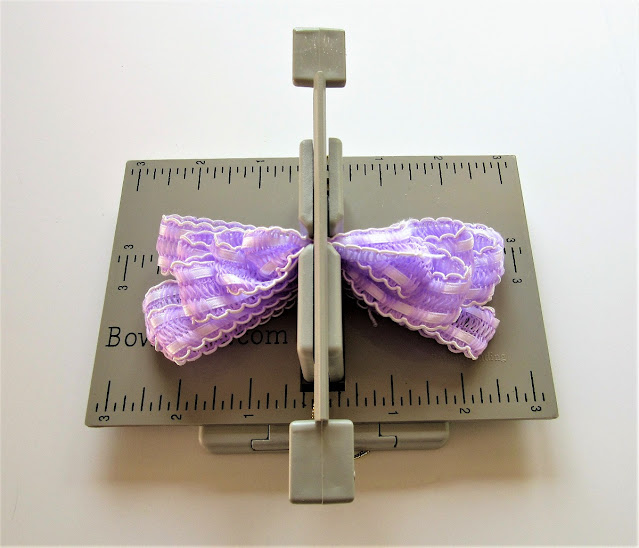
7. Using the Bowdabra wand, scrunch the ribbon all down tightly.
8. Pull the wire up from beneath the Bowdabra Tool. Insert the wire ends through the wire loop and pull securely, holding the ribbon down with your other hand.
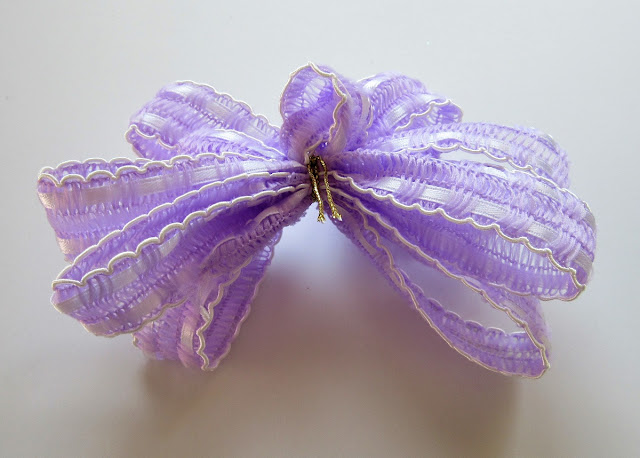
9. Remove the bow from the Bowdabra Tool. Form a small center loop with the final 1" loop, insert the wire through the loop, tucking the ribbon end underneath. Secure the wire and trim the ends.
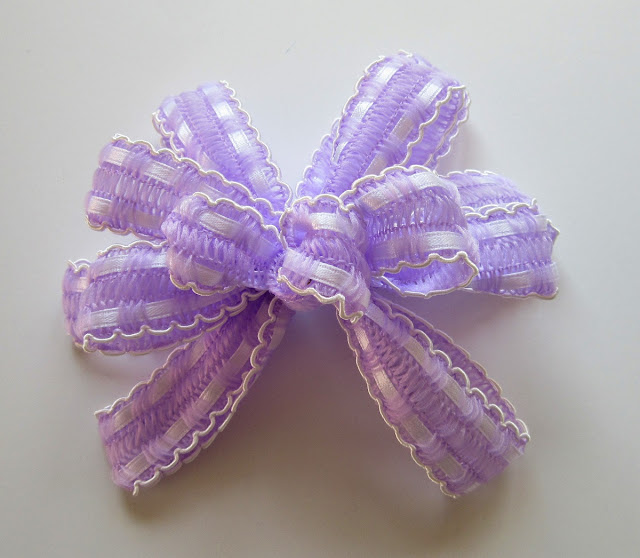
10. Fluff the loops, staggering them as shown in the photo.
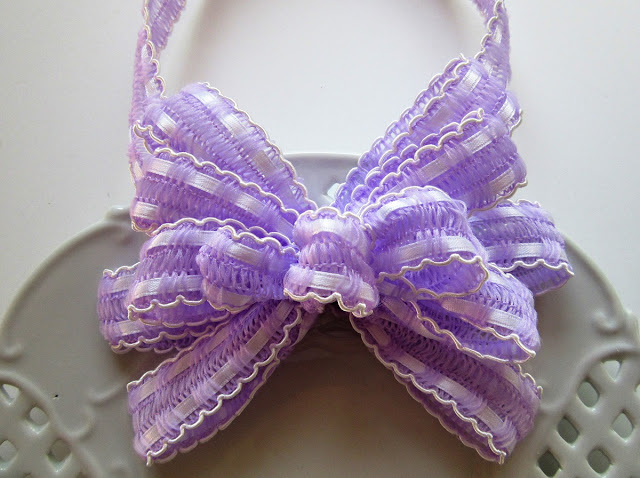
11. Finally, adhere the ribbon bow in place on the top of the plate, covering the hanger knot. Fluff and arrange as desired.
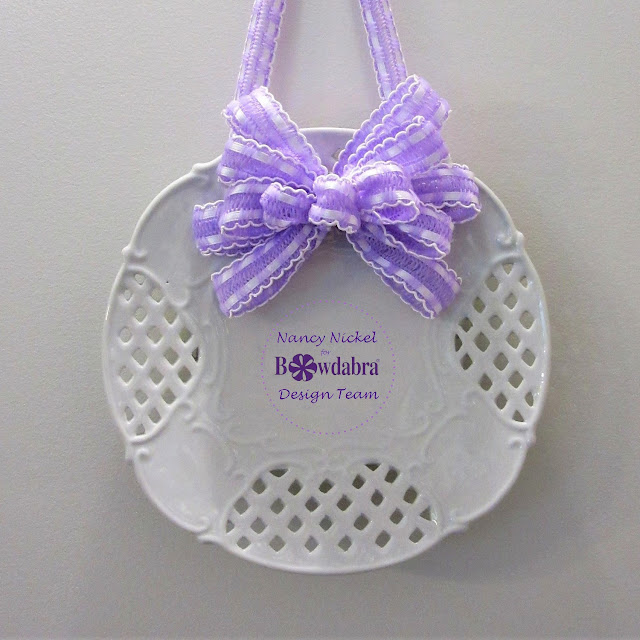
This makes such a pretty wall decor piece.
You can match the ribbon to the room, or use seasonal ribbon for holiday decor.
You can match the ribbon to the room, or use seasonal ribbon for holiday decor.
* * * * *
Thanks so much for stopping by today!
I'll be back next month with another fun bow project!
* * * * *
Here are all the Bowdabra links for you:
4 comments:
Pretty plate. Congratulations on your new home.
Beautiful ribbon it makes a lovely bow. Hope all is going well with settling into your new home.
Gosh! Nancy, beautiful ribbon made into a beautiful bow onto a beautiful plate. Hope you're settled soon, in your lovely new home.
Faith x
WOW that is amazing Nancy you have done a beautiful job with the bow I love it
hugs
lorraine x
Post a Comment