Showing posts with label Home Decor. Show all posts

Wednesday, 13 August 2025

Home Sweet Home Decor for Clear Scraps

   Hello, my friends!

I'm back with a fun new project for Clear Scraps!
This time it's a home decor item.


 This project features the Standing House with Wood Embellishment.
This item comes unassembled and ready to decorate.


I added some pieces from the Embellishments Chipboard Punchout Home:


I also added one key that I had leftover from Keys Chipboard Embellishments.

Here are all the pieces I used:


I chose four colors of acrylic paint: white, light brown, light grey, and dark grey. 
These happen to be the colors in my brick backsplash.

Here is how I painted all the pieces:


The house portion of the stand: I brushed on one coat of the acrylic paint. While it was still wet,
I used a baby wipe to remove some of the paint.
The base of the stand: I used the dark grey acrylic paint, and brushed on two coats.
The scroll embellishment: Again, two coats of the dark paint. I left the edges unpainted.
Home Sweet Home Chipboard: I painted in dark grey. 
Small Chipboard House: I removed the heart, and painted the house in light grey. 
Chipboard Key: Painted in light grey. 
Wooden Knob: Painted in white.
Small Chipboard Heart: Painted in white.

I set all the pieces aside to dry. Once they were dry, I moved on to the stenciling. 


I placed a small amount of each of the four acrylic paints on a palette. 
Using a makeup sponge, I picked up a bit of each color. 
After dabbing it on a paper towel, I sponged the paint onto the house,
I just kept dabbing until I had the look I wanted. 


Next, I inked around all the edges, of all the pieces, using black ink.
I decided on my placement, and then used my tacky glue to adhere everything in place. 
Finally, apply a coat of water-based varnish to protect your finished project. 

Here's a closer look:


This was such a fun project to make!


There are so many fun and creative ways to use this Standing House!
In face, I'll share another idea with you next time!

* * *
Clear Scraps Products Used:


Other materials used:
Acrylic Paint: White, Light Grey, Dark Grey, Light Brown;
Makeup Sponge;
Black Ink;
Water-Based Brush On Varnish.

* * *
Thanks for stopping by today!
I'll be back soon with another fun project share! 

* * *

Here are all the links for you:

Clear Scraps Shop

Clear Scraps Facebook

Clear Scraps Instagram

Clear Scraps Pinterest


Tuesday, 13 December 2022

Outdoor Decor with Bowdabra

            Hello, my friends!

It's time for another fun Bowdabra project!
This will be my final Design Team post for Bowdabra, 
as I've made the tough decision to stop down.

This one was a little bit tricky for me!
I had this idea, and made my bows very easily.
The tricky part came when it was time to attach my bows and take photos.
There was a windchill of -41 C at the time,
so I hope you'll understand why my photos were taken quickly! ;o)

Here's what I did using my favorite Bowdabra Burlap Ribbon:


When we moved into this house a year ago,
The yard, front and back, was filled with statues and planters, and even a fountain.
We quickly cleared most of them out.
However, I did decide to keep these little gargoyles
that are mounted on either side of the front door.
Our Christmas decorations/lights are still all packed up,
but I did want to add something festive. 
I think the bows are a nice start.


Here's how I did it:


Supplies Used:


These pieces are mounted to the house with two screws.
I began by measuring the distance between the two screws.
It measured 4 1/2", so I determined that a 6" bow would be just right.


1. I cut an 18" piece of wire, folded it in half, and inserted it in my Mini Bowdabra, tucking the ends under. 


2. I wanted long tails on my bow. I cut a 24" piece of ribbon, and inserted it in the tool


3. Leaving 2" on the left side, I twisted my ribbon, and inserted it in the tool.


4. Since I'm making a 6" bow, I made a 3" loop on the right side. I twisted my ribbon, inserted it into the tool, and made a matching 3" loop on the left side. 


5. Next I repeated the process, forming a 2" loop on either side.


6. I cut the ribbon off the spool, leaving a tail


7. After scrunching the ribbon down with the Bowdabra Wand, I untucked the ribbon. I pulled the two ribbon ends through the loop. Holding the bow down, I pulled the wire ends tight, and removed the bow from the tool. 


8. I pulled the wire tight and tied a secure knot. Then I tucked the ribbon ends in, and shaped my bow.


9. I made a fishtail cut on both ends of the ribbon tails.


10. I repeated the entire process to make a second matching bow. Here are the finished and fluffed bows. I left the wire ends long, as I want to use them in the design.


11. I went out side and used the wire to fasten the bows to my gargoyles. I wrapped the wire around the mounting screws, and then tied a secure knot. I wrapped the wires around my fingers to curl them, and left them hanging. They add a nice touch of sparkle. 
12. Finally, I shaped the bow loops and tails!


There you have it!
A fun festive touch has been added to my front door!
Next, I need to make little Santa hats for the Griffin
but that's a project for a different day! :o)

* * * * *

Thanks so much for stopping by today!
I'll be back soon with another fun project!

* * * * *

Here are all the Bowdabra links for you:

Bowdabra Shop

Bowdabra Blog

Bowdabra Facebook   

Sunday, 25 September 2022

Give Thanks with Printable Cuttable Creatables

  Hello, my friends!

Today I'm sharing a new project for Printable Cuttable Creatables!

With the Fall/Thanksgiving Season fast approaching,
and with a new dining room to decorate,
I decided to make a home decor piece!

This could easily be adapted to a card, or layout, or anything else you want to make.

 
Here's my project:


I began with a very heavy weight cardstock square that measures 8 1/2".
I then printed out the green gingham paper, 
 and cut it at 8" square.
I adhered it in place on the cardstock base.


I then cut the Autumn Flower Wreath Frame SVG File to fit,
and adhered all the pieces in place.


I then cut out just the words from the Give Thanks Title file.
They are such a lovely, skinny script, and look great in the center of the wreath.

Here's a closer look at the flowers:


To finish off my project I added the 3D Bow.
Some projects just aren't finished until you put a bow on them! ;o)
This bow file is free and just the final touch to my project.
I cut it from another one of the papers from the Autumn Basics Digital Paper Pack.
I cut it, inked the edges, assembled it, and added it in place on the top of my wreath.


This was another really fun project to make!
There are so many wonderful Fall themed files in the shop,
and they all work beautifully together!

* * * * *

 Printable Cuttable Creatables Files Used:


* * * * *

Thanks for stopping by today!
I'll be back soon with another fun project!

* * * * *

Here are all the links for you:

Printable Cuttable Creatables Shop

Printable Cuttable Creatables Blog

Printable Cuttable Creatables Facebook

Thursday, 23 June 2022

Fun Home Decor Project with Bowdabra

    Hello, my friends!

It's time for another fun Bowdabra project!

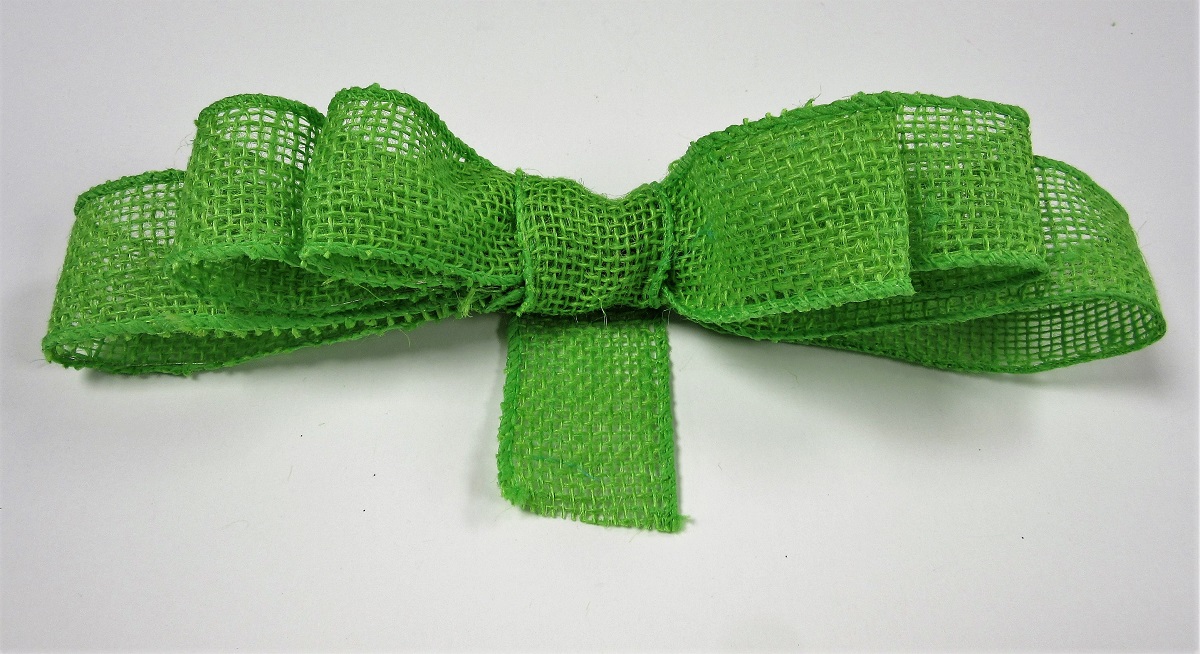
I just love this beautiful lime green burlap ribbon!
I've been really anxious to use it on a project.
It's so bright and cheerful, and the texture is fabulous!

I finally decided to use it on a fun home decor project:

Here is how I did it:


Supplies Used:
Three Small Wood Frames;
Acrylic Paint - Cobalt Blue;
Frame Inserts of Choice;
Hot Glue Gun and Glue;
Scissors.

 Instructions:
 

1. I started by preparing my small wood frames. I found these at a local dollar store. They came in a set of 6. I chose three of them to fit on my ribbon. I removed the glass and the backing. I then painted them with a cobalt blue acrylic paint. I love the contrast of the lime green and the cobalt blue!


2. I cut matching green cardstock to fit into each of the frames. It's easy to get the right size by measuring the backing paper that was removed. I went through my stamps and found some fun images. I stamped them on the green cardstock, using a matching cobalt blue ink. Any image or photo that fits into the frame will work. I then reassembled the frames with the glass and backing. Then I set these frames aside and moved on to my bow.


3. I cut an 18 inch length of Bowdabra Wire, folded it in half. I inserted it into my Bowdabra, tucking the ends under, as shown in the photo.


4. I decided that I wanted my bow to measure 8 inches across. I began by inserting the ribbon end into the Bowdabra Tool, leaving a 2 inch tail on the right side.


5. I twisted the ribbon, inserted it into the tool, and measured a 4 inch loop on the left side.


6. I twisted the ribbon, inserted it into the tool, and formed another 4 inch loop on the right side.


7. I repeated the process and formed a second loop on the left-hand side. This loop I made 3 inches.


8. I then continued the same steps, until I had three loops on each side: a 4 inch, a 3 inch, and a 2 inch loop. I twisted the ribbon one more time, and insert it into the tool. I then cut the ribbon leaving about an 8 inch tail.


9. I then inserted my Bowdabra wand into the tool, and scrunched down all the ribbon loops.


10. I then pulled up the Bowdabra Wire from under the tool. I threaded the two ends through the loop end. While holding the ribbon down securely, I pulled the wire up tightly. I then removed the bow from the Bowdabra Tool. 


11. I pulled the wire ends to the back of the bow, tied it off securely, and trimmed the ends.


12. I then took the 8 inch tail and wrapped it around the center of the bow. In the photo above you can the 2 inch beginning tail that shows on the right hand side. I tucked it into the center, under the wrap.


13. Here you can see that it's all gone.


14. I then cut a 20 inch piece of the ribbon to mount the frames on. I'm sorry but I don't seem to have a photo of it. It is just a straight piece. In this photo you can see where I tucked it into the back of the wrap.


15. I tucked the wrap tail into the back and trimmed it off. Using a needle and thread, I secured all the layers of ribbon together, and stitched on a plastic ring for hanging. 

16. Finally, I adhered the frames in place using my hot glue gun. These frames are very light, so just a little dab of the glue on the top and bottom of the frame is all that's needed. 


Here it is...hanging on the wall.
This was a really fun project to put together. 
It would work with any of the beautiful Bowdabra Ribbons;
just a change of colors and images,
and it would look completely different.

* * * * *

Thanks so much for stopping by today!
I'll be back next month with another fun bow project!

* * * * *

Here are all the Bowdabra links for you:

Bowdabra Shop

Bowdabra Blog

Bowdabra Facebook 

Blog Archive