Happy Friday, my friends!
Today I am sharing a new project for LineDotArrow!
Nathalie creates beautiful printable journal kits,
along with so many other fun printables.
This month, I thought I'd do something a little bit different.
Instead of completing a junk journal,
I thought that I would share some fun ephemera ideas.
There are lots of photos in this post.
Just scroll down until you find the ones that interest you.
Nathalie has some great neutral collections in the shop for this purpose.
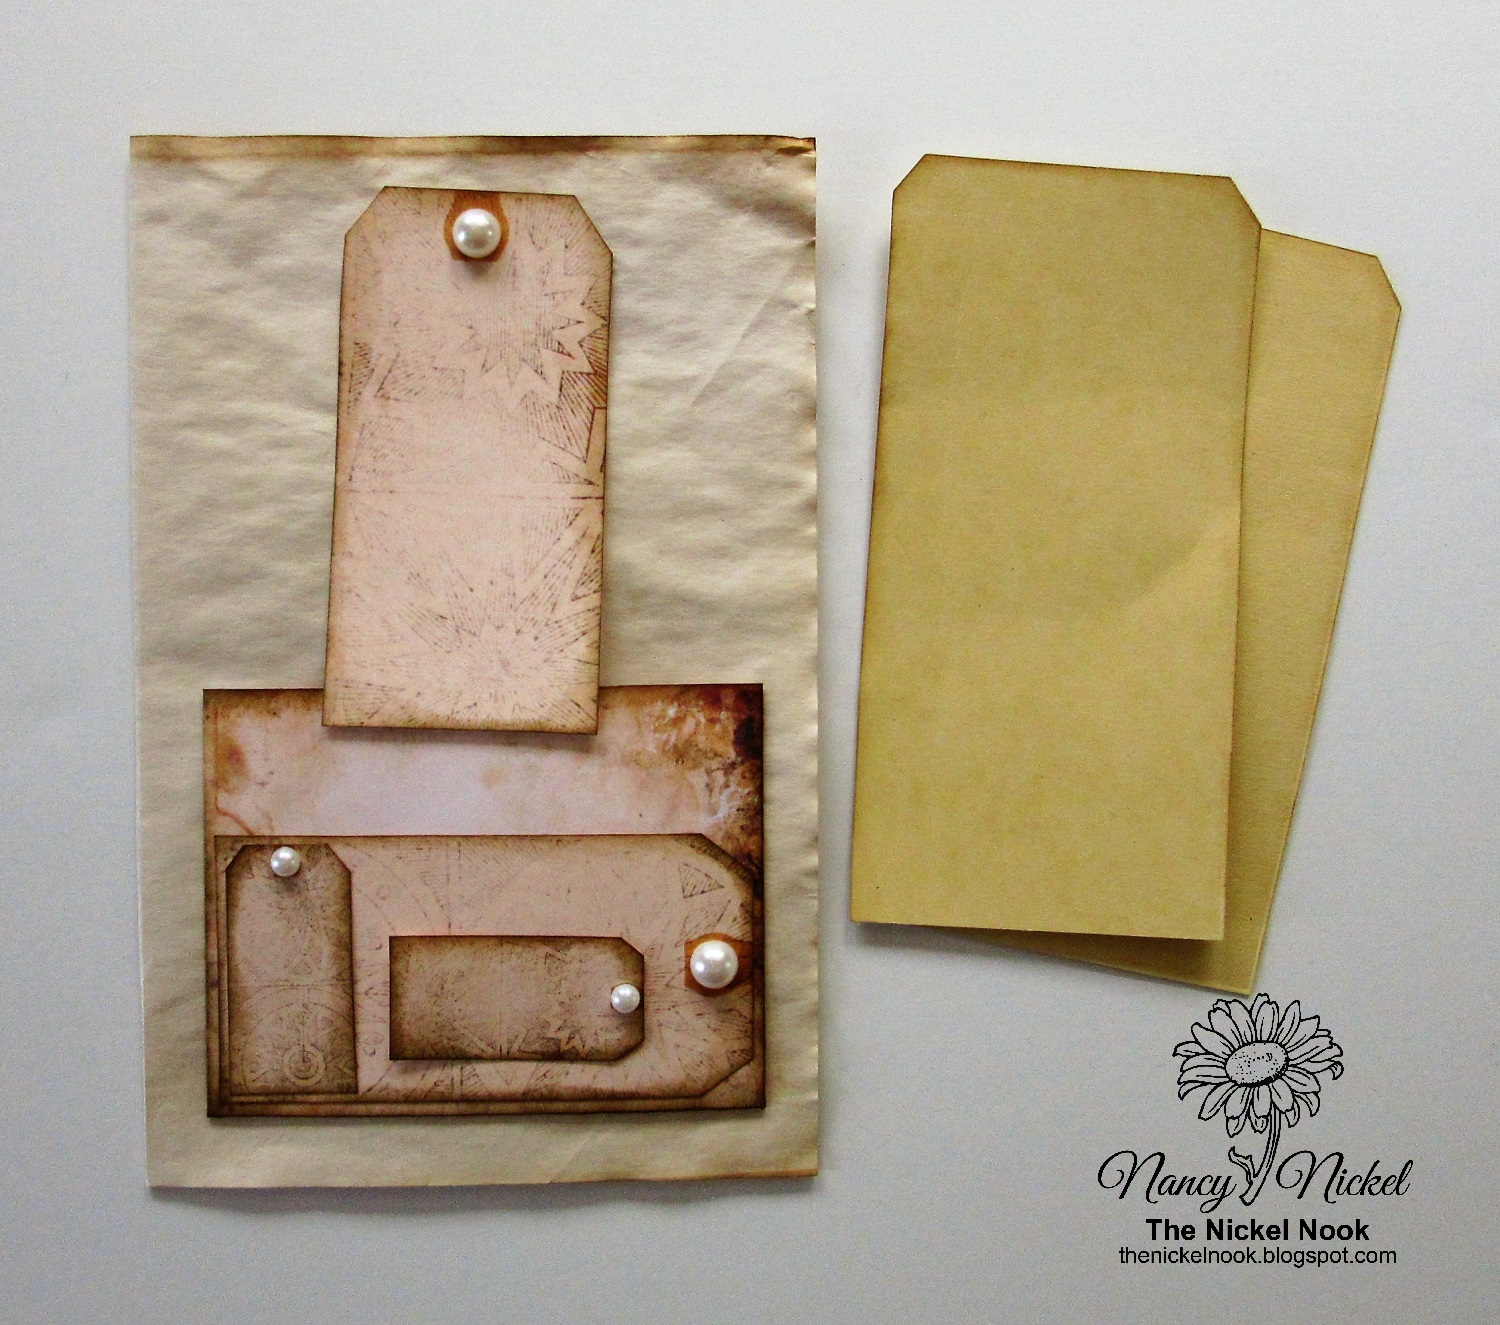
Here's what I used.
These items are all included in the
Collage Tear Papers Collection.
I printed out some of the pages, and all the little bits.
I cut them out, inked the edges, and assembled the pockets.
The papers were made into little bits with the aid of my tear ruler,
and then all the edges were inked.
There are so many fabulous bits to pull out and collage on tags.
As you'll see in the coming photos.
Both the tags above, and all the pockets and envelopes below,
I cut out all the pieces, inked the edges, and assembled the pockets and envelopes.
I fussy cut them all out with a narrow white border.
These large tags are so pretty, with greens and pinks.
I kept with the pretty theme and added some lovely bows to the top.
I'll have more about these bows in a post next week.
Here are two of the more grungy looking tags.
I added the collage bits, along with some of the pretty butterflies.
I punched out the hole in the top,
and added a piece of lace with a jute tie.
For the tags below, I cut the tag base from a manila folder.
I collaged the entire front of these tags with the collage bits.
To one I added the butterfly, to the other added a little piece of a vintage book page.
For the top of these tags, I folded over a strip of the collage paper,
and adhered it in place.
For the two tags below, I again used manila base tags.
This time I pulled out some of the pretty blue collage bits.
I adhered them in place, along with a couple of vintage book page bits.
I added some little pieces of cheesecloth, before added the pretty blue butterflies.
To the top of these tags, I added a label that was folded over and inked.
Here are some other very simple tag ideas.
The pretty tags on the top were printed, cut out and inked.
I then reprinted the tags in a miniature size.
The mini tags were adhered in place on top of the larger tags.
They are left open on the top and one side to form little tuck spots.
The tags shown on the bottom are simply layered, with a brad through the hole.
This way the tags can be tucked in,
and then swiveled for journaling on the backs.
They can be tucked into any pocket or tuck spot.
Now I'll show you some of the pockets.
They've been decorated and added to some coffee dyed paper.
On this pocket I layered some labels and a butterfly.
I added lace and a jute tie to the top of the tag,
and tucked it in the pocket.
To this pocket, I added one label, some cheesecloth,
and a pretty green butterfly.
I tucked in two of the pretty tags that pulled out the green.
To the top of these, I added a simple looped ribbon.
Here's another fun page pocket idea.
This is one of the larger pockets.
I added tags to the front of the pocket,
to form some additional pockets.
I then tucked more tags into the tag pockets.
To the top of each of these I have added pearls.
I tucked two plain manila journaling tags into this pocket.
Here are all the tags un-tucked.
Here's another fun idea for ephemera.
Each of the pieces below are mounted on paper clips.
Since they clip onto the edge of the page,
they are decorated on the front and the back.
Here is the front side:
Here is the back side:
Here is what they look like clipped onto the page.
Now for my final idea.
Here I have used another one of the big pockets.
I used a flower template to pierce holes,
and then I stitched the design with crochet cotton.
I then used the same thread to crochet matching flowers,
which I adhered in place to the top of the plain manila tags.
These collections are so much fun to combine and create with!
Now I have all these fun goodies ready to add to my journals,
or any other creative projects.
* * * * *
LineDotArrow Products Used:
Collage Tear Papers Collection;
The Basics No: 2 Collection;
Fussy Cut Butterfly Collection.
Other Materials Used:
Walnut Stain Distress Ink;
Ribbon, Jute, Cheesecloth,
and Lace from my stash;
Vintage Book Pages;
Burlap Bits;
Pearls.
* * * * *
Thank you so much for stopping by today!
I'll be back soon with another fun project.
* * * * *
Here are all the links for you:
LineDotArrow Shop
LineDotArrow Facebook Group
LineDotArrow Youtube


5 comments:
Nancy these are just gorgeous and some really great inspiration!
So inspirational Nancy, I struggled with them all for ages and started with flowers etc and got the hang of things, these are all amazing..
Luv CHRISSYxx
Sooooo many items to play with and you came up trumps and made beautiful tags.
Faith x
Wow! Thank you ever so much for describing the kits you’ve used from Line Dot Arrow! That’s extremely helpful since I’m new to the group! I love that you’ve shown examples of how to use the kits as well! Really appreciate the time you took to show them for inspiration! Gillian, watching from Canada.
Wow! These are super-duper fabulous! I love them all. I am currently working on some mini journals for friends, so thank you for all the delicious inspiration. hugs, Teresa
Post a Comment