Hello, my friends!
I'm back today to share a fun project for Maker's Movement!
* * *
For those of you that don't know, I'm in the middle of a big move.
We're packing up the house that we've lived in for 23 1/2 years,
and leaving the town we've lived in for 36 1/2 years!
We're packing up the house that we've lived in for 23 1/2 years,
and leaving the town we've lived in for 36 1/2 years!
We don't know where we're going yet, as we haven't found a house we like enough to buy.
I'm finding it rather exciting...with no definite destination in mind.
Everything has gone into storage, including my craft room.
I've managed to keep out a "few" things but I don't think it will all fit in the car!
I've managed to keep out a "few" things but I don't think it will all fit in the car!
Apparently I can't take it ALL with me! ;o)
I plan to continue with my regular crafty posts.
although I am a little bit behind right now.
I'll just need a little time to catch up once the packing is finished.
Okay...now back to our regular schedule...
* * *
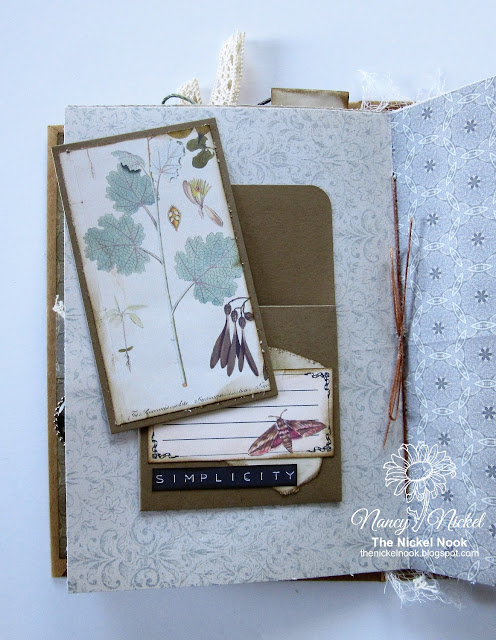
This is actually a sneak at a journal I've just finished.
I'll have a video flip-through ready very soon...I hope!
I'll have a video flip-through ready very soon...I hope!
The pages and images used in this post are all from Paper Craftivity .
Maker's Movement has some fabulous dies that are great journal additions
I used my wonderful Crossover II Machine for all my die-cutting on this project.
I've also used:
Here's what I've done:
First, the Library Pocket Die Set.
I cut the pocket and card from kraft cardstock.
I cut the pocket and card from kraft cardstock.
I folded the pocket and adhered it onto my journal page.
I then decorated it with some of the elements from Paper Craftivity.
I also decorated the library card.
The back is left plain to journal on.
Below, I'm sharing another Library Pocket Card.
It's made the same way but decorated differently.
Here's a look at the decorated Library Card.
On the next page, I've added a tab to the envelope flap.
This tab is also included in the Library Card Pocket Die Set.
Here is another spot where I used the tab die.
I've added it to the top of a folded coffee dyed page.
I've added it to the top of a folded coffee dyed page.
Now I'll show you how I used the Waterfall Card Die Set.
I cut the flaps out of kraft cardstock.
The set includes a few options for adding a decorative edge.
I used the bracket shape on my flaps.
I cut three flaps and added them to my journal page.
I decorated the top flap with a pretty journal card,
and added a trim across the top.
I added another journal spot to each of the next two flaps.
I left the spot under the last flap blank.
It's a great spot for some "hidden" journaling.
Here is another way I used the Waterfall Card Die Set.
This time I cut only one flap out of kraft cardstock.
I added a decorative top, and some graph paper for journaling.
I added another piece of the graph paper on the under side of the flap.
Then I positioned it in place over a journal card that had been adhered to my page.
These fabulous dies from Maker's Movement are great additions to any journal project!
They're so versatile and easy to use too!
You'll be seeing lots more of both of these dies in coming journals! :o)
* * * * *
Other Materials Used:
Coffee Died Papers.
* * *
Thanks so much for stopping by!
I'll be back soon with another fun project!
* * *
Here are all the links for you:


3 comments:
Love your journal Nancy , fantastic dies and lovely papers.
What a big change for you ! Praying that you will find a wonderful new home!
Beautiful journal, Nancy. Wow. We made such a move nearly 18 years ago. It is exciting and I pray the Lord leads you through every step. hugs, Teresa
Amazing project so clever it’s beautiful Enjoy your adventure so brave but very exciting take care Love and hugs Carole x
Post a Comment