Hello, my friends!
I'm going to show you how I decorated this ornament,
and a pretty box to put it in,
using these fabulous foiled papers!
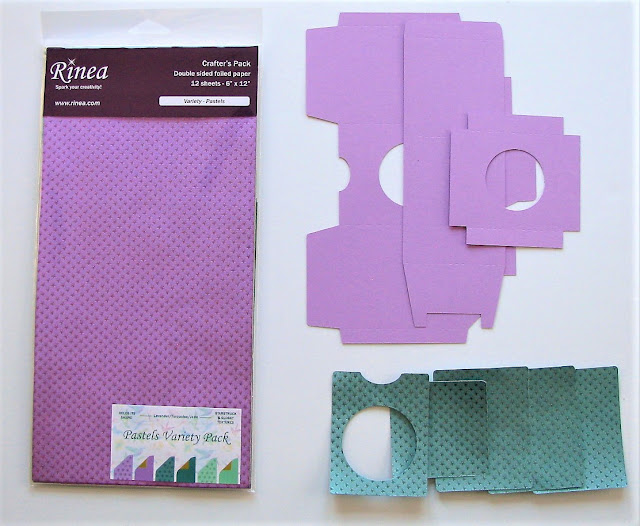
I'm using the "Pastels" collection for this project.
This would make such a lovely Christmas gift,
and there are so many different ways you could personalize it!
Here's the ornament in the box:

Here's the ornament out of the box:


Isn't that a great combination?
The foiled papers make it look so fabulous!
I think it would make a wonderful Christmas gift.
It would be an ideal way to present all those unique,
or personalized ornaments that we like to make.
Or even the ones that we purchase each year!
and a pretty box to put it in,
using these fabulous foiled papers!
I'm using the "Pastels" collection for this project.
This would make such a lovely Christmas gift,
and there are so many different ways you could personalize it!
Here's the ornament in the box:

Here's the ornament out of the box:

Here's how I made it:
Materials Used:
Cut File: Simply Crafty SVGs - Round Ball Ornament Box;
Machine: Cricut Explore Air;
Paper: Lavender Cardstock (to match lavender foiled paper);
Dies: Memory Box - Wreath, Your Next Die - Ornaments, Unknown - Bow;
Punches: Martha Stewart - Holly and Branch;
Nuvo Drops: Bottle Green, Simply White.
1. I began by cutting the Ornament Box out, as per the instructions of the cut file. The cut file includes three options. I opted to use the one with the round front opening. I cut the box from lavender cardstock, and the panels from Starstruck Turquoise foiled paper.
2. I adhered the panels in place, and assembled the box.

2. I inserted the base ornament holder into the box. With this...the box is finished.

3. Using the dies and punches, I got to work cutting the embellishments. I cut two wreaths and one bow. I then cut the ornaments out of all of the glossy foiled papers in the collection, and punched numerous holly and branches out of each of the colors in the collection.

4. I had planned to keep the design quite simple. However, since I had so many pretty little bits, I went a little farther with the embellishing! ;o)
5. I started by adhering one wreath in place around the front opening, and the other wreath to the center of the box top.
6. Next, I added the ornaments to the center of the wreath, and used the holly and branch punches to create a sway at the top of the wreath.

7. On the two sides of the box, I layered the holly and branch punches to resemble a garland. I then added the ornaments in place as if they were hanging from the garland.

Here's the other side:

8. I then went back and added the green and white Nuvo Drops in several places.

9. I kept the ornament simple. I added the bow to the front of the hanger, and adhered one of the holly punches to the front of the ornament.
10. I finished it off with three green Nuvo Drops.

The ornament fits perfectly, and safely, in the ornament box!
The foiled papers make it look so fabulous!
I think it would make a wonderful Christmas gift.
It would be an ideal way to present all those unique,
or personalized ornaments that we like to make.
Or even the ones that we purchase each year!
* * * * *
Thanks so much for stopping by today!
I'll be back soon with another fun Christmas project for Rinea!
* * * * *
Thanks so much for stopping by today!
I'll be back soon with another fun Christmas project for Rinea!
* * * * *
3 comments:
WOW! Nancy this ornament box is the best and most beautiful I've seen, a gorgeous creation and love the colour combo too.
Faith x
Fabulous make, Nancy! Love that color combination. What a great gift idea!
Now that's a fabulous gift idea. So many wonderful die cuts decorating that cute box. Awesome project Nancy!
Post a Comment