Showing posts with label Mirtillamente Craft Shop. Show all posts

Tuesday, 2 April 2019

Mirtillamente Craft Shop - Mini Album Tutorial

Hello, everyone!

I'm back today with a fun share for
This is a wonderful shop located in Italy!

Just before I get into my project...
...my year long term on this Creative Team is soon ending!
Mirtillamente is holding a Call for a new Creative Team!
You can find all the details on the blog HERE!

Okay, onto my project...

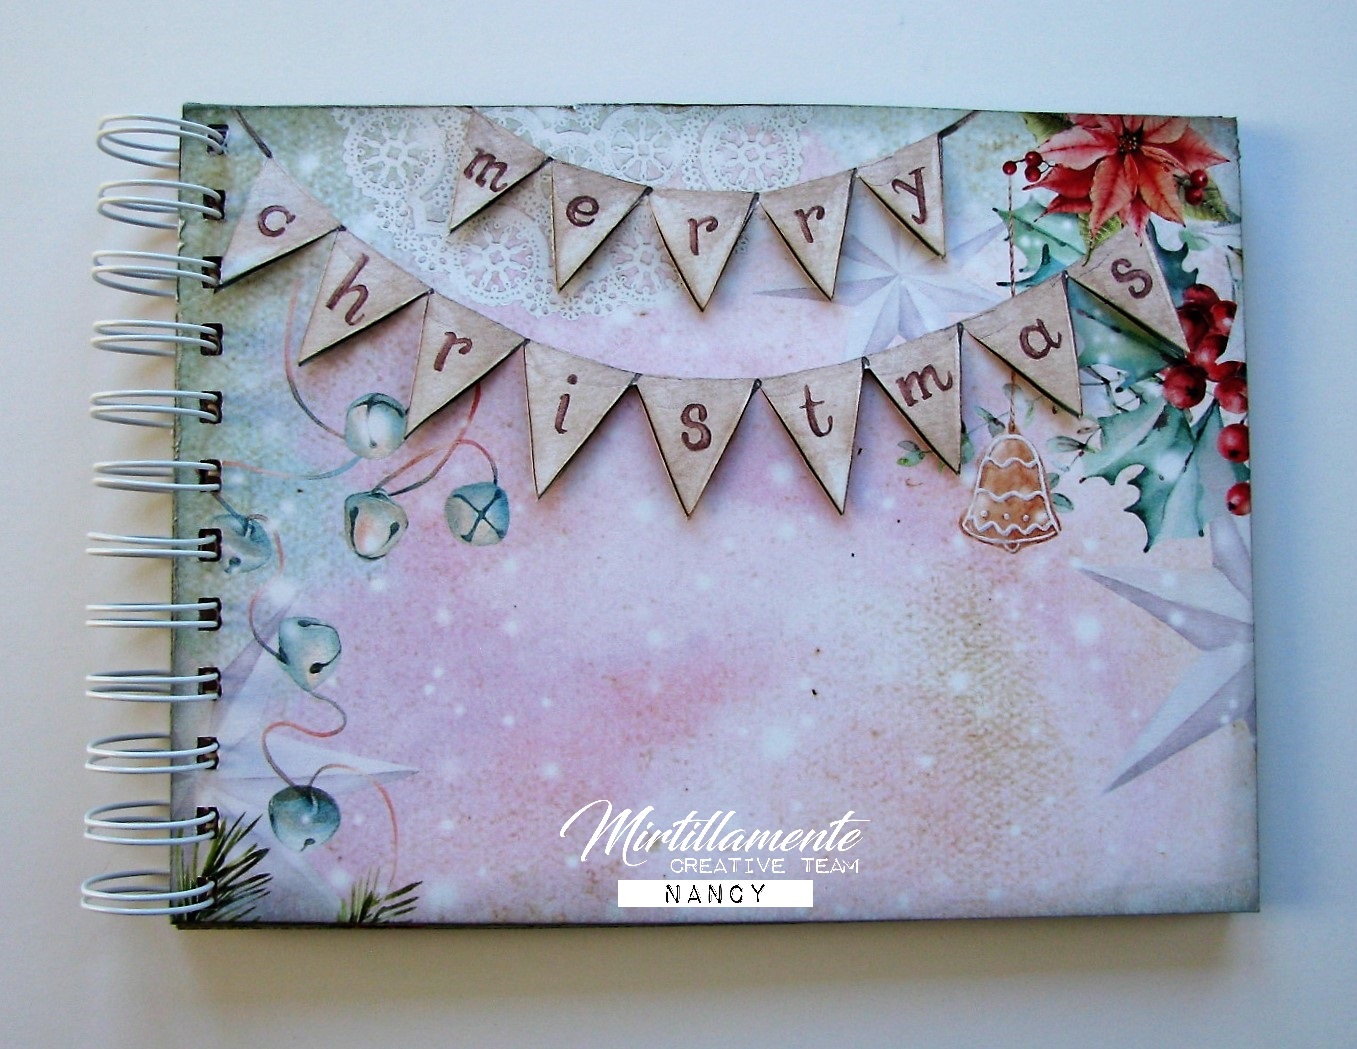
Today I'm sharing a new Mini Album Tutorial!


Materials Used:


Silver Metallic Cardstock - 12 x 12 - 1


Georgia Blues Papers

Georgia Blues Flowers


Gather the the supplies...


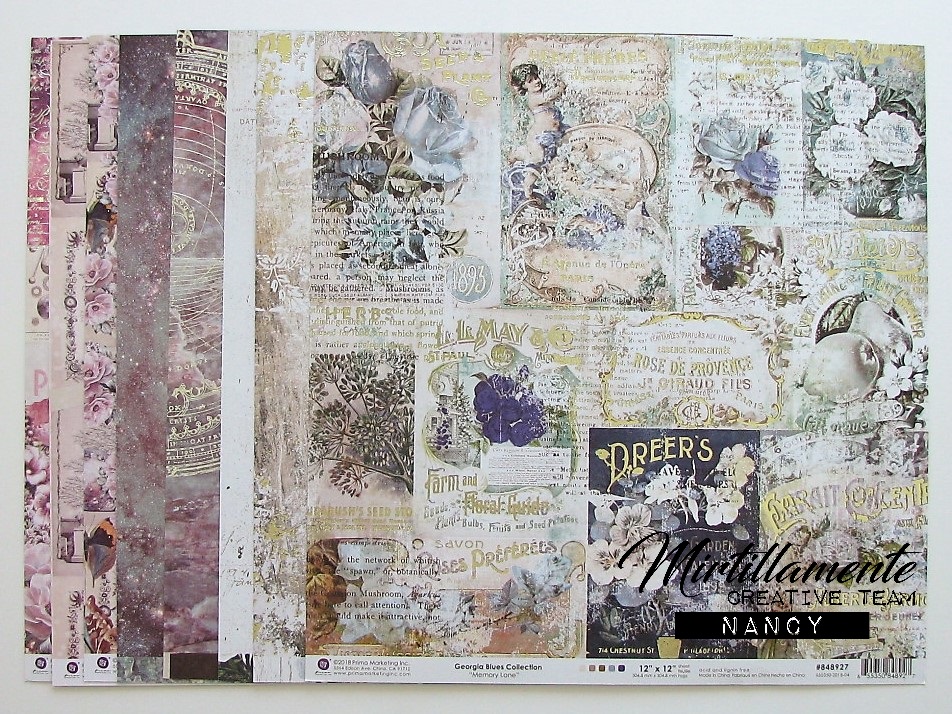
...as I have listed.


For the covers - cut all pieces 6" x 8":
2 from chipboard
2 from Silver metallic cardstock
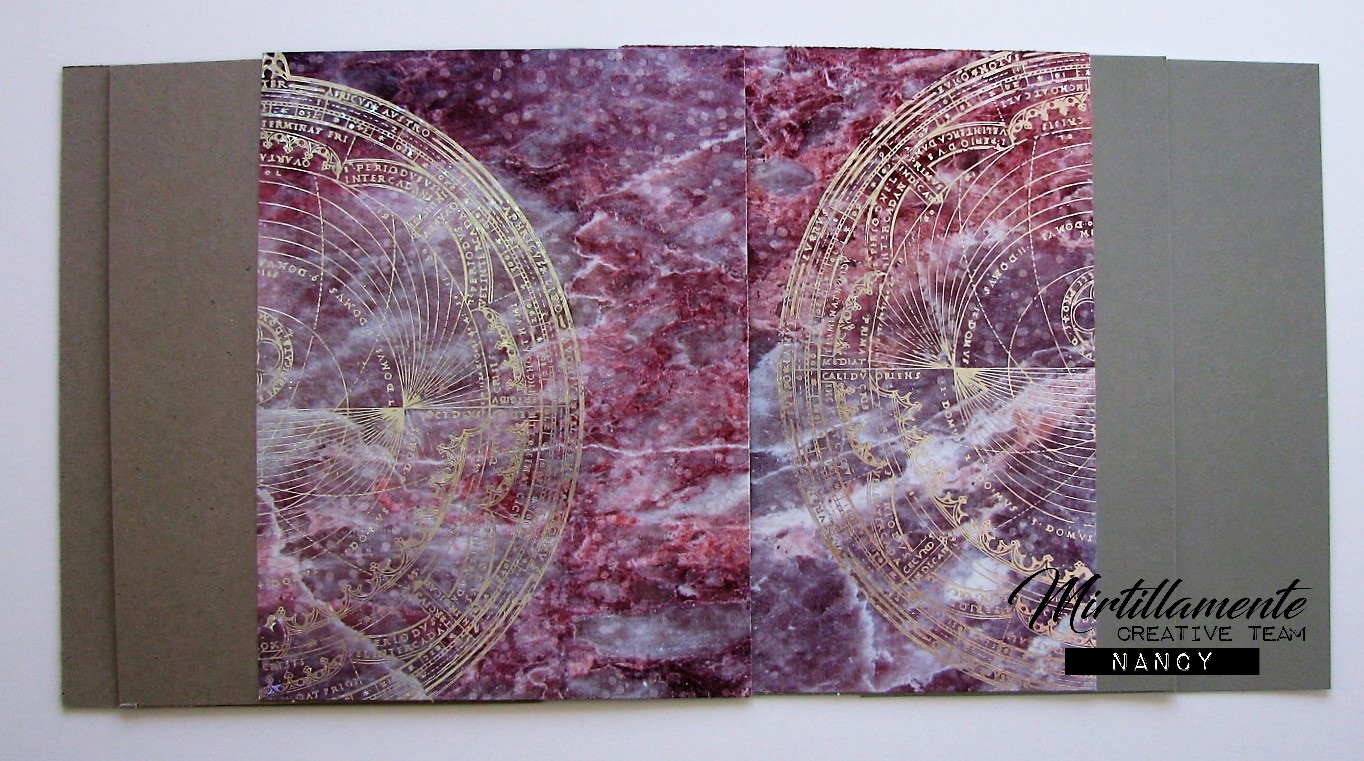
2 from Moon Child paper
(as shown - or choose another)


From light and dark purple cardstock:
Make 4 Envelopes that measure 5 1/2" x 7 1/2"
I used my envelope punch board to do this.


Cut a thin slice off the envelopes, as shown in the photo. 
On the long side of the light purple envelopes.
On the short side of the dark purple envelopes.
Punch a tab in the center of each opening, as shown.

Now have fun putting your album together, 
as shown in the following photos.


For the front cover,
Adhere the decorative paper to the front of the chipboard,
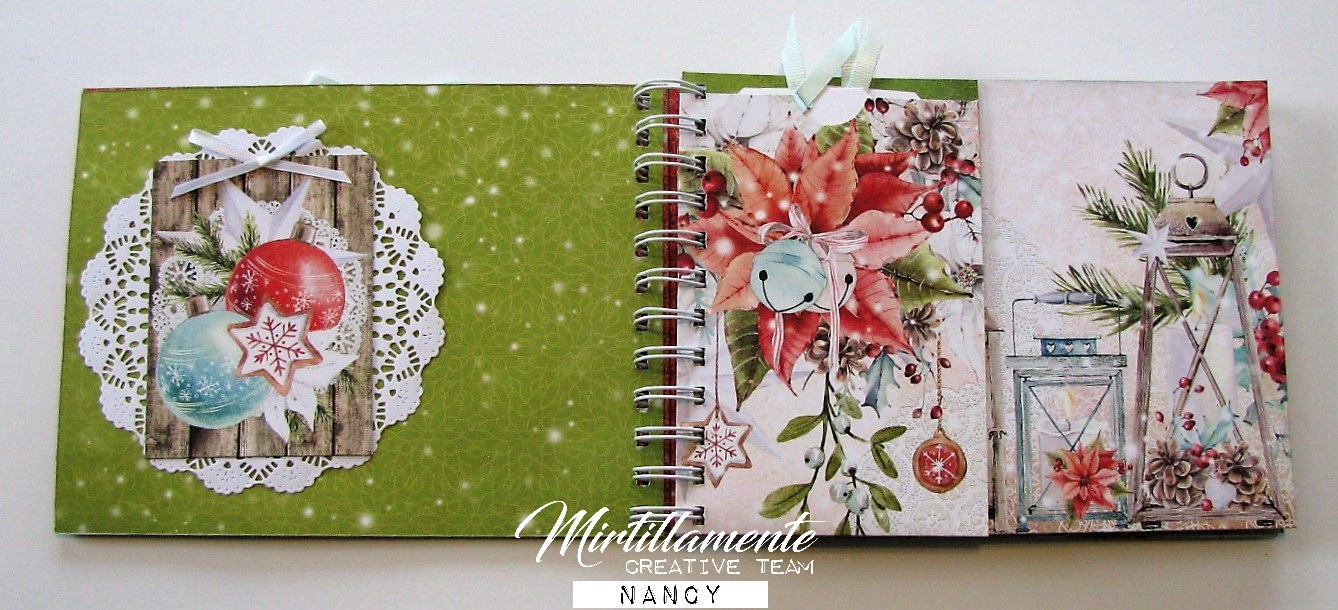
and the silver cardstock to the inside cover.


I added a triangle pocket to the inside to hold a card.
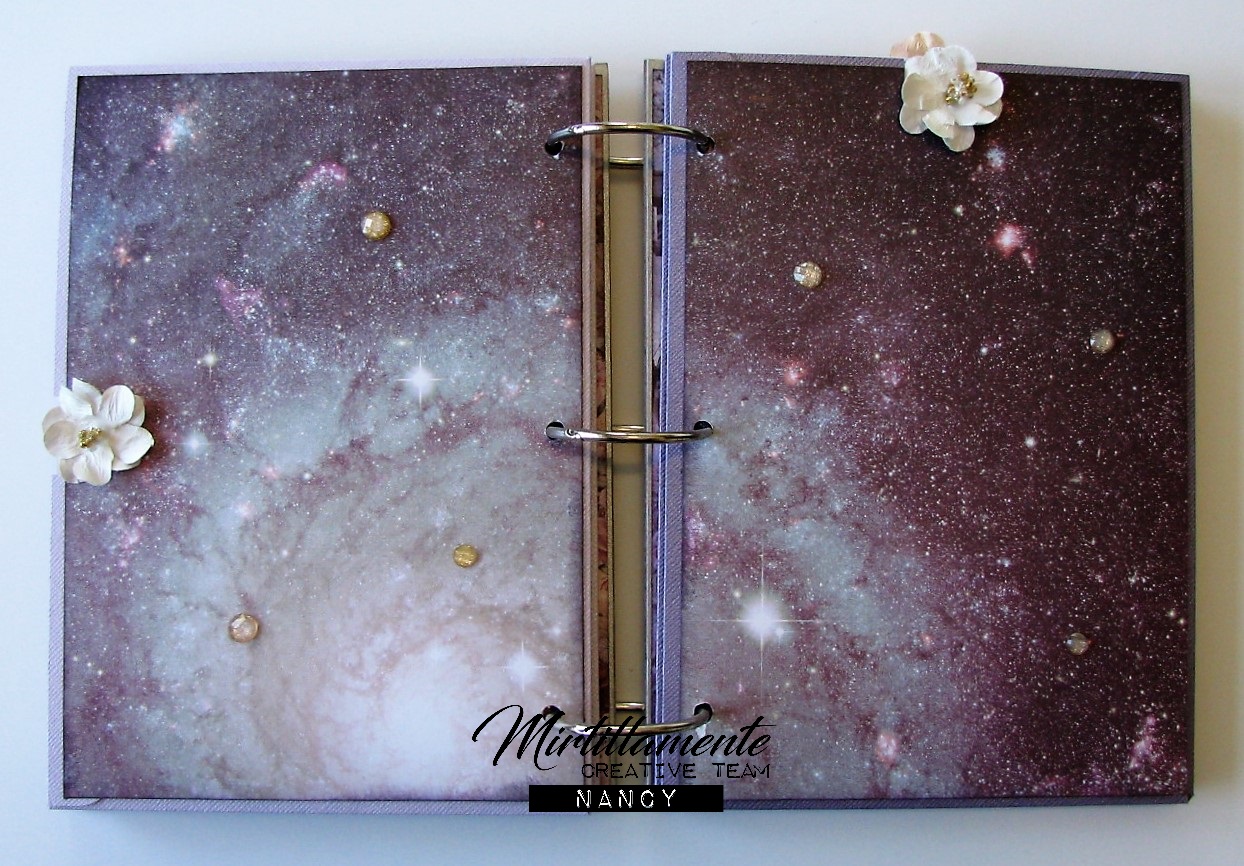
The next page is a double sided paper, cut at 5 1/2 x 7 1/2.
Both sides were too pretty to cover up!


On the right, I covered the envelope with paper, 
punching a matching tab opening.
I added a decorative band to hold several cards.
I inserted a tag into the pocket, and used a flower for a pull.


Decorative paper on the envelopes.


Decorative paper on the envelopes, with the tabs punched out.
Tags inserted in the envelopes, with flower pulls.


More pretty paper on the envelopes.
I added punched pockets along the bottom to hold cards.


The back of the last envelope.
I covered it with paper, and punched a tab.
Here you can see the envelope insert pulled out.


I added another decorative band to hold some more cards.
The page on the right is the final double sided paper.
I think it's my favorite!


The last page, and inside back cover.
More cards in the pocket. 
All have beautiful metallic silver foil!


Above: The back cover.
Below: One final look at the front cover.
I added a number of the enamel accents.


I hope you enjoyed my mini album!
I really enjoyed creating it for you!

Head on over to the Shop and check out all the fun goodies!
I'll be back again soon!


* * * * * * * * * * *

Here are all the links you'll need:

Saturday, 9 February 2019

Mirtillamente Craft Shop - SNOW? Card

Hello, everyone!

I'm back today with a fun share for
Mirtillamente Craft Shop!
This is a wonderful shop located in Italy!

Spring is right around the corner, right? ;o) 
So we have to finish using all of our fun Winter products!
I still had lots of my fun Echo Park Stickers left. 
That is what inspired this card:


Here are the products I gathered for my project:
The Echo Park - I Love Winter 12 x 12 Sticker Sheet
White Cardstock Card Base - 4 1/4" x 9 1/4"
Piece of Heide Swapp - Magnolia Lane Paper - 4" x 9"


I began by adhering the decorative paper to the card front.
 It already looks frosty, doesn't it?


Then I looked at the Sticker Sheet and saw that many of the Stickers said "SNOW". 
I decided that would be the title of my card. 
So I began by using the letter stickers to add "SNOW" to the top of my card. 
I then added a question mark behind it.
 I also added a border sticker to underline it.

Next, I added the SNOWMAN sticker, with a snowman beneath it. 
I then added the Snowflakes sticker. 
To fill in the gap, I came back and added three pretty silver sequin snowflakes.


For the bottom half of the card, 
I added a Snowflake sticker, beside the Snow Day sticker.
Finally, I added the "Snow Much Fun" with the cute little penguin sticker!

I think Snow, Snowmen, Snowflakes, and Snowdays are just Snow Much Fun! 
I Love Winter! :o)


So for a finishing touch, 
I added the "I Love Winter" Banner Sticker to the top left corner of the card.


All together it's just a card full of Winter goodness!


There was even a fun sticker for the inside of the card:


 With that...I wish you all Warm Winter Wishes...
quick...before Spring arrives!  


Thanks so much for stopping in today!
I'll hope to see you again very soon! :o)


* * * * * * * * * * *

Here are all the links you'll need:

Saturday, 26 January 2019

Mirtillamente Craft Shop - Freezing Season Layout

Hello, my friends!

Today I have a Winter layout to share with you for Mirtillamente Craft Shop.
(The shop is closed for inventory just now)

 I wanted to play with this photo of a beautiful Blue Jay. 
He is a regular visitor to my back yard. 
He is VERY noisy, and always lets me know when he is there! 

I call this my Freezing Season Layout:


Here is how I created it:

I began by gathering a navy cardstock for my background base. 
I then used two Dylusions stencils (Let It Snow and Small Bubbles) 
and Prima art extra vagance Snowflake Paste.


I stenciled my snowy design, and then set it aside to dry.
 When it was dry, it resembled snow beautifully!


Next, I cut a mat for my photo from white cardstock, 
and I cut several strips from the Les Papiers de Padore - Weeeek-end! paper. 
I also punched several circles from white cardstock using my 1/2", 1", and 1 1/4" circle punches. 
These will be my snowballs.


This photo shows how I assembled all these pieces. 
I first distressed all the edges with a distressing tool. 
I began with matting the photo. 
Then I added a strip of paper to the top, and a smaller strip to the bottom. 
I then adhered it to the background using foam tape. 
I then added a longer strip of the paper along the bottom of the page. 
I then added a variety of the "snowballs" randomly around the page.


Finally, I added some fun stickers from the 
Echo Park - I Love Winter 12 x 12 Sticker Sheet. 


Here's a closer look at the photo, 
and the embellishments surrounding it:


Here's the bottom of the page:


The top right corner: 


Here you can see some of the dimension the foam tape adds:


The paste also adds wonderful texture:


Here's one final look at the finished page:


Thanks so much for stopping by today! 
May you enJOY happy Winter days!


* * * * *
Here are all the links for you:


!

Friday, 21 December 2018

Mirtillamente December Post - Merry Christmas Mini Album

Hello, everyone! Merry Christmas to you all!
I am here to show you a Christmas Mini Album created with beautiful products from the Mirtillamente Craft Shop! All the links will be found below my project. I have LOTS of photos to share with you. Here is a look at my finished album cover:


Here is how I made it:
I began by deciding on my size. If you look at the finished cover, I was inspired by the "Merry Christmas" banner. To take advantage of it, I chose to make my album 8" wide by 6" tall. I also wanted to have chipboard covers; front and back. I cut all my pieces 8"x 6" - 2 chipboard pieces, and 9 decorative papers. You can look ahead to my finished album to see how I cut the paper for the base pages. These papers are covered with gorgeous designs, and I took full advantage of them!


I wanted to bring special attention to the banner on the front cover. I first covered the chipboard with a layer of teal colored cardstock that was slightly smaller than the chipboard. It matched the darkest teal in the design on the patterned paper. Then using a very sharp blade, I cut the bottom points of the pennants on the banner. You can see in the photo below, where I place a skewer underneath them.


Before adhering the decorative paper onto the teal cardstock, I placed foam pop dots to the back of each pennant of the banner. I added adhesive to the rest of the page, peeled off the backing of the pop dots, and adhered the decorative paper in place, on top of the teal cardstock. 


The teal cardstock peeks out just a little bit.  


Now the banner stands out beautifully, making it a real focal point of the front cover!
I went on to cover the other side of the chipboard with paper. I did the same with the back cover.
I thin inked all the edges of all the pages. Finally, I bound the album together with my Bind-It-All,
using 1" white O-wires. Now all that's left is the embellishing!


To finish off my front cover, I added part of a doily along the bottom center. I then fussy cut a large poinsettia from one of the pages, and added most of it using foam tape. Finally, I added some Prima crystals and a little ribbon bow to the top. 


The red page is the back of the front cover. I added a white doily. On top of that I added a jounal card, and a little ribbon bow. The ride side page is just the beautiful paper.


The left side is the same, with the doily and the journal card with the bow. Between the pages I added a pocket, created from an extra strip of paper. To the pocket I added two white tags.


To the back of the pocket I added one of the photo frame journal cards. The right side is more beautiful paper.


Here I have added a doily again, and turned the photo frame journal spot sideways. Between the pages I have added an extra under-cut strip of paper. I decorated it with some fussy cut elements.


More of the gorgeous decorative paper. 


To this spread I added two corner pockets. These are decorated with more fussy cut elements. A lovely journal card is tucked into each one.  


A matching doily is folded in half to form a pocket, and inserted between the two pages. This doily pocket is decorated with ribbon bows, and holds two more journal cards. 


Here's another lovely spread, with an under-cut page insert.


To the back side of it I added this sweet little die-cut mini envelope with a letter that reads "God Jul"!
Isn't that adorable? I love it so much I wanted to add it to every page! lol 
On the bottom right corner I added several fussy cut elements. 


Another pretty spread, consisting of corner pockets, journaling spots, and a pretty doily with ribbon bows. 


Here I added some pretty shimmer ribbon across the corner, and a fun tag pocket.


I added a pretty bow, and a little gingerbread house to keep the tab closed.


This pocket holds another white tag with ribbon. The right side is the inside of the back cover. It has another white doily with a journal card on top. 


Finally, here is the back cover. So frosty and pretty in pink!


Here are links to all the products I used from Mirtillamente Craft Shop:

Prima Marketing enamel shapes - Amber Moon

Christmas Dies by Lene

Mintay by Karola Witczak - Christmas Stories


* * * * *
Linking Up To:

Mini Album Makers Challenge


* * * * *


* * * * * * * * * * *

Here are all the links you'll need:


Blog Archive