Tuesday, 8 October 2024

Fun Thanksgiving Place Setting Idea for Printable Cuttable Creatables

         Hello, my friends!

It's time for a new post for Printable Cuttable Creatables!

Thanksgiving is next weekend here in Canada, and next month in the US.
I've come up with a fun place setting idea that I wanted to share.

I wanted to take a photo of this on my Thanksgiving dinner plate.
However, I can't find half of my Thanksgiving dishes.
I have cups & saucers, cream & sugar, and a serving bowl.
No plates to be found...yet!

Here's my project:


Isn't that lovely?...and perfect for a Thanksgiving place setting!
I sized it at 6 1/2" wide, so that it would fit nicely on a plate.

Here's what I cut out:


You might notice that I cut an extra base piece in green.

Here's what I did with that:


I added the green piece to the back of the neutral base.
I added a stamped journal spot, along with the "Thankful" title.
If you don't have appropriate stamps, 
you can do the same thing with a ruler and pen.

All of the guests at my Thanksgiving dinner will have a Thankful Heart on their plate.
They can then document whatever they are thankful for,
and take it home for a reminder.


My dishes really suit the style of this project.
If you're setting a fancier table, you could make some simple adjustments to make it work.
Just use some foiled or glittered papers, and add some sparkle and shine!

* * *

Printable Cuttable Creatables Products Used:

Other Materials Used:
Cricut Explore Air Machine;
Ranger Archival Ink;
Tim Holtz Stamp;
Carta Bella Title.

* * *
 
Use my code to get 15% off your purchase:


* * *

Thanks for stopping by today!
I'll be back soon with another fun project!

* * * * *

Here are all the links for you:

Printable Cuttable Creatables Shop

Printable Cuttable Creatables Blog

Printable Cuttable Creatables Facebook     

Wednesday, 2 October 2024

Happy Thanksgiving Day with Dr. Digi's House of Stamps

 Hello, my friends!

I'm very happy to be sharing a project as Guest Design Team member for
Dr. Digi's House of Stamps!

If you're not familiar with Dr Digi's, it's an online shop that carries a wonderful - and fun -
assortment of digital images, papers, and sentiments. They also carry some fabulous cutting files!

I have used all four of those things to create my card;
 the digital pumpkin image,
the pumpkin background paper,
the Thanksgiving sentiment,
and the brick cut file.

Here it is: 


I created a 5 1/2" square card base, from white cardstock.
I then printed the background paper out, and cut that at 5 1/2" square,
adhering it to the front of my card base. 
I also sized the brick stencil at 5 1/2" square, and cut it from black cardstock.
I sized the pumpkin image to print one large and two smaller pumpkins.
I then coloured them and fussy cut them out.

I snipped out part of the brick cut, to show off more of the background paper,
and to open a spot for the sentiment.
The sentiment was circle die-cut, and then matted twice,
before adhering it in place with foam tape.
I backed the brick with a matching solid coloured cardstock.
Finally, I adhered the pumpkins in place;
the large one flat, and the two smaller with foam tape.


Thanksgiving is fast approaching here in Canada, and next month in the US.
So I thought it would be appropriate to create a Thanksgiving card.
Since all of the products I used are digital, and available right away,
you have lots of time to make one of your own! :o)

* * *

Dr.Digi's Files Used:

Pumpkin Image;

Pumpkin Polka Dots Backing Paper;

Thanksgiving Sentiment Sheet 01;

Old Bricks Stencil.

Other Materials Used:
Recollections Cardstock:
WRMK Nesting Circle Dies;
Spectrum Noir Markers.

* * *

Thanks for stopping by today!
I'll be back to share another fun project very soon!

* * *

Dr. Digi's Links:

Dr. Digi's House of Stamps Shop

Dr. Digi's House of Stamps Facebook

Dr. Digis House of Stamps Instagram

Wednesday, 25 September 2024

September Project for Bea Grob Mixed Media and More

 Hello, my friends!

I'm excited to be sharing my first Design Team project for 

Bea is a very talented artist, who has just released her own line of products!
She has stencils, stamps, washi stickers, and digital papers.
She is based in Switzerland, and ships all over the world.

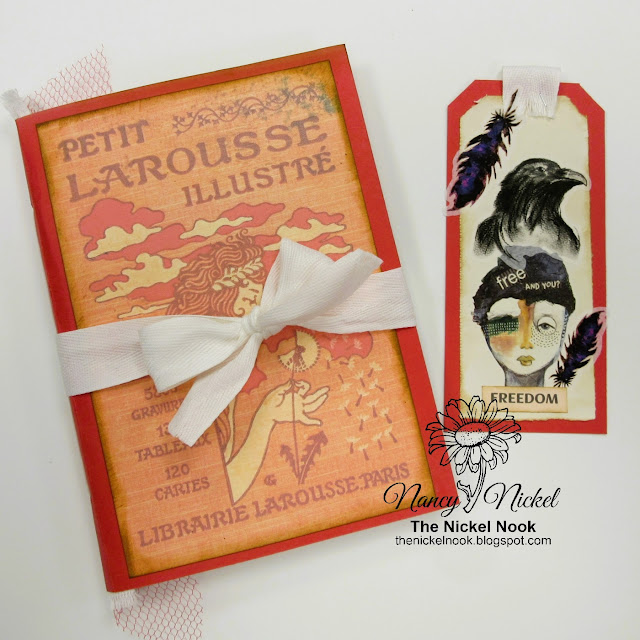
For my first project, I have created a junk journal, as well as a tag.

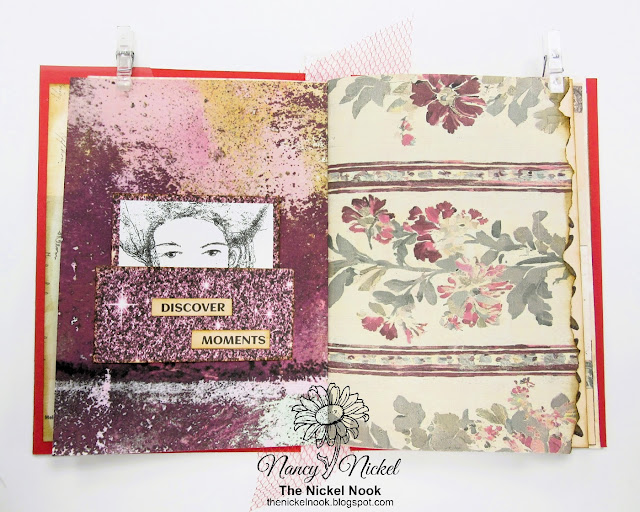
Here are a couple of photos of the pages inside:


The art pieces are all Bea's own original artwork.
The ephemera is also Bea's own; created from her collections.


I have a video on youtube where I do a complete walk through of the journal.
I also show you how I put together this tag:


Here is the video:


Here are the Bea Grob products I used:


Other Materials Used:
Red File Folder;
Vintage Photo Distress Ink;
Tim Holtz Tiny Attacher;
Strip of Tyvek;
White Cotton Ribbon;
Waxed Linen Thread.

* * *

Thanks for stopping by today!
Next month I will be adding further decoration to my journal pages!

* * *

Here are all the links:

Bea Grob Mixed Media and More Shop

Bea Grob Mixed Media and More Facebook

Bea Grob Mixed Media Instagram

Sunday, 22 September 2024

Autumn Greetings Card - Printable Cuttable Creatables

       Hello, my friends! Happy Fall!

It's time for a new project share for Printable Cuttable Creatables!

I am loving the cooler temperatures and ALL that is FALL!
So I just had to create a Fall card! 

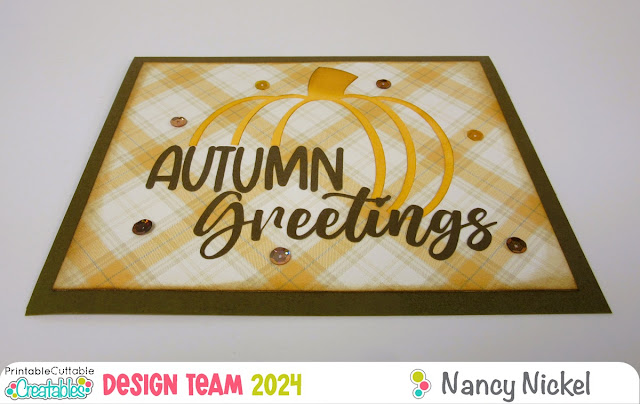
I have used:

 Autumn Greetings SVG Cut File,
 
and Autumn Harvest Digital Paper Pack.


Here's my project:


For me...plaid just goes hand in hand with Fall (Christmas too)!
So I used this lovely plaid paper from the collection for my background.


This is such a lovely/intricate cut!
In Cricut Design Space, I sized it to fit my card.
Then it was simply a matter of cutting and gluing.
I did do a little inking of the pumpkin stem, and around the plaid paper.
 

To finish everything off I added some pretty sparkly sequins!


There are SO MANY fabulous Fall files in the shop!
I'll be using more of them in the months ahead!

* * *

Use my code to get 15% off your purchase:


Printable Cuttable Creatables Products Used:

Other Materials Used:
Cricut Explore Air Machine;
Walnut Stain Ink;
Fall Colored Sequins.
 

* * *

Thanks for stopping by today!
I'll be back soon with another fun project!

* * * * *

Here are all the links for you:

Printable Cuttable Creatables Shop

Printable Cuttable Creatables Blog

Printable Cuttable Creatables Facebook     

Thursday, 12 September 2024

U R Out of This World Card - Printable Cuttable Creatables

         Hello, my friends!

It's time for a new project share for Printable Cuttable Creatables!

Have you seen all the fabulous Space Themed files that have been added to the shop?
So many fun new listings!
I have combined three of them on my project today.  

I have used:

Out of this World Title SVG,

Spaceship Rocket SVG File,

and Planets SVG File.

Here's my project:


Isn't that Fun? 
Here's how I did it:

I began by making my background.
I've inked "galaxy" backgrounds before.
However, these cuts have so much color in them that I wanted something different.
This was so simple!
I cut a piece of black cardstock 5 1/2" square.
I used a fan brush, with white acrylic paint, and simply splattered the paper.
Then I set it aside to thoroughly dry.


Here are all the pieces I cut out:


The fun title cut includes a little rocket.
Since I was using a bigger rocket, I decided to leave that out.
I had an idea...so I cut 2 of the "OUT" and "WORLD".
From the second cut, I used only a "U" and an "R".
Now my title is "U R OUT OF THIS WORLD".


Then it was just a matter of gluing all the little bits together,
and adhering them in place on the background.
I then added it to a yellow card base.

I did curve the spaceship slightly, and adhered in place with foam tape.


Such a fun card to put together!
Head on over to the shop and check out all the space files!

Find them here:

ALL SPACE FILES

* * *

Use my code to get 15% off your purchase:


Printable Cuttable Creatables Products Used:
Other Materials Used:
Cricut Explore Air Machine;
Recollections Cardstock;
White Acrylic Paint.

* * *

Thanks for stopping by today!
I'll be back soon with another fun project!

* * * * *

Here are all the links for you:

Printable Cuttable Creatables Shop

Printable Cuttable Creatables Blog

Printable Cuttable Creatables Facebook     

Tuesday, 27 August 2024

Good Vibes Card for Printable Cuttable Creatables

  Hello, my friends!

It's time for a new project share for Printable Cuttable Creatables!
This time I have made a fun card that looks like Summer! 

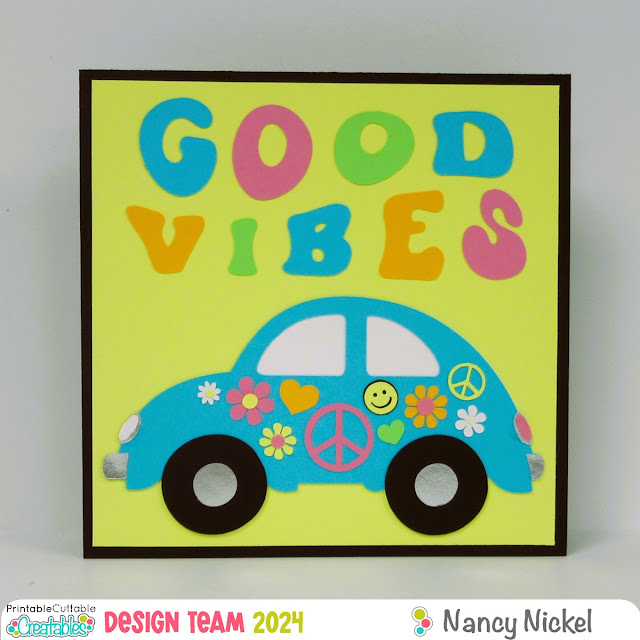
I have used:

Groovy Retro SVG Bundle 

This is another fabulous bundle of goodies that is full of creative possibilities!


Here's my project:


Isn't that fun?
These cars have always been near and dear to my heart!
Whether you call them Volkswagens, Beetles, or Bugs;
they're just wonderful!


My cousin is currently restoring his old Bug.
Maybe my card will give him some ideas for the paint job!? lol
It was so much fun to cut and add all those lovely decorative bits.


I used foiled paper to give the "chrome" the proper shine.
My black card base measures 5 1/2" square, with the yellow mat at 5" square.
I sized everything else to fit into 5", in Cricut Design Space.


This card was lots of fun to put together. 
All the little embellishments are quite small but they cut beautifully!
It was a breeze to put together, using tweezers and a glue pen.

* * *

Use my code to get 15% off your purchase:


Printable Cuttable Creatable Products Used:
Other Materials Used:
Cricut Explore Air Machine;
Assorted Cardstock;
Rinea Foiled Paper - Silver Gloss.

* * *

Thanks for stopping by today!
I'll be back soon with another fun project!

* * * * *

Here are all the links for you:

Printable Cuttable Creatables Shop

Printable Cuttable Creatables Blog

Printable Cuttable Creatables Facebook     

Sunday, 11 August 2024

Nature in Bloom Layout with Printable Cuttable Creatables

         Hello, my friends!

It's time for a new project share for Printable Cuttable Creatables!

I had an entirely different project in mind when I began.
I had recently printed out a page of flower photos that I had taken in my yard,
and found it lying on my desk. It inspired this layout.
I haven't done a layout in a long time, and this file was so much fun to play with!

I also want to share a couple of simple tips with you

I have used:

Nature in Bloom Embellishment Set

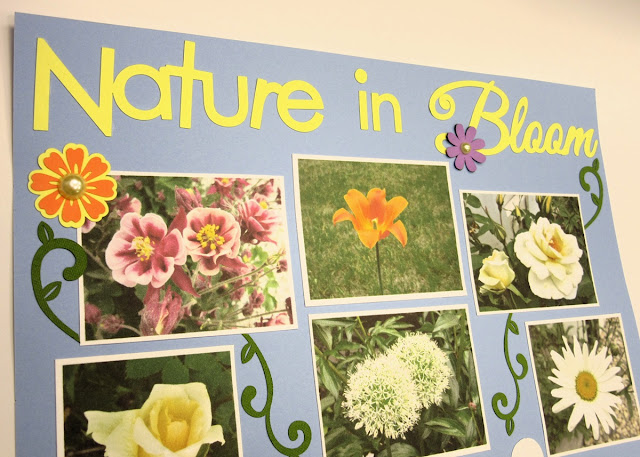
Here's my finished layout:


 This file is fabulous, and includes MANY different pieces and layers. 
My first tip for you is this: you don't have to use them ALL.
The purpose of this layout is to feature my flower photos.
That means that the embellishments are second, and cone be done more simply.
I opted to use only one fence layer, and I limited the number of flower layers too.
Rather than using the full word title embellishment,
I added only the words across the top of my page.


When I play with flower/grass/leaf cuts, I really like to add dimension to them.
I do this by curling up all the petals and fronds.
You might think that there is no point in doing this on a layout.
Once it's slipped into a sleeve, everything gets flattened. 
My second tip for you today is this: add something to the page that will prevent the flattening.

You can see some of the dimension on my page in the photo below.
I even curved the gate latch.
Now look at the center of the flowers. I added great big pearls.
Now the plastic sleeve will rest on the pearls, and not flatten all the curled pieces.


Although I used only some of the cuts in this file,
they do a wonderful job of showcasing my flower photos,


I hope that gives you some fun ideas of what to do with this collection!
It contains some intricate design details that can be used over and over again!

* * * * *

Use my code to get 15% off your purchase:


* * * * *

Printable Cuttable Creatable Products Used:
Other Materials Used:
Cricut Explore Air Machine;
Assorted Cardstocks;
Unknown Pearls.

* * *

Thanks for stopping by today!
I'll be back soon with another fun project!

* * * * *

Here are all the links for you:

Printable Cuttable Creatables Shop

Printable Cuttable Creatables Blog

Printable Cuttable Creatables Facebook     

Blog Archive