Showing posts with label Guest DT Project. Show all posts

Wednesday, 13 November 2024

Buzzing In with Dr Digi's

 Hello, my friends!

I'm very happy to be sharing a second project as Guest Design Team member for
Dr. Digi's House of Stamps!

If you're not familiar with Dr Digi's, it's an online shop that carries a wonderful - and fun -
assortment of digital images, papers, and sentiments. They also carry some fabulous cutting files!

Today I have combined a digital background paper,
along with two fabulous cutting files.

Here's my card:


Isn't that bee fabulous?!
I think it is my favorite cut file EVER!
It is so intricate and detailed!

I actually began by cutting my card base, using the shape feature in Design Space.
Top to bottom it measures 5 1/2 inches.
I printed the background paper out, and then cut it to mat on the card base.
Knowing I would just be using pieces of the honeycomb cut, I sized that at 6" square.
Once those pieces were all assembled, I measured the space left,
and sized my bee to fill it.


When the bee was adhered in place I did just a little embellishing.
I added big drops of Glossy Accents for the buggy eyes of the bee.
Then I used the Spectrum Noir Shimmer Marker to fill in the wings.


I have thoroughly enjoyed working with these fabulous products!
Big thanks to Dr. Digi for having me as a Guest DT!

* * *

Dr.Digi's Files Used:

Distressed Drops Backing Paper;

Honeycomb Stencil SVG File;

Bumble Bee Decal SVG File.

Other Materials Used:
Cricut Explore Air Machine;
Recollections Cardstock:
Ranger Glossy Accents;
Spectrum Noir Shimmer Pen.

* * *

Thanks for stopping by today!
I'll be back to share another fun project very soon!

* * *

Dr. Digi's Links:

Dr. Digi's House of Stamps Shop

Dr. Digi's House of Stamps Facebook

Dr. Digis House of Stamps Instagram

Wednesday, 2 October 2024

Happy Thanksgiving Day with Dr. Digi's House of Stamps

 Hello, my friends!

I'm very happy to be sharing a project as Guest Design Team member for
Dr. Digi's House of Stamps!

If you're not familiar with Dr Digi's, it's an online shop that carries a wonderful - and fun -
assortment of digital images, papers, and sentiments. They also carry some fabulous cutting files!

I have used all four of those things to create my card;
 the digital pumpkin image,
the pumpkin background paper,
the Thanksgiving sentiment,
and the brick cut file.

Here it is: 


I created a 5 1/2" square card base, from white cardstock.
I then printed the background paper out, and cut that at 5 1/2" square,
adhering it to the front of my card base. 
I also sized the brick stencil at 5 1/2" square, and cut it from black cardstock.
I sized the pumpkin image to print one large and two smaller pumpkins.
I then coloured them and fussy cut them out.

I snipped out part of the brick cut, to show off more of the background paper,
and to open a spot for the sentiment.
The sentiment was circle die-cut, and then matted twice,
before adhering it in place with foam tape.
I backed the brick with a matching solid coloured cardstock.
Finally, I adhered the pumpkins in place;
the large one flat, and the two smaller with foam tape.


Thanksgiving is fast approaching here in Canada, and next month in the US.
So I thought it would be appropriate to create a Thanksgiving card.
Since all of the products I used are digital, and available right away,
you have lots of time to make one of your own! :o)

* * *

Dr.Digi's Files Used:

Pumpkin Image;

Pumpkin Polka Dots Backing Paper;

Thanksgiving Sentiment Sheet 01;

Old Bricks Stencil.

Other Materials Used:
Recollections Cardstock:
WRMK Nesting Circle Dies;
Spectrum Noir Markers.

* * *

Thanks for stopping by today!
I'll be back to share another fun project very soon!

* * *

Dr. Digi's Links:

Dr. Digi's House of Stamps Shop

Dr. Digi's House of Stamps Facebook

Dr. Digis House of Stamps Instagram

Thursday, 11 August 2022

Final Guest DT Post for Artful Angel

  Hello, my friends!

Today I'm sharing a fun new project as Guest DT Member
for Artful Angel!

This is the final project that I will be sharing,
featuring July New Release Stamp Sets.

This time I've used just the Stand Tall Stamp Set.
It also has a companion Sentiment Stamp Set called High There.

These two stamp sets compliment each other beautifully!

Here's my card:


Isn't that sweet giraffe adorable?
I've used a different giraffe image this time,
as there are four of them in the set.

I colored him up with markers and then fussy cut him out.
I added him to a white die-cut base, using foam tape on the top,
but adhering him flat on the bottom.
I then stamped the "STAND TALL" beneath him.
Here's a closer look:


Originally I had intended to center the panel on my card base.
Then I changed it and moved the panel to the side.


Here is why I decided to do that.
This is the sentiment from the set, that I stamped on the inside of the card:


How perfect is the placement of that one unique giraffe?
So I had to keep it uncovered, right? 


I've had so much fun joining the great team over at Artful Angel!
BIG thanks to Charis for inviting me to Guest!

* * * * *

Artful Angel Products Used:

Stand Tall Stamp Set   

Other Materials Used:
Spectrum Noir Markers;
Spellbinders Romantic Rectangle 2 Die;
American Crafts Paper Pad - My Baby;
Crafts - Sparkle Gems.

* * * * *
Thank you very much for stopping in today!
I'll be back very soon!

* * * * *

Here are some links for you:

Artful Angel Shop

Artful Angel Facebook

Monday, 25 July 2022

Artful Angel New Release Instagram Hop!

Hello, my friends!

Here's my second post today!
It's also my second Instagram Hop Share today!

As I mentioned the other day,
I'm happy to be a Guest DT Member for the July Release at
Artful Angel!

Everything is happening over at instagram!


* * *

Here's my card:


I had so much fun making this one! 
The stamps are now available in the shop!

I used:


* * *

 The July Release is now available in the shop,
and we're having a fun Instagram Hop to celebrate!

You have an opportunity to win the entire release! ;o)

You'll find all the details, along with my fun project, over at my instagram:

@thenickelnook

Saturday, 23 July 2022

Artful Angel Guest DT Project

 Hello, my friends!

Today I'm sharing a fun new project as Guest DT Member
for Artful Angel!

This is the first of several projects that I will be sharing,
featuring July New Release Stamp Sets.
These stamp sets will be available for sale on July 25th!
(the links won't work until then)

I've used:

Stand Tall, 

and High There.

These two stamps sets compliment each other beautifully!

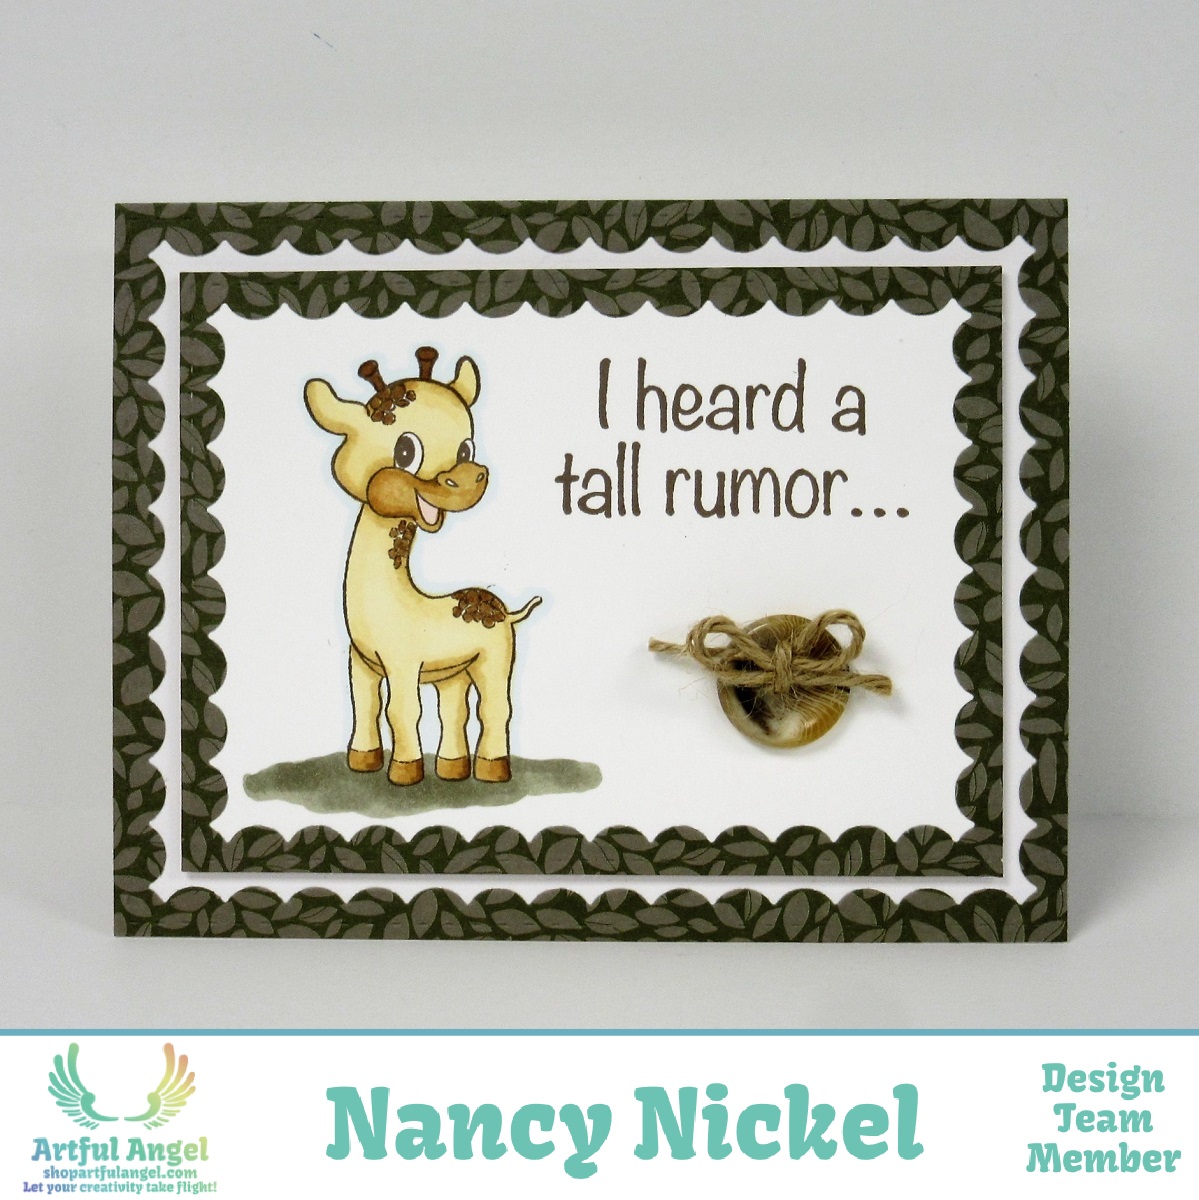
Here's my card:


Here's the inside of my card:


Isn't that fun?
I think the little giraffe is just adorable!

I stamped both the image and sentiment in brown ink.
I colored the image, and then surrounded it with some layered frames.
Finally, since we were talking about "old" I added an antique button.


Artful Angel Products Used:

 Stand Tall  
High There

Other Materials Used:
Spectrum Noir Markers;
Memento Ink - Rich Cocoa;
Maker's Movement Die - 
Antique Button;
Jute Twine.

* * * * *

As I mentioned, I'll be showing you more projects with these stamps.
The next one will be a fun Instagram Hop on Monday, July 25th!
I'll have a reminder post here and then hope to see you there!

* * * * *

Here are some links for you:

Artful Angel Shop

Artful Angel Facebook

Monday, 27 June 2022

Guest DT Post for Lilli Rain Designs

 Hello, my friends!

Today I have some fun projects to share
as Guest Designer for Lilli Rain Designs!

Zowie has the most wonderful assortment of vintage digital kits! 

I had the pleasure of working with two of them.

First up, I used the Mon Cherie Collection.

Here's what I made:


This is the front...

...and this is the back.


This is the inside:


It's a fun little trifold folio!


These are all the wonderful goodies inside! 
I added one piece of kraft cardstock and some ribbon,
everything else is from the kit.


* * * * *

For my second project I made a vintage tag, using the Dainty Dahlings Collection:


I used a manila cardstock for my base. 
Then I just had fun layering everything on top of it.


I added an eyelet and ribbon through the top of the tag.

To finish everything off I added some touches of glitter glue to the flowers.


* * * * *

These projects were so much fun to make!
Check out Lilli Rain Designs.

I'm sure you'll be inspired by the fabulous products! :o)

Monday, 26 July 2021

Colour Blast by Bee Arty - Guest DT Post

 Hello, my friends!

I'm back with my second Guest DT post for Colour Blast by Bee Arty! 
If you missed my first Guest DT post, you can find it HERE.

If you're not familiar with Colour Blast by Bee Arty...
it's a fantastic shop located in Australia.
They carry an incredible line of mixed media products,
along with all of our usual addictions:
paper, stamps, dies, stencils, etc.
They also offer a monthly kit subscription,
and these kits are loaded with incredible products!

I've created several projects for my second post.
I just kept playing and having lots of fun. 

I'll have links to all the fabulous products at the end of the post.

First, I made a tag:


For this first tag, I used a paper from the gorgeous Grateful Heart Collection.
I began with a black cardstock tag base,
and then cut the decorative paper to fit.
I fussy cut around the flowers and leaves,
and left them extending past the tag.


I die-cut the lovely butterflies using the Butterfly Effect Die.
I folded the wings up and then adhered them in place.
I added some glitter and bling, and a ribbon.

I also fussy cut some of the other leaves in the design,
and curled them up to add more dimension, as shown below.


Then I made another tag:


Here I used another black cardstock tag base,
and added another paper from the collection.
I first stamped the basket and the flowers onto the tag background.
I also stamped numerous flowers on the background.
I then stamped both the basket and flowers onto watercolour paper.
I coloured them in with watercolours, and fussy cut them out.
I added both elements in place on the tag, using foam tape.
Finally, I added some Stickles to the center of each flower,
and a ribbon at the top of the tag.
Aren't the hydrangea gorgeous?


Then I made a card:


For this card I used a black cardstock card base.
I cut a piece of watercolour paper to fit.
I then stamped the Forever Stamp Set with embossing ink,
and heat embossed it with black embossing powder.

I coloured the rose and banner in with watercolours,
and then did the smooshing technique to add some soft colour to the background.
Finally, I added some Stickles for a little sparkle.


Finally, I made three notecards:


For these three cards, I simply cut the panels from the Gathers - Cut & Colour Paper.
I made black cardstock bases and adhered the panels to them.
Again, I added touches of Stickles to each card,
and finished them off with a ribbon bow.


Colour Blast by Bee Arty Products Used:

 Grateful Heart Papers;

Butterfly Effect Die;

Hydrangea Basket Stamp Set;

Forever Stamp Set;

Gathers - Cut & Colour Paper.

Other Materials Used:
Tim Holtz Distress Tool;
Diamond Stickles:
Celebrate It Ribbon:
Ranger Detail Black Embossing Powder;
Stampendous Embossing Ink.

* * * * *

Big THANKS to Paige for having me as a Guest DT this month!
Don't forget to head over to the shop and be inspired!
I know that I am...every time I visit!

* * * * *

Here are all the links:

Colour Blast by Bee Arty Shop

Colour Blast by Bee Arty Facebook

Colour Blast Pinterest

Colour Blast on Instagram

Thursday, 8 July 2021

COVID CAPERS Traveler's Notebook for Colour Blast by Bee Arty

Hello, my friends!

I am so excited to be a Guest DT this month for Colour Blast by Bee Arty! 
Isn't that a fabulous name for a shop full of inspiring products?
They even spell COLOUR the correct way! lol

If you're not familiar with Colour Blast by Bee Arty...
it's a fantastic shop located in Australia.
They carry an incredible line of mixed media products,
along with all of our usual addictions:
paper, stamps, dies, stencils, etc.
They also offer a monthly kit subscription,
and these kits are loaded with incredible products!

For my first project share as Guest DT,
I have filled up an entire traveler's notebook.

I was so excited to receive the COVID CAPERS Collection.
This whole pandemic experience is something that we should be documenting.
This collection covers every aspect of life over the past 18 months. 
I have lots that I personally want to record about this period in time.
This TN is where I will do that.
I have left lots of room for recording all my thoughts and experiences.
There are LOTS of photos, so I have put a slideshow together for you.

Here you go:


Isn't that perfect for documenting this time?
The Collection really does cover everything!

* * * * *

I'll be back later this month with another fun Guest DT post.
In the meantime, head over to the shop and be inspired!
I know that I am...every time I visit!

* * * * *

Here are all the links:

Colour Blast by Bee Arty Shop

Colour Blast by Bee Arty Facebook

Colour Blast Pinterest

Colour Blast on Instagram

Tuesday, 16 July 2019

Quietfire Design - Guest Designer Post - Take Two!

Hello, my friends!

I'm back today with my second Guest DT post
 for Quietfire Design! 
If you missed my first post, please check it out HERE.


Now, if you're not familiar with Quietfire Design,
you really need to be.
Or...you may actually be familiar with Suzanne's work
but not realize that she is Quietfire Design.
Suzanne is one of the licensed designers for
Elizabeth Craft Designs.

Yes, so you probably do know her work well!
She designs the most incredible stamps, dies, and cut files!
I have the joy of sharing all three of those items with you this month. 

Another wonderful thing that I really must mention
is that Quietfire Design is a Canadian shop!
That's great news for all my Canadian friends! 
I'm finally sharing an "at home" shop! :o)
It's even greater news for my international friends! 
Quietfire ships internationally...but the prices are Canadian.
So it's a big win for you too! :o)

* * * * *
Today, I am sharing a mini album, of course!
You all know it's one of my favorite things to create! ;o)
This one is a combination of one of Suzanne's cut files, 
some of her incredible dies, and some gorgeous stamps!

 This time, rather than just a peek, I'll show you the front cover.
I know that you're really going to want to see what's behind the cover though!
You'll see the rest of my album at the Quietfire Blog!


So head on over to the Quietfire Design Blog and take a better look!
While you're over there, check out the shop and both blogs.
They're full of fabulous inspiration!

* * * * *
Here are all the links for you:


Friday, 5 July 2019

Swedish House Crafts - Guest Spot

Hello, my friends!

I know it hasn't been very long since I was on the DT of Swedish House Crafts.
Today I am back with a Guest DT post for them! 
Maybe they missed me? ;o)

So I have a fun project to share with you!
I have combined a sweet Paper Nest Dolls image,
with some fun Laserowe Love products,
to create this fun hanging.
I think it would be a lovely "Baby Sleeping" sign!


I began with this sweet Hippo stamp from the Paper Nest Dolls - Hippos Stamp Set.
 I stamped it onto watercolour paper, using Ranger Archival Ink.
 I then used a variety of watercolour pencils, along with a water brush, to colour it. 
I set it aside to dry.


Then I moved on to the Laserowe Love - MDF - Bookmark D. 
I thought this would be the perfect base for my little hanging. 
I used a pretty paper from the Laserowe Love - Lily Flower Collection, 
and covered the front and the back of the MDF piece.
 I inked around it with a pretty turquoise ink. 


Next, I took the Laserowe Love - MDF - Frame Banner, using the front frame piece only. 
I covered the front with Stampendous Embossing Ink, 
then sprinkled it with Beach Cruiser Embossing Powder from Sparkle 'N Sprinkle. 
I then heat set it with my heat gun. 
I then repeated the process once more to get a really nice thick coating. 


Then I die-cut the coloured image in a circle to fit behind the embossed frame, 
and adhered it in place.
 I then adhered the framed piece onto the base piece. 
I added some pretty turquoise pearls; five along the top, and three on the bottom. 


Finally, I tied a pretty yellow ribbon into a double-looped bow, 
and added it to the top of the embossed frame.
 I also added another yellow ribbon loop to the top of the base piece to serve as a hanger. 
Now it can be hung on the wall, the door, or even from the door knob.

* * * * *
Thanks so much for stopping in today!
I'll be back again soon with another fun project!

* * * * *
In the meantime,
head over to the Swedish House Crafts,
and take a look at all the fun goodies in the shop!

Thursday, 4 July 2019

Quietfire Design - Guest DT Spot

Hello, my friends!

I'm very excited about today!
Today is the first of two Guest DT Spots
that I'm doing this month for Quietfire Design! 
Woohoo!


Now, if you're not familiar with Quietfire Design,
you really need to be.
Or...you may actually be familiar with Suzanne's work
but not realize that she is Quietfire Design.
Suzanne is one of the licensed designers for
Elizabeth Craft Designs.

Yes, so you probably do know her work well!
She designs the most incredible stamps, dies, and cut files!
I have the joy of sharing all three of those items with you this month. 

Another wonderful thing that I really must mention
is that Quietfire Design is a Canadian shop!
That's great news for all my Canadian friends! 
I'm finally sharing an "at home" shop! :o)
It's even greater news for my international friends! 
Quietfire ships internationally...but the prices are Canadian.
So it's a big win for you too! :o)

Today, I have used a stamp and a cut file to create a card.
I'm only giving you a little glimpse of it here.
You have to head over to the Quietfire Blog to see the rest,
and to hear how I put it all together. 
You'll find it right HERE!

Here's a little peek:


So head on over and take a better look!
While you're over there,
check out the shop and both blogs.
They're full of fabulous inspiration!

UPDATE: Now that everyone has seen the post,
I'm adding a photo of my finished card:


* * * * *
Here are all the links for you:


Blog Archive