Showing posts with label Imagine. Show all posts

Monday, 2 September 2019

Rinea Tutorial - We Rise ATC

Hello, my friends!

Today I have a fun tutorial for Rinea.
This month we're in partnership with Joy Clair Stamps.

I'm going to show you how to make this fun ATC
using these fabulous foiled papers and stamps!


Here's how I did it:


Materials Used:
Joy Clair - Fly With Me Stamp Set;
Imagine StazOn Pigment Ink - Piano Black;
Stamp Positioning Tool;
Sizzix ATC Die.


1. I began by choosing my stamp designs, and stamping them on my chosen colors of foiled paper, using the StazOn ink. 
*I did my stamping with a stamp positioning tool. This helps prevent any sliding or mistakes. 


2. Once the ink was all set, I took my tiny scissors and fussy cut all the little pieces out. 
3. I then cut out my ATC base, and my ATC background.
4. I stamped the sentiment on the ATC background.


5. I adhered the ATC background onto the ATC base.
6. I adhered the fussy cut banner in place on the hot air balloon, as well as the basket.
7. Before adhering the hot air balloon in place on the ATC background, I curved the balloon with my fingers. I placed some foam tape under the center of the balloon, and then adhered the basket and the edges flat against the background. 


8. Finally, I adhered the clouds in place on the background. I positioned them with the clouds extending off the base, and trimmed excess. 


Here you can see some of the dimension...


...and all the pretty shimmer of the beautiful foiled papers!


* * * * *
Thanks so much for stopping by today!
I'll be back with some more Rinea Inspiration soon!

* * * * *

Here are all the links for you:


Friday, 16 August 2019

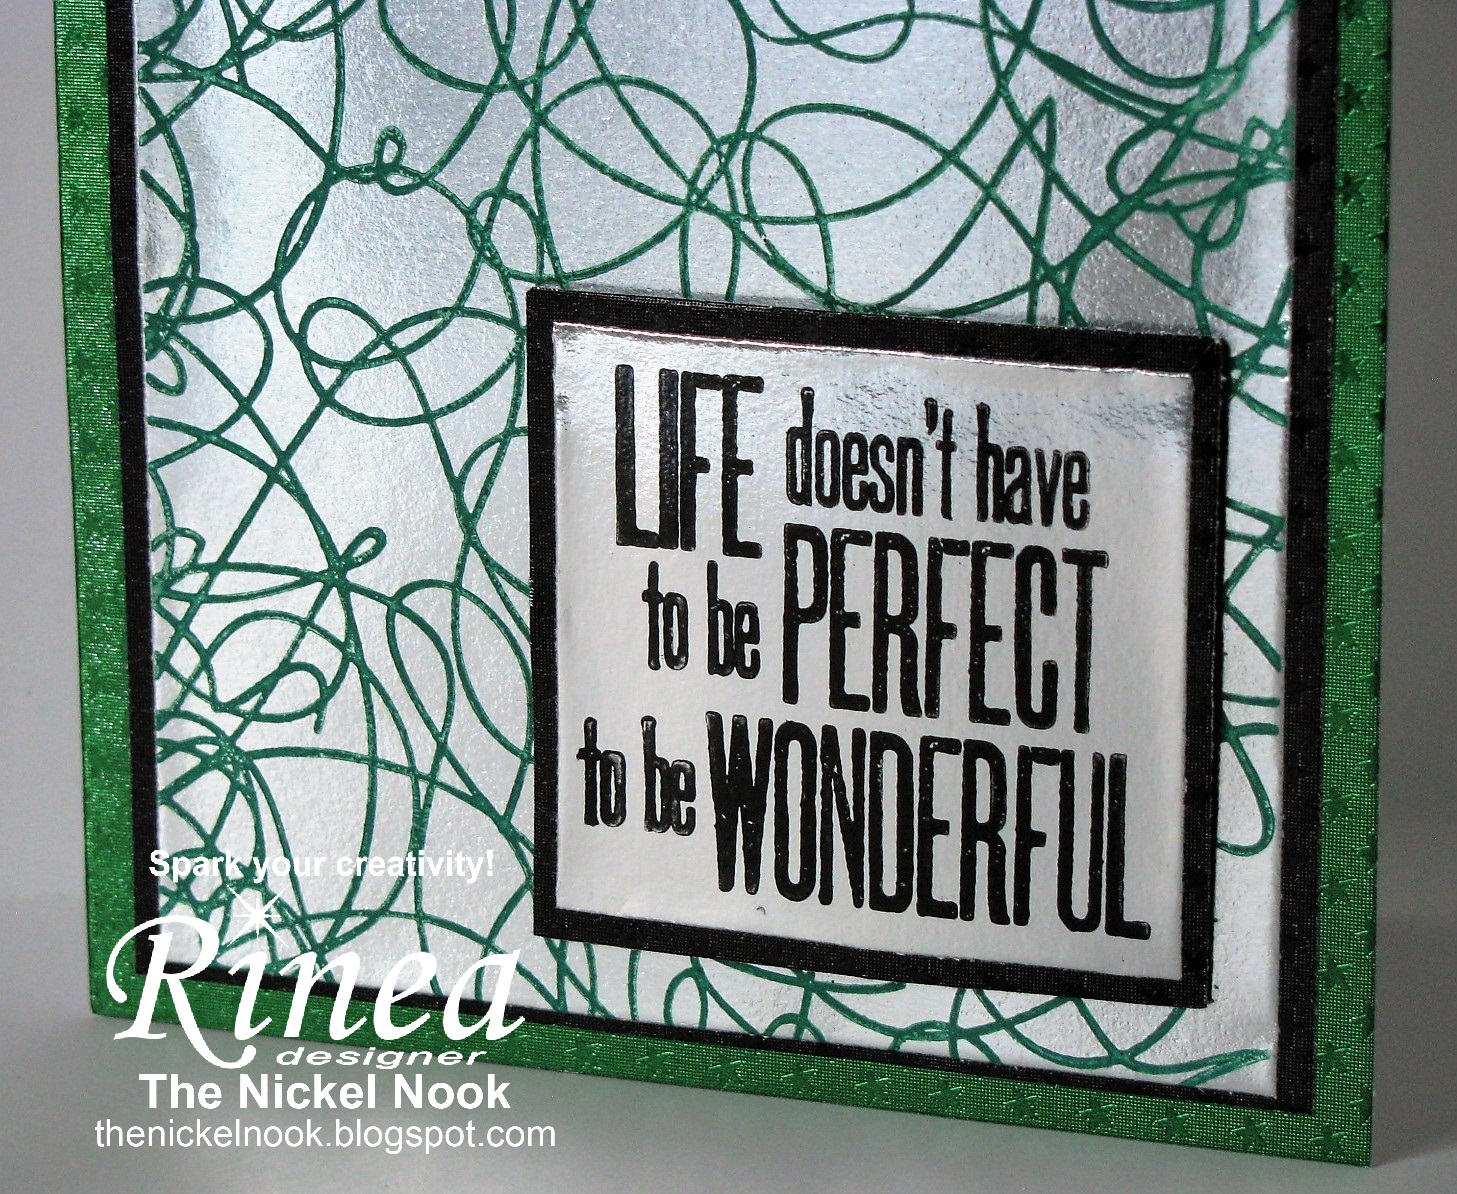
Rinea Tutorial - Wonderful Life Card

Hello, my friends!

Today I have a fun tutorial for Rinea.
This month we are partnering with Imagine Crafts.

I'm going to show you how I made my card, 
using these fabulous foiled papers,
along with some StazOn Pigment Ink!

I recently picked up this fun background stamp,
and have been anxious to use it.
I thought the "messiness" of it worked well with the sentiment.

Here's my card:


Materials Used:
Tim Holtz Stamps - Background and Sentiment;
Stamp Positioning Tool of Choice;
White Cardstock Card Base.


1. Using the Shamrock Green Ink, Stamp the background design onto the Silver/Gold Glossy Foiled Paper. Set aside.
2. Using the Piano Black Ink, Stamp the sentiment onto the Silver/Gold Glossy Foiled Paper. Set side. 


3. Mat each stamped piece with the Ebony Starstruck Foiled Paper
4. Cover the white cardstock card base with Emerald Starstruck Foiled Paper.


5. Adhere the stamped piece to the front of the card.
6. Add the matted sentiment with foam tape, as shown in the photo.


Here's one last look at the finished card:


* * * * *
Thanks so much for stopping by today!
I'll be back again soon with another Rinea Tutorial!

* * * * *

Here are all the links for you:


Friday, 2 August 2019

Rinea Tutorial - Floral Bouquet Card

Hello, my friends!

Today I have a fun tutorial for Rinea.
This month we're partnering with Imagine Crafts.

I'm going to show you how to make this card
using these fabulous foiled papers,
along with StazOn ink!


This StazOn Pigment ink works beautifully on Rinea Foiled Paper! 
I do recommend using a stamp positioning tool. 
It helps to prevent any slipping when stamping. 


Materials Used:
Tim Holtz Stamp - Illustrated Garden;
Stamp Positioning Tool of Choice;
Spellbinders Nestabilities - Elegant Ovals;
White Cardstock Card Base;
Squire Rhinestones;
Sheer Silver Ribbon.


1. Cut the largest oval die from the Rinea Silver/Gold Glossy Foiled Paper.


2. Stamp the floral image in the center of the die-cut oval, using the Peacock Feathers StazOn ink. 
Set it aside to dry.


3. Cover the white card base with a piece of Silver Glossy Foiled Paper
Mat it with a layer of the Sapphire Glossy Foiled Paper
4. When the ink is set, adhere the oval to the center of the card front with foam tape. 
5. Add a square rhinestone to each corner.
6. Finally, add a sheer silver ribbon bow.


* * * * *
Thanks so much for stopping by today!
I'll be back in a couple of weeks with a new Rinea Tutorial!

* * * * *
Here are all the links for you:


Friday, 30 November 2018

Rinea - Happiness Card in Partnership with Imagine

Hello, my friends!

I'm back with a new Rinea project share, using Rinea Foiled Paper!
This is another project created in partnership with Imagine.

Today I'm sharing a special card I created for an 84th Birthday celebration.
I used the gorgeous Princess Foiled Paper Variety Pack,
It was the perfect collection, as purple is the recipient's favorite color. 

Here's my card: 


I did some layered die-cutting.
The Glossy Lavender/Gold, and the Silver/Gold Glossy were perfect 
with my dark purple cardstock card base.
Then I used Gothic Purple StazOn ink, from Imagine, to stamp both the sentiment and image.
It's the BEST ink for this smooth foiled surface.


Here's a closer look it at the clear crisp stamping:


Finally, I added a pretty bow!


Other Materials Used:
Papers: American Crafts - Cardstock;
Dies: Spellbinders - Majestic Labels Twenty-Five;
Ink: Imagine - StazOn - Gothic Purple;
Stamp: Stampin' Up - Happiness Shared;
Ribbon: Celebrate It.

* * * * *
Thanks so much for stopping by!
Have a beautiful day! :o) 
* * * * *
Here are all the links for you:


Thursday, 15 November 2018

Rinea Tutorial - Christmas Tag with Imagine

Hello, my friends!

Today I have a fun tutorial for Rinea.

I'm going to show you how to make this fun Christmas Tag
using these fabulous foiled papers!


I'm using the Jolly Foiled Variety Paper Pack for this project.
Also, in partnership with Imagine, I'll be using StazOn Ink.


Other materials used:

  • Imagine StazOn Ink - Jet Black;
  • Stamp: Just Rite - Festive Poinsettia, Gina K Designs - Merry Christmas, Stampin' Up - Luke 2;
  • Dies: Spellbinders - Layered Poinsettias, Just Rite - Custom dies;
  • Cardstock: American Crafts - Green;
  • Punches: WRMK - Hole Reinforcer, Fiskars - Holly Border;
  • Ribbon: Trim It Up - Gold Metallic;
  • Beads: Round Rose Gold Metallic.

1. Using Jet Black StazOn Ink, stamp multiple Poinsttia leaves and flowers onto Emerald/Gold Glossy Foiled Paper.


2. Then use the Jet Black StazOn ink to stamp multiple Poinsettia flowers onto the Ruby/Gold Glossy Foiled PaperAlso, stamp several of the floral style berries.


3. Next, stamp both of the sentiments, and several of the holly berry outlines (I ended up not using these), with the Jet Black StazOn ink. Do this onto the Gold side of the Silver/Gold Glossy Foiled Paper.


4. Using the coordinating dies, cut out all the stamped designs.
5. Cut the tag base from the green cardstock. It measures 4 1/4" x 8 1/2". Angle cut the top corners.


6. Cut strips of the Gold Glossy paper to fit around the outside of the tag. Punch with the Holly border punch. Adhere in place.
7. Die-cut the sentiments using the Just Rite Custom Dies. Layer as shown in photo, and adhere in place on the tag.


8. Punch a hole in the center top of the tag. Using the WRMK Reinforcer punch, punch a reinforcer from the Gold Glossy paper. Adhere in place around the hole.
9. Thread gold metallic ribbon through the hole.


10. Shape the Poinsettia flowers and leaves, and adhere the layers together. 
11. Adhere one round Rose beads to the center of each Poinsettia.
12. Adhere Poinsettias in place on the tag, as shown in the photo. 
13. Finally, adhere several of the floral style berries randomly around the tag. 


* * * * *
Thanks so much for stopping by today!
I'll be back with another Rinea tutorial next month!

* * * * *

Here are all the links for you:


Tuesday, 23 October 2018

Clear Scraps - Fall Acrylic Home Decor Hanging

Hello, my friends!

I'm back with a new project share for Clear Scraps!

Today I am featuring the Expressions Large Fall V piece,
which you can find right HERE.

This is a wonderful piece of clear acrylic that measures 5"x 15".
It comes with a protective film on both sides,
that you just peel back when you're ready.
The creative possibilities are absolutely endless!!

Here is what I made:


I began by placing the "F" in an embossing folder,
and de-bossing an owl at the base of the letter.
I did this before removing the protective film.
After it was removed from the embossing folder,
I removed the protective film from the back of the letter.
Then I used StazOn ink in Ganache, 
and a Fantastix coloring stick, to color my owl.
I used short little strokes, to mimic feathers.
Then I added Jet Black StazOn ink for the eyes and lashes.
I adhered a die-cut pumpkin behind the owl before adding the woodgrain paper. 
I also added a large die-cut leaf on the one side.
I removed the protective film from the front of the letter,
and added three enamel dots, and a pretty ribbon bow.


In place of the "A" in Fall there is a lovely Maple Leaf.
I removed the protective backing, and added the checked paper to the back.
After removing the protective film from the front,
I added three enamel dots, and a die-cut flourish.
I also added a small ribbon bow around the stem.


Here again, I removed the protective backing, 
and adhered paper to the back of the first "L".
I added another large die-cut leaf behind the letter.


While the protective film was still in place,
I ran the second "L" through a decorative embossing folder.
After it was embossed, I removed the protective film from both the front and the back.
I inked the back of the letter with the Ganache StazOn Ink.
Once it was dry, I adhered yellow paper behind it.
I then adhered the pumpkin and crow in place, on the back of the letter.
The die-cut flourish, acorn, and leaves were added to the front.
Finally, a small ribbon bow was adhered in place.


Here's one final look at the finished piece:


Other Materials Used:
Papers: Recollections - Autumn;
Die-Cuts: Recollections - Autumn;
Enamel Dots: Your Next Stamp;
Inks: Imagine StazOn - Jet Black, Ganache;
Ribbon: Celebrate It.

* * * * *
Thanks so much for stopping by today!
I'll be back very soon with another project share! :o)

* * * * *
Here are all the links you need:

Blog Archive