Showing posts with label Relative - History DT. Show all posts

Wednesday, 17 November 2021

12 Days of Christmas

 Hello, my friends!

I had so much fun making this new Christmas project!
I'm calling it the 12 Days of Christmas
because I made 12 little treat boxes.
If you doubled it, and made 24,
then you would have a wonderful advent collection!

To make this project, I used the adorable Gift Carton Die Set from the Maker's Movement,
along with the fabulous Reindeer Christmas Collection from Relatively Thoughtful.

These papers all coordinate so beautifully and they're great quality,
just perfect for this little carton.
The die cuts brilliantly and they're so easy to put together.

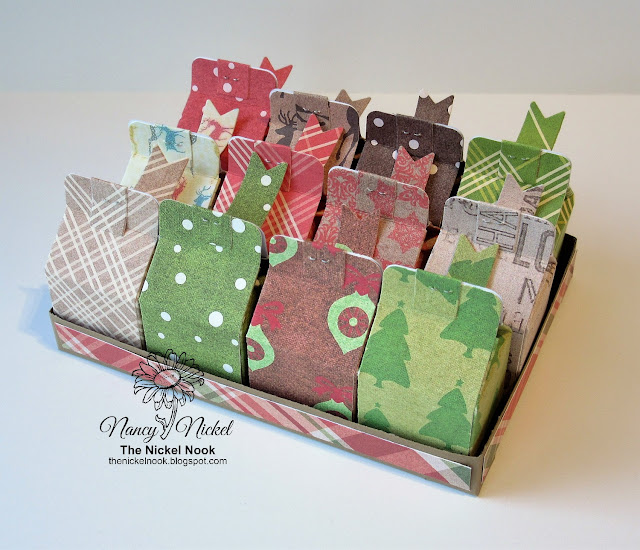
Here's my little collection:


I cut one die and one tag from 12 different papers.
I adhered the bottom of the carton closed.
I folded the matching tag over the top of the carton,
and stapled it in place using my tiny attacher.
I then curled the tags up a little bit so that they could be placed in rows.

This is the back.
To keep all 12 cartons contained I made a little tray from kraft cardstock.
I added strips of the pretty plaid paper to finish it off.


Here's a closer look at one of the cartons.
Isn't it the cutest thing?
There's lots of room to tuck a little gift inside:
goodie, money, jewelry, etc.
It might be a bit small to fill with the actual "12 Days of Christmas" items
but there are so many creative ways to fill them!
A name or number can be written on the tag.


Here's one final view from the top. 
Let me know if you have any questions about the tray.
Another option would be to attach a ribbon to the top
and hang the cartons on the tree! :o)

* * * * *
Materials Used:

Relatively Thoughtful: Reindeer Christmas Collection,

Maker's Movement: Gift Carton Die Set.

* * * * *

Here are all the links for you:

Relative - History Shop

Relative - History Blog

Relative - History Facebook

Maker's Movement Facebook

Friday, 29 October 2021

Monochrome/Masculine Slimline Christmas Card

 Hello again friends!

I know that I've been swamping you with posts lately.
Thanks so much for coming back time and again.
I'll soon be all caught up and back to my regular schedule.
This was actually an October project that I missed sharing here.

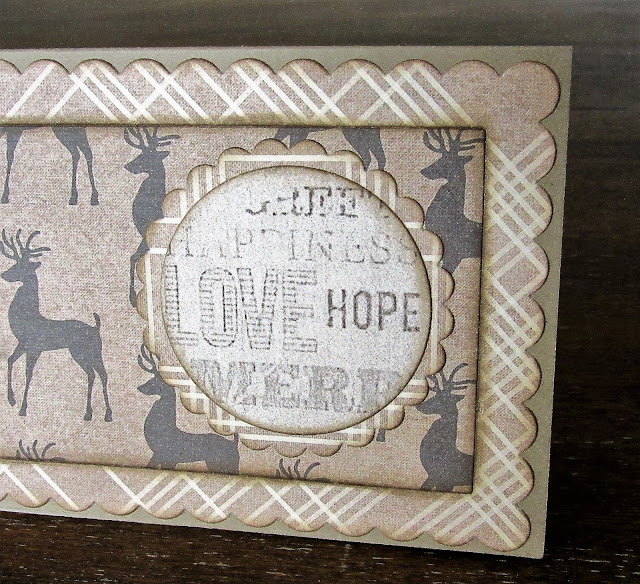
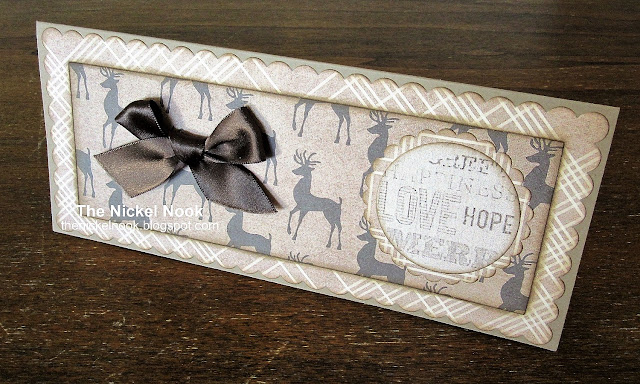
Today I'm sharing a fun monochrome/masculine Christmas card.
I've used the Slimline Essentials Die Set from Maker's Movement,
and the Reindeer Christmas Paper Collection from Relatively Thoughtful.

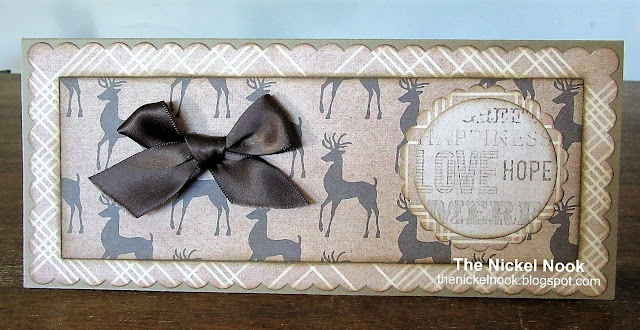
This is just the card for the men in your lives:


I used kraft cardstock for the base.
Then I chose several of the brown/tan papers that coordinated well.
I die-cut them, inked them, and layered them.


I die-cut the circle from the sentiment paper,
positioning it so that lots of my favorite words were included.


To finish it off I added a brown satin ribbon bow.
It's even a masculine bow, right? ;o)

This combination of products makes such a great Christmas card!

* * * * *
Products used:


* * * * *

Here are all the links for you:


Tuesday, 14 September 2021

Christmas in September

 Hello, my friends!

It's time for another new project share for Bowdabra!

This is also a new project for Relative-History!

I used a Bowdabra bow, along with a lovely paper from Relative-History,
to decorate a wood framed mirror. 

You can buy these simple wood frames at Michaels very inexpensively.
They come as photo frames or framed mirrors.

The paper I chose is from the beautiful Winter Wonderland Collection.
I distressed all the edges of the paper,
and adhered it in place over the frame.


 Then I went on to make the lovely red bow!

Here's how:


Supplies Used:
Red Sparkly Wired Ribbon;
Decorated Wood Framed Mirror;
Scissors.


1. Place the ruler over the Mini Bowdabra.
2. Cut a piece of the Bowdabra wire approximately 18" long. Fold in half. Insert into the Bowdabra tool, as shown in the photo. Tuck the extra length under the base of the tool. 


3. Determine how long you want your tails to be. Insert the ribbon into the Bowdabra tool at that measurement. I made mine about 10" long.


4. Then determine how wide you want your bow to be. I wanted mine to be approximately 6" wide. I made my first loop the width of the ruler, which is just over 3". That will give just a little bit of extra room for some fluffing of the bow, and making it 6" wide.
5. Twist the ribbon, insert it into the tool, and form your second loop on the other side.


6. Make a second loop, on top of the first, measuring 2 1/" inches. Twist the ribbon, and insert it into the tool. Repeat for the second loop on the left side.


7. Now measure out your second tail, and trim the ribbon off.


8. Using the Bowdabra wand, scrunch the ribbon all down tightly.


9. Pull the wire up from beneath the Bowdabra Tool. Insert the wire ends through the wire loop and pull securely, holding the ribbon down with your other hand.


Here's a closer look at what that looks like.


10. Remove the bow from the Bowdabra Tool, and trim the wire ends.


11. To finish off my bow, I cut a small piece of ribbon, folded it over, and wrapped it around the center of the bow. This hides the wire, and makes a pretty center. This piece of ribbon can be stitched or glued in place.


Finally, adhere the ribbon in place to the top of  the decorated frame.
I then gave my ribbon tails a bit of a twist to finish it off!

* * * * *

Thanks so much for stopping by today!
I'll be back next month with another fun bow project!

* * * * *

Here are all the Relative-History links for you:

Here are all the Bowdabra links for you:

Bowdabra Shop

Bowdabra Blog

Bowdabra Facebook 

Friday, 25 June 2021

Relative-History - My Jane Austen Quote Album

    Hello, my friends!

I'm back again today, with a another new project share for Relative-History!
Relative-History is a UK based company,
dedicated to helping people tell their stories and document their family history.

When you do any shopping at Relative-History,
you can use code: RHNANCY10
That will give you a 10% discount on anything you purchase! :o)

I have to tell you that I had the BEST time putting this project together!
I hope you enjoy looking at it as much as I enjoyed making it!

With our focus being on Jane Austen,
I thought it would be fun to put an album together with some information on Jane herself.
That's how this project began but then it turned into more of a quote book.
I grabbed one of my SNAP albums and a variety of pocket pages,
and then filled it using products from Relative-History.
I've used a combination of physical products, as well as digital pieces printed out.
Most of the embellishments are also from the collection
and some are from wonderful free files that were shared at the special events.
(You'll find them Here at the Blog)

I die-cut an assortment of shapes from white cardstock.
Onto these, I hand wrote a variety of wonderful Jane Austen quotes. 
I had just purchased some pretty colored pens, so it was fun to use them.

I do hope you take the time to read the quotes...they're really fun!

Here we go:


I'm using a SNAP binder with the pretty green spine.
It worked beautifully with this photo from the collection,
as well as the gorgeous paper from the Romantique Collection.
I also added a strip of lace.


The first page focuses on Jane.


I turned this page into a pocket,
that houses a pull-out page with a tab on top.
Originally, I was going to fill this page with biographical information on Jane Austen.
However, there were so many fantastic quotes left after filling the pockets.
So I filled the front with additional quotes,
and added the biographical info on the back.


I added another picture of Jane on the last page.
Doesn't it look like she's sitting in a grand drawing room?


Isn't that fun? 
I'm thrilled to have an album full of Jane Austen quotes!
There are enough great quotes to fill several albums! :o)

* * * * *

Relative History Products Used:

My Dearest Jane - Full Kit;

 Family Tree - Romantique - Digital Download;

My Dearest Jane Postcard Pack - Digital Download;

My Dearest Jane Collection - Digital Download.

Other Materials Used:
Recollections Cardstock;
Assorted Dies From My Stash;
Walnut Stain Distress Ink;
Simple Stories SNAP Binder and Pocket Pages;
Colored Pens;
Lace. 

* * * * *
Thanks so much for stopping in today!

There are some really fun events happening at the Relative-History facebook page.
You really want to head over there and take a look.
I hope that many of you will come and join in the fun!

 * * * * *

Here are the links for you:

Relative - History Shop

Relative - History Blog

Relative - History Facebook

Thursday, 24 June 2021

Relative-History - Jane Austen Cards

   Hello, my friends!

I'm back with a new project share for Relative-History!
Relative-History is a UK based company,
dedicated to helping people tell their stories and document their family history.

When you do any shopping at Relative-History,
you can use code: RHNANCY10
That will give you a 10% discount on anything you purchase! :o)

We're continuing to focus on the Jane Austen Collection.
I have created four different cards.
Each card has used a couple of the beautiful papers,
along with one of the lovely postcard images.

Here are my cards:


I layered the card base, die-cut the background,
and added a fussy cut image.
I finished the card off with a pretty bow and some liquid pearls.


For this card I followed the same steps.
I used the full postcard instead of fussy cutting the image.


Again, much the same...but different. 


Here I went back to fussy cutting the image,
and I added some pretty ribbon roses.

Those are my four Austen Jane cards.
I followed much the same steps for all the cards.
Then to finish each one off, I added touches of Stickles!

Our Jane Austen events are starting to wind down!
There are still some upcoming events that you can attend,
and I'll have a couple more projects very soon!

* * * * *

Relative History Products Used:

 Family Tree - Romantique - Digital Download;

My Dearest Jane Postcard Pack - Digital Download;

My Dearest Jane Collection - Digital Download.

Other Materials Used:
Recollections Cardstock;
Spellbinders Dies;
Celebrate It! Ribbon;
Ribbon Roses;
Stickles;
Liquid Pearls.

* * * * *
Thanks so much for stopping in today!

There are some really fun events happening at the Relative-History facebook page.
You really want to head over there and take a look.
I hope that many of you will come and join in the fun!

 * * * * *

Here are the links for you:

Relative - History Shop

Relative - History Blog

Relative - History Facebook

Monday, 7 June 2021

Relative History - Two Tags

  Hello, my friends!

I'm back with a new project share for Relative-History!
Relative-History is a UK based company,
dedicated to helping people tell their stories and document their family history.

We are continuing to focus on all things Jane Austen!
I have so many fun projects coming, using the My Dearest Jane Collection.
Today I am also adding in the Family Tree - Romantique Collection.
Some of these products are also available as digital downloads.

Oh, before I forget...again...I have a special discount code for you.
When you do any shopping at Relative-History,
you can use code: RHNANCY10
That will give you a 10% discount on anything you purchase! :o)

Today I have two tags to share with you:


Aren't those ladies beautiful?

For this one, I die-cut my favorite black paper from the collection.
I adhered it onto one of the green papers,
and trimmed around it.


I fussy cut the lady out, and added it to the base with foam tape.
To finish everything off, I added a ribbon bow to the top,
a pretty flower to the bottom, and some Stickles for some sparkle!


For this tag, I used the same papers as the other tag,
and added the pretty pink paper.
I die-cut all the layers and adhered them together. 
I fussy cut another pretty lady, and added her to the base with foam tape.


I stamped the sentiment on the pink paper,
and matted it with the green, before adhering it in place. 
To finish this one off, I added some pretty flowers,
and some sparkly touches of Stickles.


These tags were so much fun to make!
I find this whole collection very inspiring!
I hope you do too! :o) 

* * * * *

Relative History Products Used:

 Family Tree - Romantique - Digital Download;

My Dearest Jane Postcard Pack - Digital Download;

Other Materials Used:
Punches: Martha Stewart - Branch, Rose Leaf,
Stampin' Up - Modern Label;
Stamps: The Project Bin - Just Sayin';
Inks: Memento - Gray Flannel;
Ribbon: Celebrate It!;
Stickles: Stardust;
Dies: 
 

* * * * *
Thanks so much for stopping in today!

There are some really fun events happening at the Relative-History facebook page.
You really want to head over there and take a look.
I hope that many of you will come and join in the fun!

 * * * * *

Here are the links for you:

Relative - History Shop

Relative - History Blog

Relative - History Facebook

Wednesday, 26 May 2021

Relative History - My Dearest Jane Mini-Mini

 Hello, my friends!

I'm very happy to be sharing my first post as a Design Team Member of Relative-History!
Relative-History is a UK based company,
dedicated to helping people tell their stories and document their family history.

This month, and next, we are focusing on all things Jane Austen!
There are some fabulous new collections to go along with this,
including the one I've used today which is called:

"My Dearest Jane"

Some of these products are also available as digital downloads.
I have been having so much fun with this collection!
I will have more projects to show you in the coming weeks.

Today, I have made a little mini - mini.
This little book measures about 2 1/2" x 3 1/2", which makes it super cute!
I have lots of pictures to share with you

Here it is:


I started by die-cutting my mini-mini base from black chipboard.
The front cover is decorated with one of the digital papers cut in an oval,
and one of the beautiful ladies fussy cut from a downsized digital postcard.
I added a pretty green bow, along with a green rhinestone on the closure.


For the patterned papers in my book,
I printed the papers double sided, using two of the digital papers.
I added an adorable pocket and tag to the inside front cover.
For the title page, I used the collection name strip.
I just inked it and adhered it in place.


For my pages, I used a combination of the printed patterned papers,
manila sketch paper, and parchment paper.
Book page images are actually shrunken down illustrations from a Jane Austen book.


These pages all form one signature that I stitched into the cover,
using waxed linen thread.


There are several other pages in this book that I didn't photograph.
They were just the manila and parchment pages.
The pages are small but there are lots to write on.


I added another pocket and tag on the back inside cover.


Here's the spine where you can see the signature stitch.


Here are the fanned out pages.
You can also see the bulb pin that I added to the closure.
I've added some coordinating beads and sequins to the bulb pin.


Can you see how much fun I had making this?
I always really enjoy making mini things! :o)

* * * * *

Relative History Products Used:

A4 My Dearest Jane - Digital Download;

My Dearest Jane Postcard Pack - Digital Download;

Book Illustrations - Digital Download.

Other Materials Used:
Eileen Hull Needle Book Die;
Walnut Stain Distress Ink;
Manila Sketch Paper;
Parchment Paper;
Bulb Pin, Sequins, Beads:
Green Woven Ribbon;
Green Rhinestone.

* * * * *
Thanks so much for stopping in today!

There are some really fun events happening at the Relative-History facebook page.
You really want to head over there and take a look.
I hope that many of you will come and join in the fun!

 * * * * *

Here are the links for you:

Relative - History Shop

Relative - History Blog

Relative - History Facebook

Blog Archive