Showing posts with label Stencils. Show all posts

Tuesday, 27 November 2018

Clear Scraps - Pine Cone Christmas Card

Hello, my friends!

I'm back with a new project share for Clear Scraps!

Today I'm sharing another Christmas card I made.
This time I'm featuring the 6" Pine Cone stencil.

This is another nice flat card that can easily be popped in the mail. 
My card measures 5 1/2" square.
Here's my card:


I inked the stenciled image with Distress Oxide Inks.
Then I spritzed it all with water.
I love how that brings the ink to life!


Once it was all dry, I mounted it on to the card base.
I stamped the sentiment in the corner.


To add the Stickles, I held the card up vertically.
I then added it to the top spots, and let it drip, like melting snow would.


Here's a final look at the finished card:


Other Materials Used:
Papers: Recollections - Kraft, Cardstock;
Inks: Distress Oxide Inks - Fired Brick, Vintage Photo, Peeled Paint;
Imagine - Memento Tuxedo Black;
Stamp: Red Lead Paperworks - Wishing You a Cozy Christmas;
Bling: Stickles - Icicle.

From Clear Scraps:


* * * * *
Thanks so much for stopping by today!
I'll be back with another project share next week! :o)

* * * * *
Here are all the links you need:

Tuesday, 13 November 2018

Clear Scraps - Holly Stencil Background Card

Hello, my friends!

I'm back with a new project share for Clear Scraps!

Today I'm sharing a Christmas card I made featuring the 6" Holly Stencil.

We all need cards that are flat, and can easily be popped in the mail.
This design is really good for that. 
I've made it 5 1/2" square but it could easily be done in A2 size.
Here's my card:


Using a foam applicator, and Distress oxide inks, 
I stenciled the design, onto kraft cardstock, as follows:
Holly Leaves in Peeled Paint,
Holly Berries in Fired Brick, and 
Swirls in Wilted Violet.
I thought the addition of the purple really added some fun excitement! ;o)


When I was finished I trimmed it to 5 1/4" and misted it with water. 
I love what the water does to the Distress Oxide inks on kraft!


I mounted the finished piece onto a 5 1/2" purple card base.
I stamped the sentiment on kraft, using the Memento Tuxedo Black ink.
I matted it with purple cardstock, and adhered it in place with foam tape.
Finally, I added a pretty purple double-looped bow!


Here's one last look at the finished card:


Other Materials Used:
Papers: Recollections - Kraft, Cardstock;
Inks: Distress Oxide Inks - Fired Brick, Vintage Photo, 
Imagine - Memento Tuxedo Black;
Stamp: Gina K Designs - Merry Christmas;
Ribbon: Celebrate It.

From Clear Scraps:


* * * * *
Thanks so much for stopping by today!
I'll be back with another project share next week! :o)

* * * * *
Here are all the links you need:

Saturday, 29 September 2018

Rinea - A Creative Mind Canvas

Hello, my friends!

I'm back with a new Rinea project share!  
This time I have created a mixed media project.
I think you can guess how much fun I had with this one! ;o)

I have used the gorgeous Princess Foiled Paper Variety Pack!
I've also used some Ebony/Ebony Starstruck Foiled Paper,
and some Ebony/Gold Glossy Foiled Paper.

Again, we are partnering with Rita Barakat!
 I've used a fabulous face stencil called Sweet Sisters Flower.

Here is the canvas I created:


I began with the stencil and a piece of watercolor paper. 
I drew the face with a pigma marker, 
and colored the face with distress markers and a water brush.


I painted the canvas, did a little bit of white texture stamping,
and adhered the face in place.
I added hair of brown texture paste.
When it was dry, I stenciled a pattern over the brown,
in an almond colored texture paste.


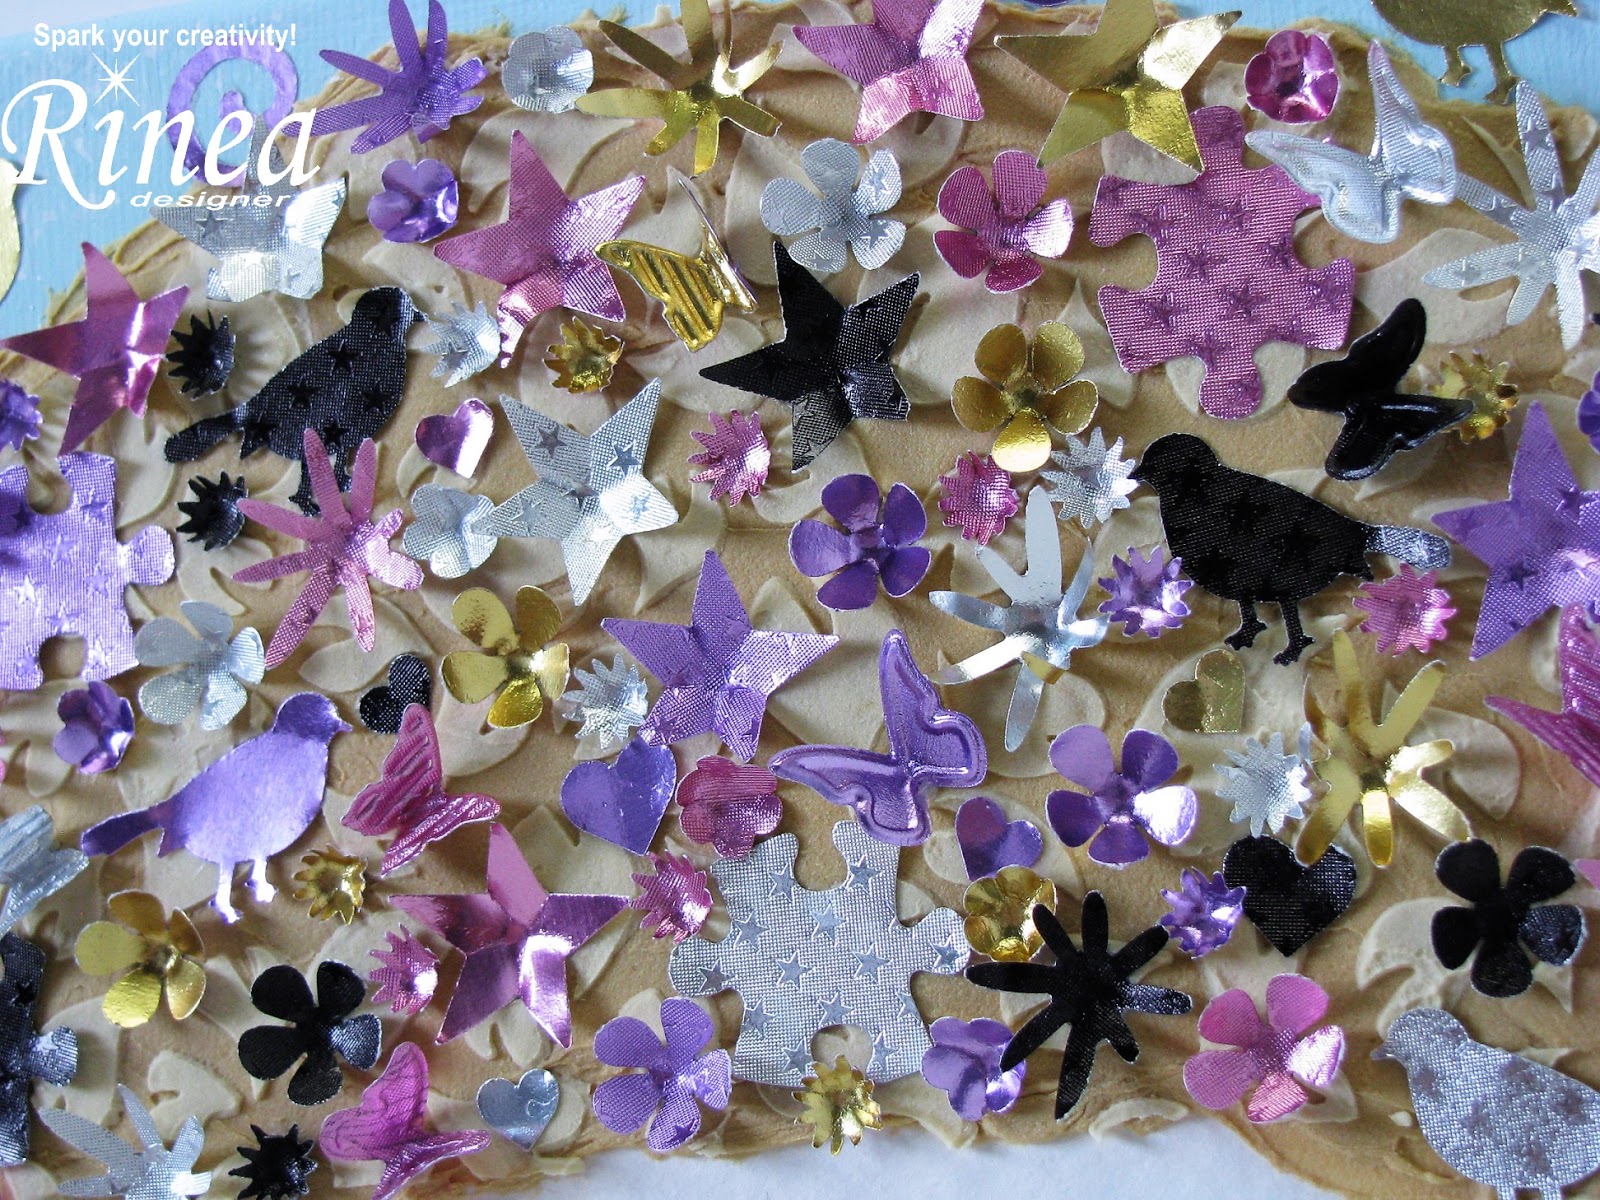
Then I gathered an assortment of my little punches,
and the Rinea Foiled Paper listed above,
and got busy punching!


Using tweezers, and multi matte medium, 
I adhered all the punched pieces in place.
I used a stylus to shape and add dimension before adhering.
Here's a closer look:


See all the pretty dimension:


Finally, I die-cut the title from the Glossy Black Foiled Paper.
I layered the letters on some black cardstock to make them thicker.
Here's a final look at the finished canvas:


Other Materials Used:
8 x 10 Canvas;
Watercolor Paper;
Acrylic Paint;
Black Pigma Pen;
Distress Markers;
Texture Paste;
Assorted Punches;
Ranger Multi Matte Medium.

* * * * *
Thanks so much for stopping by today!
I hope you liked my mixed media canvas!
See you again soon! :o) 
* * * * *

Here are all the links for you:


Tuesday, 14 August 2018

Clear Scraps - Joy Journey Journal

Hello, my friends!

I'm back with a new project share for Clear Scraps!

This time I am showcasing the fabulous new Journey 6 x 8 Wood Album

Here is my journal:


I used several Clear Scraps stencils to decorate the Journal:


I also used a Distress Ink, and a gold metallic wax.


First, I inked the entire wood cover with Chipped Sapphire Distress Ink.


Then I stenciled the designs using the gold wax.
I used an inking tool to do this.
I went over the "Joy" using a gold paint pen, to make it stand out.


Finally, I adhered a piece of Rinea Gold/Gold Foiled Paper,
 behind the open "journey" in the cover.
I added six binding rings through the holes,
and then tied pretty gold metallic bows on them.


Here's the back cover:


One final look at the finished album:


Other Materials Used:
Rinea Gold/Gold Foiled Paper;
Distress Ink - Chipped Sapphire;
DecoArt Metallic Lustre - Gold Rush;
Inking Tools;
Binding Rings - Six;
Gold Metallic Ribbon.

Clear Scraps Products Used:


* * * * *
Thanks so much for stopping by today!
You'll find a printable version of this tutorial over at the
Clear Scraps Blog HERE.

* * * * *
Here are all the links you need:


Monday, 16 July 2018

Clear Scraps - Just a Pretty Card!

Hello, my friends!

I'm back with a new project share for Clear Scraps!

Today I'm featuring this great 6" Doily Mat Stencil.
You can find it in the shop HERE.

It's such a pretty lacy looking doily stencil,
so I just had to create a pretty card!

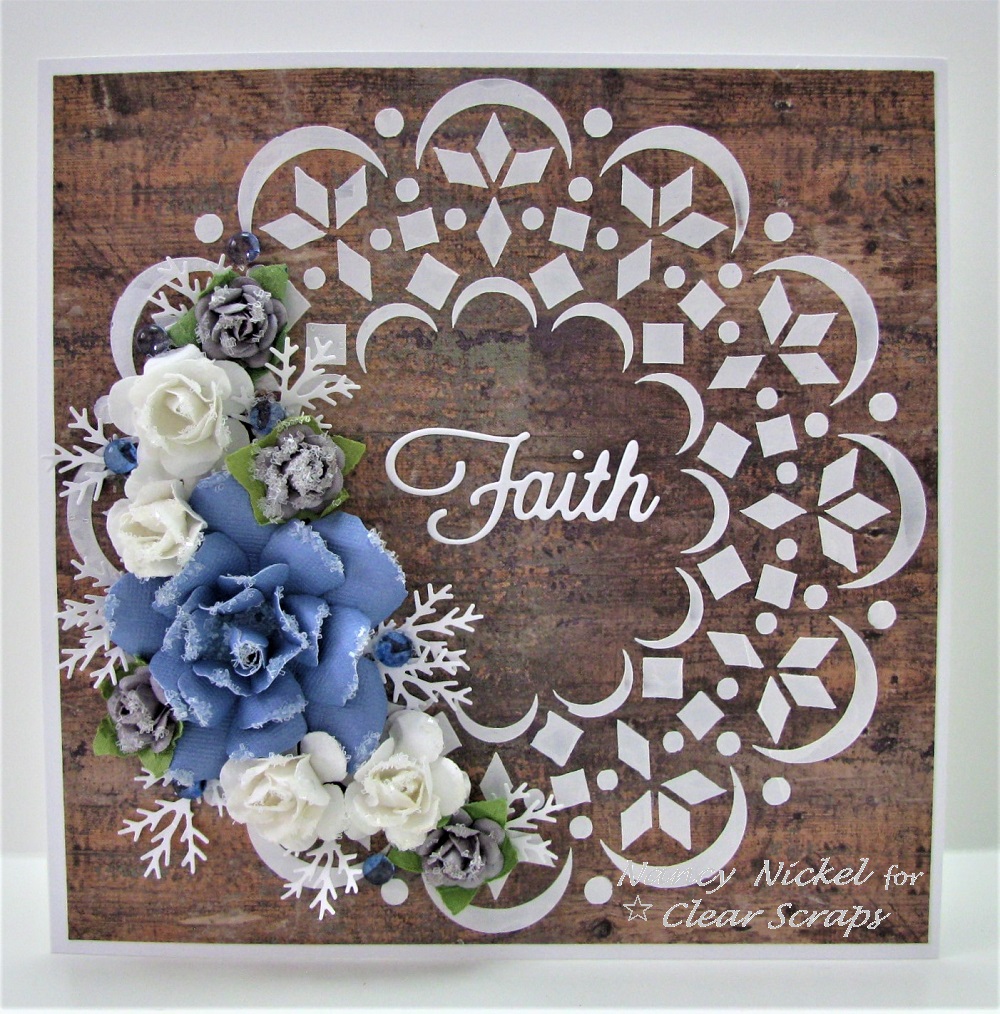
I began by applying white gloss embossing paste through the stencil. 
It's so pearly and pretty on the rough wood paper.


I added the wood paper on a white cardstock card base.
The center needed a little something,
and this lovely "Faith" die-cut was just the right addition. 


I tried to get a photo that would show the pearly shine,
and the dimension, but it doesn't really show up very well. 


I made the big blue rose from cardstock,
and then surrounded it with other little flowers from my stash. 
I added some dew drops, and some punched branches.
Then I dusted everything with some crystal glitter. 


Here's one last look at my finished card:


Other Materials Used:
Papers: Recollections - Cardstock, Docrafts - Mr Smith's Workshop;
Embossing Paste: Dreamweaver - White;
Punch: Martha Stewart - Branch;
Flowers: The Nickel Nook and Assorted;
Bling: The Robin's Nest Dew Drops - Water,
Mainstays Crafts Glitter - Crystal.

From Clear Scraps:


* * * * *
Thanks so much for stopping by today!
I'll be back with another project share next week! :o)

* * * * *
Here are all the links you need:

Tuesday, 26 June 2018

Clear Scraps - BLOOM Art Journal Page

Hello, my friends!

I'm back with a new project share for Clear Scraps!

This week I've created a fun Art Journal page,
using a variety of wonderful stencils from Clear Scraps.
You'll find a printable version of this tutorial over at the Clear Scraps Blog!

I know that the saying is "Bloom where you are planted",
and that is what the full stencil includes.
I decided to create a page that states "Bloom where you are..."
Sometimes we go through periods of time where we don't feel very planted.
We might be pulling up our roots, or considering a complete change of garden! lol
Even in that situation we need to remember to BLOOM! :o)

Here's the page I created:


I began by spraying my page with the yellow spray. 

I added a misting of water, and then dried it.


Then using the Plaid Stencil and Mowed Lawn Distress Ink,

I stenciled the plaid design around the outside of the pages. 


Allow this to dry completely before going on to the next step.


Next, I added some fun flowers with the 6” Daisy Stencil. 

I did this by combining some DecoArt Modeling Paste with Lindy’s 
Magicals;

first in purple, and then in red.

I stenciled the pasts using a plastic palette knife.

I allowed them to dry completely between colors.


Then I used the black ink and the 3 X 12 Bloom where you are planted Stencil.

I stenciled only the “Bloom where you are.”

Finally, I added some black and white spatters to the page. 


I hope you like it, and are inspired to create a similar page for yourself! 


Materials Used:

Clear Scraps Stencils:


Other Materials:
Dyan Reavely – Small Art Journal,
Recollections Shimmer Mist – Boho,
DecoArt Media – Modeling Paste,
Lindy’s Magicals – Cajun Carnelian Red, Jazzy Jivin’ Purple,
Distress Ink – Mowed Lawn,
Memento Ink – Tuxedo Black,
Ranger Inking Tool.

* * * * *
Thanks so much for stopping by today!
I'll be back with another project share very soon! :o)

* * * * *
Here are all the links you need:

Blog Archive