Showing posts with label Whisker Graphics. Show all posts

Monday, 8 April 2019

Whisker Graphics - Easter Tag Tucks

Hello, my friends!

I'm back to share a fun project created with products from the Whisker Graphics Shop!
I'm also over on the Whisker Graphics Blog today.
You're going to want to go over there and subscribe in the sidebar, if you haven't already done so. 
That way you won't miss all the fun shares from the rest of the DT,
and all the fun ways you can use these great products! 

Here's a peek at what I made this month:


Doesn't that just shout Spring and Easter? :o)

Here are the Whisker Graphics products I used to make it:


Whisker Graphics Products Used:


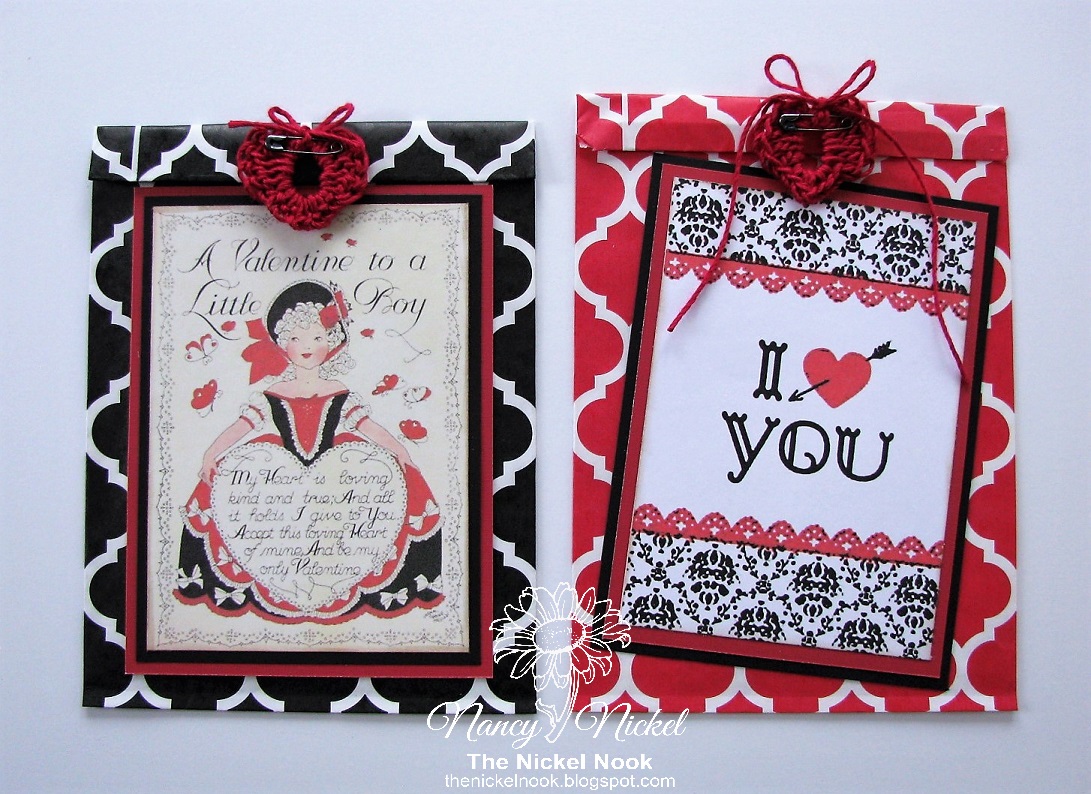
I pulled some fun Easter stamps out of my stash.
I stamped the images with Versamark ink,
and heat embossed them using coordinating embossing powders.
The green doesn't show up very well in the photo
but in person it shows up very nicely.


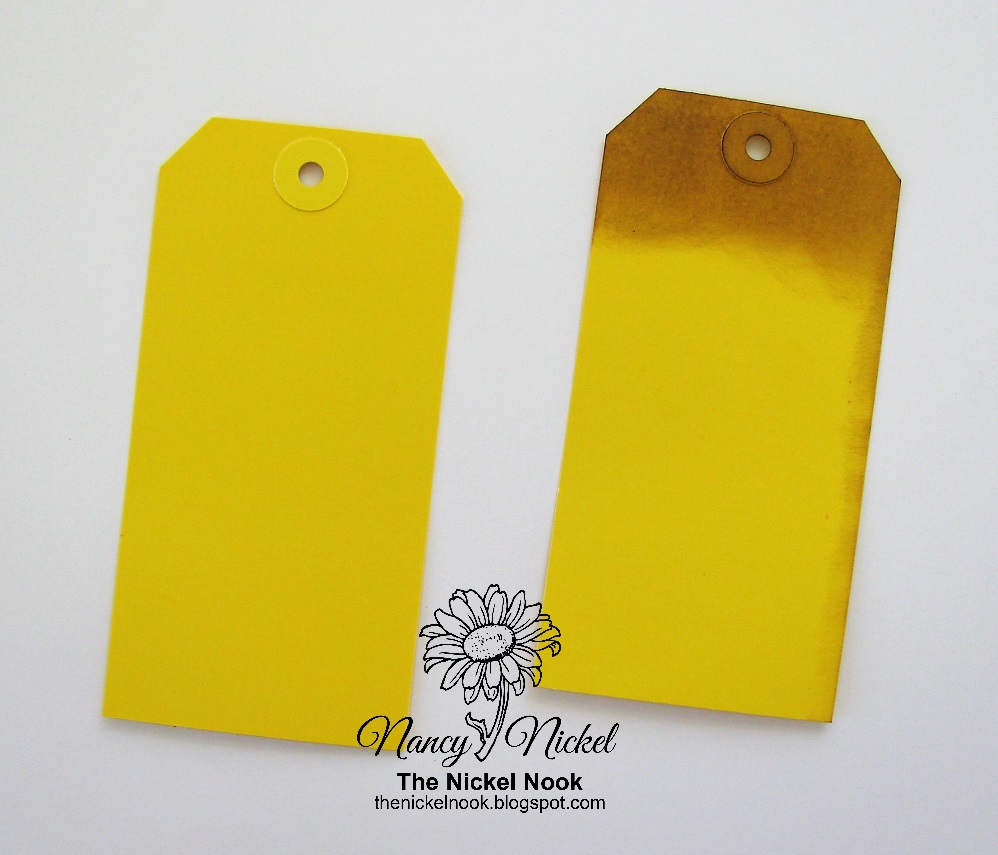
I looped twine through the top of each tag,
and then tied a matching bow around each bag.
I just love how everything coordinates so beautifully!


Here they are all tucked in. 
What do you do with them now?
They would be lovely tucked into an Easter basket!
There's lots of room on the back of the tag to write a message.
You could adhere the bag to the front of an A2 card base.
You could bundle a few of these together, 
and present them as a hostess gift.
You could use them as an insert in your Easter mini album,
or on your Easter layouts.
So many fun ways to use these Easter tag tucks! :o)


* * * * *
I hope I've given you some fun ideas!
There's so many great ways to use tags, and bags and twine!

* * * * *
Thanks for stopping by!
I'll be back again soon with another project share!

Here are all the links you'll need:

Monday, 7 January 2019

Whisker Graphics - Valentine Project Idea and a Freebie

Hello, my friends!

I'm back to share a fun project created with products from the Whisker Graphics Shop!
I'm also over on the Whisker Graphics Blog today.
You're going to want to go over there and subscribe in the sidebar, if you haven't already done so. 
That way you won't miss all the fun shares from the rest of the DT,
and all the fun ways you can use these great products! 

I thought it was a good time to share a Valentine idea!
Here's what I created:


I used the Middy Biddy Bags in black and red, in the Casablanca design.
I also used the Red Divine Twine Bamboo.
I use this twine so much that I've lost my label along the way.


With thoughts, and projects, turning to love...
...I thought it would be fun to do something a little bit different.
I came up with a simple little crocheted heart pattern to share with you.
If you don't crochet yet, you really should! lol 
It's just too much fun not to. 
This twine is fabulous for projects like this.
I used a 4.00 mm hook (G/6 US size)


Crochet Heart Pattern
Leaving enough of a tail to tie a bow, chain 3. 
Into first chain made, work 3 dc, 3 sc, ch 1, 1 sc, ch 1, 3 sc, 3 dc. 
Ch 3, sl st into beginning spot to end off. Leave enough of a tail to tie a bow.
Now take both ends of twine and tie a bow.
Cut ends short, or leave them long.
I did one of each. 
To help it form a nice heart shape,
just give a little tug to the sc at the bottom of the heart.

I added a little black pin through my hearts.
It adds a lovely little vintage touch.
This verse is what inspired me to create the little hearts.


I inked the edges of these cards and layered them on cardstock.
Then I adhered them in place on the middy biddy bags.
I folded the top of the bag down, and adhered the heart in place.


These bags could hold a love note, a Valentine card,
or they could be stuffed full of sweet treats!


Other Materials Used:
Papers: Recollections - Cardstock;
Pins: Making Memories - Vintage Pins;

* * * * *
I hope I've given you some fun ideas!
There's so many great ways to use tags, and bags and twine!

I also hope you enjoy my little freebie!
Please let me know if you try it! :o)
(A link back to my blog would be appreciated)
* * * * *
Thanks for stopping by!
I'll be back again soon with another project share!

Here are all the links you'll need:

Monday, 19 November 2018

Whisker Graphics - Christmas Ideas with Bags, Tags, and Twine.

Hello, my friends!

I'm back to share a fun project created with products from the Whisker Graphics Shop!
I'm also over on the Whisker Graphics Blog today.
You're going to want to go over there and subscribe in the sidebar, if you haven't already done so. 
That way you won't miss all the fun shares from the rest of the DT,
and all the fun ways you can use these great products! 

* * * * *
 Today I want to share some fun ways to incorporate these products into your Christmas projects.

When I saw these sweet Little Bitty Bags they just shouted Christmas to me!
Don't they make you think of a gingerbread house.
They totally reminded me of one of my favorite Christmas paper pads.
That is what inspired the following creativity! :o)

I began by gathering some supplies together:


Then I pulled out the Christmas paper pad I mentioned. 
It's the AC Merrymint Collection, and I'm down to just scraps.
I cut pieces that measured 2 1/4" x 3 3/4",
and adhered them to both sides of each tag.


Here's what the tags look like.
Aren't they festive? 


Here's what they look like inserted into the Little Bitty Bags.
So cute!


At this point you could simply insert a ring through the tags,
tie a ribbon around the ring, and call it a mini tag book.
You could add photos to the tags, as well as the bags.
It would make a lovely gift.
Another gift idea would be to add a hand-written gift certificate to each tag.
"This is good for one shoveling of the sidewalk and driveway."
The possibilities are endless! 


Now I'll share a few more ideas.
You could add some twine to the top of the tag.
Then wrap some more twine around the bag with a bow.
Simply adhere this onto a package, and add the recipients name on the tag.


Here I've punched a label, and added it to the outside of the bag.
I've written To: and From: on the tag.
A personalized message can be added on the tag inside,
and this can also be added to a wrapped package.
This would also be a lovely way to present a gift card.


Speaking of gift cards...why not put one on the tag
...inside the Little Bitty Bag...on the outside of a Christmas card?
Then you've got it all done in one! 


Now, going back to my original idea.
You can add several strands of matching twine to the binding ring. 
Then add one of the fun Sweet Sticky Labels to the front.
I added "Happy Holidays" in mine.
You could even put a sticker on each Little Bitty Bag if you wanted.

I hope I've given you some fun ideas!
There's so many great ways to use tags, and bags and twine!

* * * * *
Thanks for stopping by!
I'll be back again soon with another project share!

Here are all the links you'll need:

Monday, 1 October 2018

Whisker Graphics - Count Your Blessings Card

Hello, my friends!

I'm back to share a fun project created with products from the Whisker Graphics Shop!
I'm also over on the Whisker Graphics Blog today.
You're going to want to go over there and subscribe in the sidebar, if you haven't already done so. 
That way you won't miss all the fun shares from the rest of the DT,
and all the fun ways you can use these great products! 

* * * * *
 I had originally planned a different project share for today.
I was going to go back to my previous journal pages,
and show you how I finished off the Bitty Bag pages
with the wonderful twine from Whisker Graphics.
However, since next weekend is Thanksgiving here in Canada,
I thought it appropriate to do a Thanksgiving themed project instead.

Here's the card I'm sharing today:


Here's how I made it:

I started by taking a Plain Brown Little Bitty Bag
and running it through the embossing folder.
Then I inked all the edges with Walnut Stain Distress Ink.


Next, I took a Large Yellow Tag.
I wanted the yellow but the brightness of the tag didn't work well with my papers.
I inked just the top of the tag with the Distress Ink,
as the bottom will be covered.


I created a kraft card base that measured 4" x 7",
and covered it with my inked decorative paper.
I inked the journal card and adhered it in place on the yellow tag!
See how well the yellow works now?


Now it's time to add the Red Bamboo Twine.
I added a double loop through the top of the tag.
Then I wrapped the bag and tied a bow,
before adhering the bag to the card front.


I added the bag slightly askew to add interest.


Fall projects are so much fun to make!


Here's one final look at the finished card:


Other Materials Used:
Papers: Carta Bella - Autumn Collection,
Recollections - Kraft;
Ink: Distress Ink - Walnut Stain;
Embossing Folder: Cuttlebug - Pumpkin Harvest.

Products from Whisker Graphics:


* * * * *
Thanks for stopping by!
I'll be back again soon with another project share!

Here are all the links you'll need:

Monday, 27 August 2018

Whisker Graphics - Ways to Use Bitty Bags in Your Journals

Hello, my friends!

I'm back to share a fun project created with products from the Whisker Graphics Shop!
I'm also over on the Whisker Graphics Blog today.
You're going to want to go over there and subscribe in the sidebar, if you haven't already done so. 
That way you won't miss all the fun shares from the rest of the DT,
and all the fun ways you can use these great products! 

* * * * *
In today's post I am sharing a number of ways to use Bitty Bags in your journals.
Whisker Graphics has an incredible selection of these fabulous bags!
I will link to the size only but you need to check out the amazing color selection!
I chose bags that kept with my journal color.

I'm filling a journal that I previously decorated for Clear Scraps.
You can find the link HERE.
This is the front of the album:


On the inside front cover, I adhered a Bigger Bitty Bag - Gold Metallic.
I trimmed just a little bit off the top, and punched a half-circle.
This is the perfect spot to keep extra large tags that I add as pages.
On the right I added a matching Little Bitty Bag - Gold.
This is the perfect spot for a Large Gift Tag.


Here's another option for the same Little Bitty Bags.
Turn them sideways on the page, and insert the Large Tags.


Here I've used a Middy Biddy Bag - Gold.  
With two small folds, it now holds a very large cardstock tag,
and one of the Large Colored Tags.


I think this bag is my very favorite from all of the bags! :o)
This is just a beautiful Middy Bitty Bag adhered to a page.
Then I cut a very large kraft tag to fill it. 
It fits in beautifully with the color scheme of my album!


Moving on to one of my blue pages,
Then I cut a large matching cardstock tag to fill it. 
This provides a wonderful opportunity to add some ephemera, or some stamping.


Here's another idea using the Middy Bitty Bags - Gold.
I took two of the gold metallic bags, and adhered them together along three sides, 
leaving the one long side open.
The holes were punched in the side that was adhered together. 
This creates a great pocket page!
It holds two big tags in the top bag pockets, 
and a couple of tags along the side pocket.


This is the other side of it:


For my final idea, I have trimmed and layered two bags on top of each other. 
I began by trimming a Middy Bitty Bag down to a square, 
and adhering it to the page.
Then I took a coordinating Little Bitty Bag
trimmed it down, and adhered it on top of the other bag. 
I cut a large cardstock tag for the one pocket, 
and added a Large Colored Tag to the other. 


That's just a few of the ways I'm using these great little gift bags!
They're so much fun!
Head on over to Whisker Graphics and check out all the 
wonderful colors and patterns that are available!

Next time...I'll show you how I'll add twine to these pages!
* * * * *
Thanks for stopping by!
I'll be back again soon with another project share!

Here are all the links you'll need:

Blog Archive