Friday 29 June 2018

Rinea - Oh Canada Card

Hello, my friends!

I'm back with a new Rinea project share, using Rinea Foiled Paper!

Today I am using the gorgeous Ruby/Gold Glossy Foiled Paper from the
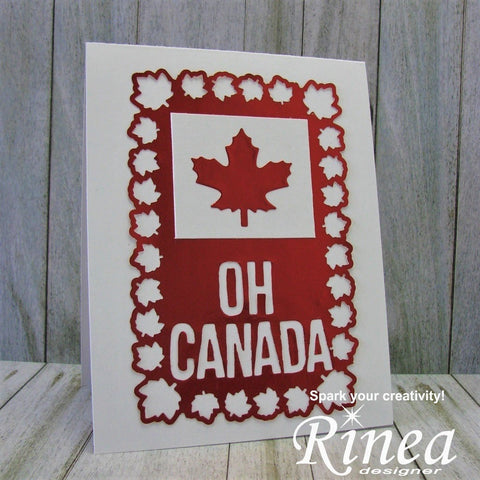
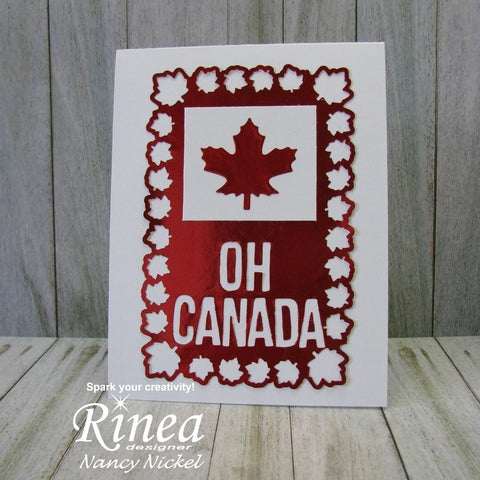
Here is my card:

Rinea Foiled Paper

I'm a Canadian girl, and tomorrow we celebrate Canada Day here. 
This beautiful glossy red paper helped me create the perfect celebration card!
Our National Anthem is O Canada but I made a card that says Oh Canada! 
I'm very thankful to live in this beautiful country!

Rinea Foiled Paper

Some simple punching and die-cutting helped me create this fun design.
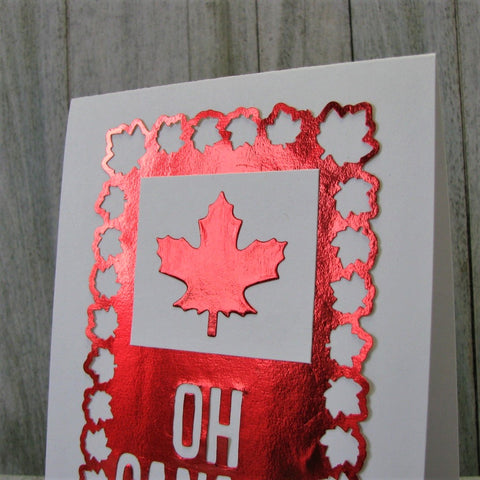
My card is a little reminiscent of our flag, as far as the colors and the Maple Leaf.

Rinea Foiled Paper

Here's a photo that shows off the gorgeous red foil!

Rinea Foiled Paper

Other Materials Used:
Papers: Recollections - Cardstock;
Punch: Martha Stewart - Maple Leaf - Punch Around the Page;
Dies: Tim Holtz - Alphabet Thinlits, Unknown Maple Leaf.

* * * * *
Thanks so much for stopping by today!

I wish you all a very Happy Canada Day! :o)

* * * * *

Here are all the links for you:


Thursday 28 June 2018

My Scrap Chick - Seed Packet Envelope Mini

Hello, my friends!

Welcome to a new DT post for My Scrap Chick!

Today I am sharing this wonderful Seed Packet Envelope File.
You can find it right HERE.

This is a super fun file that I will use over and over again!
I use these envelopes: on cards, in minis, as minis, etc.
The can hold photos or journal spots or ephemera.
Today I have used it as the base of my mini album.

I cut five envelopes out of manila cardstock, and adhered them together. 
In my stash, I found this old file entitled "free seed packet printable."
They fit the envelope front perfectly!


To the back I added a flower with a button center.
It's pretty but also serves to hold the envelope flap closed.


Three of the envelopes have pink flowers and pink buttons.
Then I cut a pink cardstock piece to put in the envelope.


Two of the envelopes have white flowers with yellow buttons.
They have a piece of yellow cardstock in them.


Here is the front of all five envelopes:


Here is the back of all five, 
along with ribbon covered binding ring:


I punched a hole in one corner of each envelope
and threaded them all on the binding ring.
Here's the finished mini all fanned out:


I hope you like my little envelope mini!
This really is a great file for so many reasons!
Perfect for anywhere you need an envelope or pocket!

* * * * *
Thanks so much for stopping by!
I hope you'll head over to the shop and give it a try! 
Have you signed up for the My Scrap Chick newsletters yet?
Don't forget to do that!
You really don't want to miss out on any of the great freebies! :o)

* * * * *
Here are all the links you need:


Tuesday 26 June 2018

Clear Scraps - BLOOM Art Journal Page

Hello, my friends!

I'm back with a new project share for Clear Scraps!

This week I've created a fun Art Journal page,
using a variety of wonderful stencils from Clear Scraps.
You'll find a printable version of this tutorial over at the Clear Scraps Blog!

I know that the saying is "Bloom where you are planted",
and that is what the full stencil includes.
I decided to create a page that states "Bloom where you are..."
Sometimes we go through periods of time where we don't feel very planted.
We might be pulling up our roots, or considering a complete change of garden! lol
Even in that situation we need to remember to BLOOM! :o)

Here's the page I created:


I began by spraying my page with the yellow spray. 

I added a misting of water, and then dried it.


Then using the Plaid Stencil and Mowed Lawn Distress Ink,

I stenciled the plaid design around the outside of the pages. 


Allow this to dry completely before going on to the next step.


Next, I added some fun flowers with the 6” Daisy Stencil. 

I did this by combining some DecoArt Modeling Paste with Lindy’s 
Magicals;

first in purple, and then in red.

I stenciled the pasts using a plastic palette knife.

I allowed them to dry completely between colors.


Then I used the black ink and the 3 X 12 Bloom where you are planted Stencil.

I stenciled only the “Bloom where you are.”

Finally, I added some black and white spatters to the page. 


I hope you like it, and are inspired to create a similar page for yourself! 


Materials Used:

Clear Scraps Stencils:


Other Materials:
Dyan Reavely – Small Art Journal,
Recollections Shimmer Mist – Boho,
DecoArt Media – Modeling Paste,
Lindy’s Magicals – Cajun Carnelian Red, Jazzy Jivin’ Purple,
Distress Ink – Mowed Lawn,
Memento Ink – Tuxedo Black,
Ranger Inking Tool.

* * * * *
Thanks so much for stopping by today!
I'll be back with another project share very soon! :o)

* * * * *
Here are all the links you need:

Monday 25 June 2018

Simply Crafty SVGs - Part 1 of New Series

Hello, my friends!

Welcome to a new project share for Simply Crafty SVGs!

If you read my title, you already know that this is Part 1.
I'm beginning a fun series of shares for Simply Crafty SVGs. 
For the next several months I will be sharing a combination post.
Each post will have a card/cards, along with a card holder,
both available in the shop.
I think sets like these make fabulous gifts,
so this may help you get ready for the gift giving season well in advance.
They are also really great to keep and use for organizational purposes.
I hope to share a variety of styles, so as to appeal to all of your tastes! :o)

* * * * *
Part 1 Files:

Cards: Daisy Card Set

Holder: Magazine Style A2 Card Box

We'll start with the Daisy Card Set.
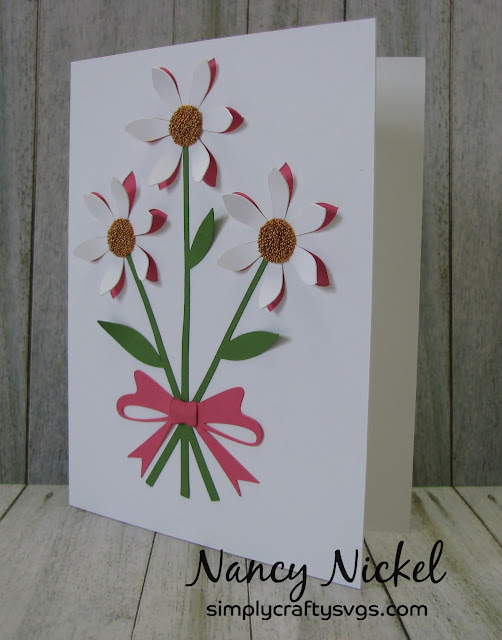
This file contains two daisy cards that are so pretty and unique!
Here's the first:


The petals pop up and add lovely dimension to the card.


I added copper beads to the flower centers for some added interest.


Here's the second card:


Isn't it pretty?
I love the way the card front is cut in the shape of the flower.
I just added a simple stamped sentiment.


Here's a closer look at the flower:


Now we move on to the card box.
It's a shrunken version of a magazine holder.
It even comes with a divider and tab.


The file also includes a label for the front.
This way you could have a box for each theme:
birthday, sympathy, Christmas, Easter, etc.


You could even add a calendar on the front of the divider.
Then list all the dates that you need cards for.


Here is the box with the Daisy Cards in it:


Isn't that a lovely way to store cards,
or a beautiful way to gift a set of cards?

So head on over to the shop and pick up these files:

Cards: Daisy Card Set

Holder: Magazine Style A2 Card Box

Thanks for stopping by today!
I hope you found some inspiration!
I'll be back next month to share Part 2! :o)

* * * * * 
Here are all the links:


Friday 22 June 2018

Swedish House Crafts - Fun Decorating Scene Card

Hello, my friends!

I have a new project share for Swedish House Crafts!
  
If you've been over to the Swedish House Crafts blog 
since the release of the Magnolia Fixer Upper Collection, 
or if you're a Tilda fan, 
then I'm sure you've already seen this sweet Tilda hanging her wallpaper. 
Well, now she's adding the finishing touches, and hanging her pictures! 
I can't remember the last time I spent so much time on a single card...or had so much fun! 
I began with stamping and colouring the Wallpaper Tilda Image. 
Then I set about creating the scene.


 I used a mold and some clay that I have to create this lovely frame. 
Then I stamped and coloured the sweet Mini Magnolia Stamp called to fill it. 
It's called "Jam, Sitting Tilda" and doesn't she look lovely framed? 
Next, I needed to add some furniture to my scene, 
and a little step-stool to help Tilda reach!


 Using a scrap of woodgrain paper from my stash, I snipped and cut, 
until I had assembled this side table. 
I added a brad for the drawer pull. 
Now I needed to add something to the tabletop. 
I found the Gummiapan Tie Stamp in my DT stash
 and decided that it would make a lovely vase. 
I stamped it, fussy cut it, curled it, and glued it in place. 
Then I added the flowers.


 Here's a closer look at both of the images. 
The striped paper makes a great background.


 Here you can see the curl in the vase, the detail in the frame,
 and more of the dimension of the card.


Here's a final look at my little scene card!
 I hope you like it...and are inspired to create one of your own! :o)  


Linking Up To:


* * * * *

*DON'T FORGET* 
Suha is having a wonderful celebration during the month of June. 
Please visit Suha's post HERE for a video where she explains all about it. 
Everyone is invited to join the party. 
We are all being celebrated no matter what you make.

Suha would love for you to share your makes with us so she, 
and us DT peeps, can pop in and see your wonderful creations. 
All you need to do is write a short post with your make, 
and then link up your post HERE ,
so we can come visit you.

Suha has made a hashtag you can use if you post on social media. 
She had made it especially to show that we are 'One Special Community' 
and she will keeping watch for you using it, and here it is...

#1SPECIANITY

Thanks so much for stopping by today!  

Links to the products I used:
Wednesday 20 June 2018

Clear Scraps - Summer Fun Acrylic Mini Album

Hello, my friends!

I'm back with a new project share for Clear Scraps!

I've had a great time decorating this sweet mini album. 
This is the 6 X 6 Tab Album.
You can find it HERE.

This album comes with a front cover, 3 tabbed pages, and a back cover.
The clear acrylic is covered with a protective film.
You simply peel it off whenever you're ready to get to work! 
An acrylic album requires a little more creative thinking,
and it's so much fun!


I created a Summer themed album.
Instead of my usual charms and ribbon on the rings,
I simply tied a bow of fringed fiber!


I tool distressed all the papers, and adhered them in place.
Then the pages and tabs were decorated with matching stickers.


I left lots of room to add plenty of photos.


Here I inserted one of the journal cards in between the pages.


On these pages, the papers were adhered under the acrylic.
The adhesive was placed in position where it would be covered with the stickers.
Then I added the stickers on top of the acrylic. 
Layering it that way gives it an added dimension,
and it's just fun!


Here I used one of the matching papers to create a 4 X 4 envelope.


 I added it between two coordinating pages.


 It holds several more journaling cards.


 Here is the back page, where I added a date sticker.


 Here's one last look at the front cover, and the tabs. 


Other Materials Used:
Echo Park - Walking On Sunshine Collection;
Binder Rings, Unknown Fiber.

* * * * *
Thanks so much for stopping by today!
I'll be back with another project share next week! :o)

* * * * *
Here are all the links you need:

Blog Archive