Friday 28 June 2019

Makin's Clay® - Create ART ATC

Happy Friday, my friends!

Today I have another project share for Makin's Clay®! 
Each month, I have one full tutorial over on the Makin's Clay® Blog,
and a fun project share here on my blog.

Today it's time for my shared project.
Just like last month, I have created a fun ATC:


I created my clay by molding it in the mod podge mold.
It makes these very small but very detailed pieces.


They're perfect to decorate my artsy ATC.


I hope it inspires you to create some fun art!


Materials Used:
Makin's Clay® - White Clay,
Makin's Clay® - Clay Push Mold - Florals

 Other Materials Used:
Mod Podge Molds - Ornamental Icons;
Black Chipboard;
Ink: Distress Ink - Black Soot;
Stamps: Finnabair Sentiment Words;
Unknown Bling.

* * * * *
Isn't that fun?
This clay is so much great to play with!
I'm looking forward to sharing much more with you!

* * * * *
Here are all the links for you:


Thursday 27 June 2019

My Scrap Chick - Birdhouses???

Hello, my friends!

Welcome to a new DT post for My Scrap Chick!

Today I'm featuring the fabulous
Birdhouse Trio File,
which you can find HERE.

Now if you look take a look at my project,
they don't really look like birdhouses, do they?
They aren't supposed to! 
When you click on the shop link you'll see the adorable birdhouses.

I've actually considered purchasing a certain die for a while.
You might know the one.
It's a little dwelling die by a very popular designer. 
It's also very expensive, and I'm trying to decide if it makes sense for me.
I decided to take a look through the fabulous selection at My Scrap Chick,
with this die in mind, to see if a cut file would work.
When I came across the Birdhouse Trio file,
I decided it just might work.

What do you think? Aren't these adorable?


The file does include a sweet little chimney. 
I opted not to add it, as I just want a simple little building.
Maybe I'll use it another time.


The papers I used are just perfect for this project.
They are digital papers that were offered free online.
I'm afraid they're no longer available, so I can't provide a link for you.


I have some fun ideas of how to decorate these further.
I'll share them when/if I do.
I don't think I'll need to buy that expensive die after all!


I can see making a whole village of these sweet little buildings. 
It really pays to look at these great files and consider what else they can be! 
So much fun waiting to be had! :o)


Other Materials Used:
Paper: Kraft Cardstock, Unknown Digital Papers;
Ink: Distress Ink - Walnut Stain.

Scrap Chick File Used:


* * * * * 
Thanks so much for stopping by!
I'll be back soon with another fun project share!

 * * * * *
Have you signed up for the My Scrap Chick newsletters yet?
Don't forget to do that!
You really don't want to miss out on any of the great freebies! :o)

* * * * *
Here are all the links you need:


Tuesday 25 June 2019

Arnold Grummer - Handmade Paper Butterfly Heart Card

Hello, my friends!

 I have a new project to share with you for Arnold Grummer.

You'll find all the details HERE,
at the Arnold Grummer Blog.

* * * * *
My blizzard day stash is almost gone...so I'll have to make some new paper soon!
However, when I was looking through what I have left,
I came across this pretty purple piece just waiting to be finished!


Here's what I made:


Here's What I Used:

Materials Used:
Blender;
Stampendous - Butterfly Trio Die Set;
Inks: Archival Ink - Jet Black;
Distress Markers: Black Soot, Wilted Violet, Dusty Concord;
Water Brush;
Spectrum Noir Sparkle Pen
Black Micron Pen.

Here's How I did it:

1. I used this fun template to create this card, during my paper-making blitz.


 2. Then I pulled out this lovely Butterfly Trio Stamp and Die Set from Stampendous to decorate my card.


 3. I found a scrap circle of a contrasting handmade paper in white. I stamped the butterfly in Archival - Jet Black Ink.  


4. Once the ink was dry, I used the Distress Markers and a water brush to add color to the butterfly. 
I dried it with my heat tool.

5. I then went over the entire butterfly with the Spectrum Noir Sparkle Pen. Set aside to dry. 


6. When dry, I adhered the butterfly body to the card, folding the wings upward, and positioning it at a slight angle. 

7. Using the micron pen, I added stitch marks around the outside edge of the card. I also added the two antenna. 


That's all there is to it. Here are some more pictures of this pretty card. 
The sparkle is so bright that it interferes with the photos.


The inside of the card is read for stamping or writing any sentiment. 


The butterfly is so pretty, and has such lovely detail.


This was a really fun card to create! I hope you'll consider making one of your own! 


* * * * *
Thanks so much for stopping by today!
I'm really looking forward to sharing more handmade paper projects with you 
in the months ahead!
It's so much FUN!

Oh, you'll want to check out the resource page over at the website. 
You can watch Arnold Grummer himself demonstrate how to make paper! 

* * * * *
Here are all the links:


Makin's Clay® - Decorative Heart Box

Happy Tuesday, friends!

I'm over on the Makin's Clay Blog today!

Head on over there to see how I made my 
 Decorative Heart Box,
using this fun clay!


* * * * *

Thanks for stopping in today!
See you again very soon! 

* * * * *
Here are all the links for you:


Monday 24 June 2019

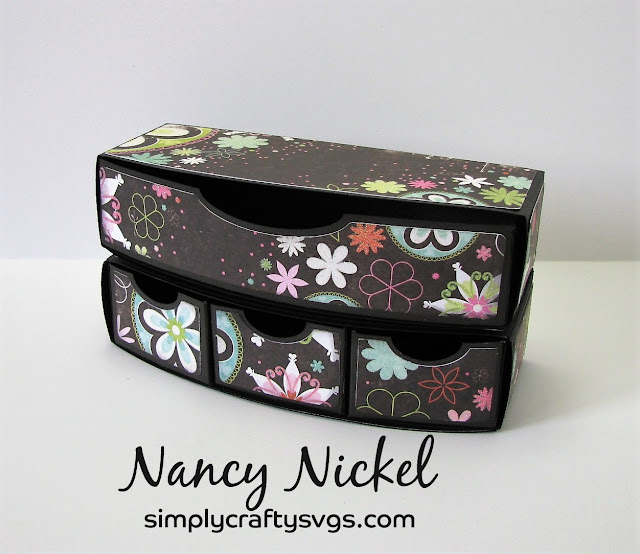
Simply Crafty SVGs - Curvy Drawer Organizer Files

Hello, my friends!

Welcome to a new project share for Simply Crafty SVGs!

I'm interrupting my Box Card series this month,
and sharing some fun organizational files.

I've used:
Curvy 3-Drawer Organizer
and Curvy 1-Drawer Organizer.

These files are so fun to put together!
The hardest part is deciding which paper to use!

This is the 3-Drawer Organizer:


This is the 1-Drawer Organizer:


They stack perfectly on top of each other.


I think maybe I like them better this way:


Here's a little peek of the open drawers.
Maybe I need to make more and more,
 and stack them up really high!
That's how much fun they are!
I can't wait to fill them with lots of little bits!


Other Materials Used:
 Papers: Colorbok - Cardstock; WRMK - Tiffany Collection;


File from Simply Crafty SVGs:

Curvy 3-Drawer Organizer 
 Curvy 1-Drawer Organizer 

* * * * *
Thanks for stopping by today!
I hope you found some inspiration!
I'll be back next month to share a brand new project! :o)

* * * * * 
Here are all the links:


Friday 21 June 2019

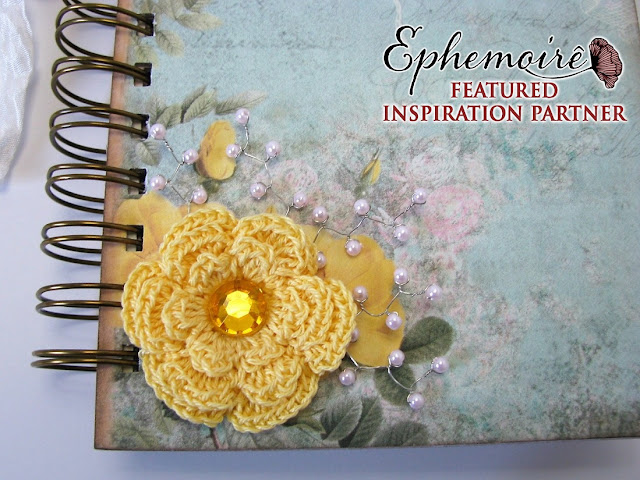
Ephemoire - 'Til the Bobbin Runs Out Mini Album

Hello, friends!

Today I have a fun new project for Ephemoire!

This month I've had the best time creating a mini album!
It's been a while since I've done one, and I've missed it!
They do take me a little longer than some of my other projects,
just like it will take you a little longer to read this post! lol
It is VERY photo heavy!

Actually, I just had a great idea! How about a slideshow option?
It's short and sweet!
Then I'll follow it up with all the photos, 
just in case you want more details!


Please let me know if you have any questions!

Ephemoire Products Used:


* * * * *

Now here are the photos:


Here are the links for you:

Blog Archive